incident.io authenticates with a Freshservice API key. Actions in Freshservice appear as the agent who owns that key, so we’d recommend use a dedicated ‘service account’ agent (for example incident.io) rather than a personal account.The user needs permission to read ticket fields, and to create, read, and update tickets and notes.
1
Copy the Freshservice API key
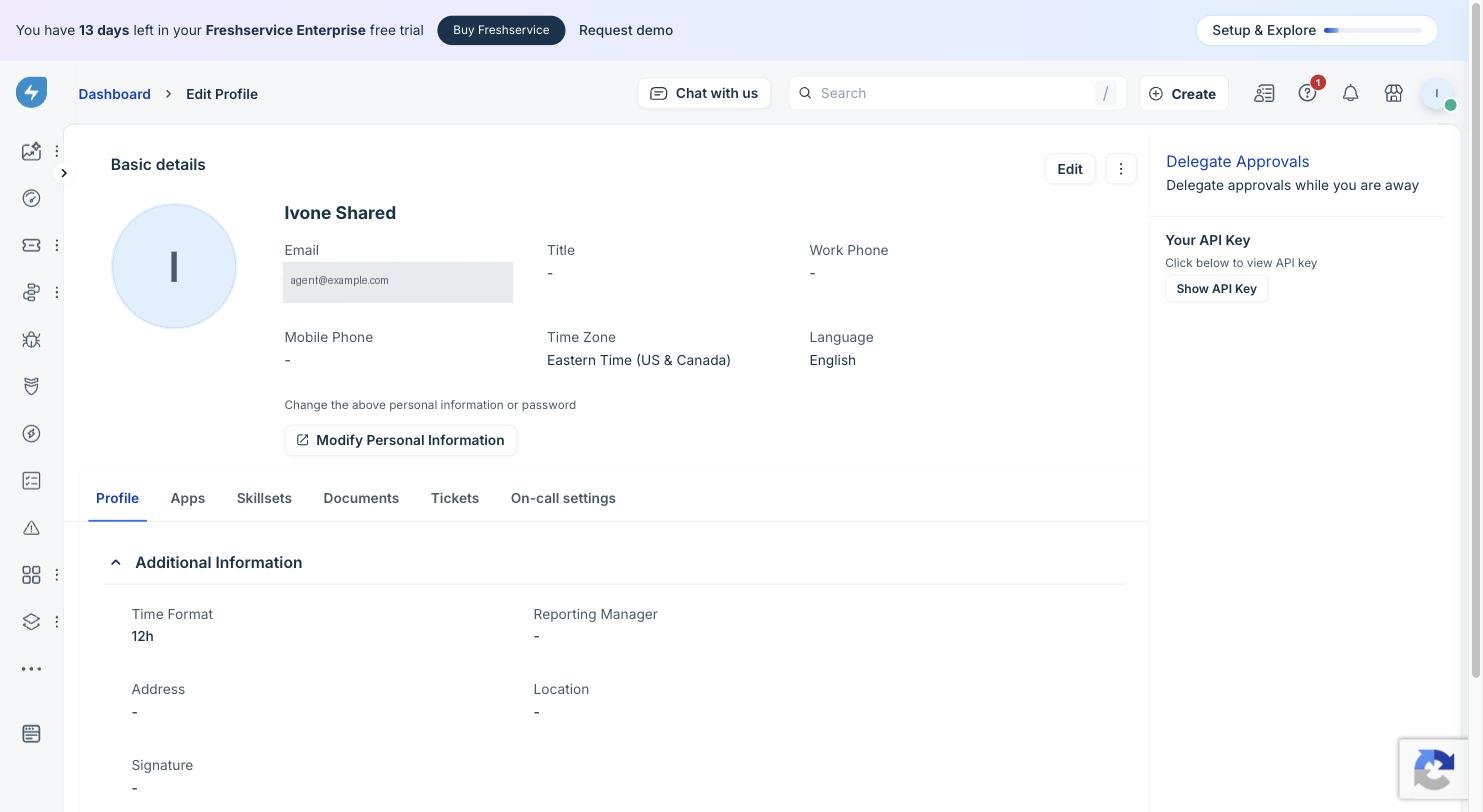
In Freshservice, open your profile picture in the top-right corner and go to Profile Settings. The API key is on the right, below Delegate Approvals. Click Show API Key to reveal it.
Freshservice Profile Settings, with the API key on the right
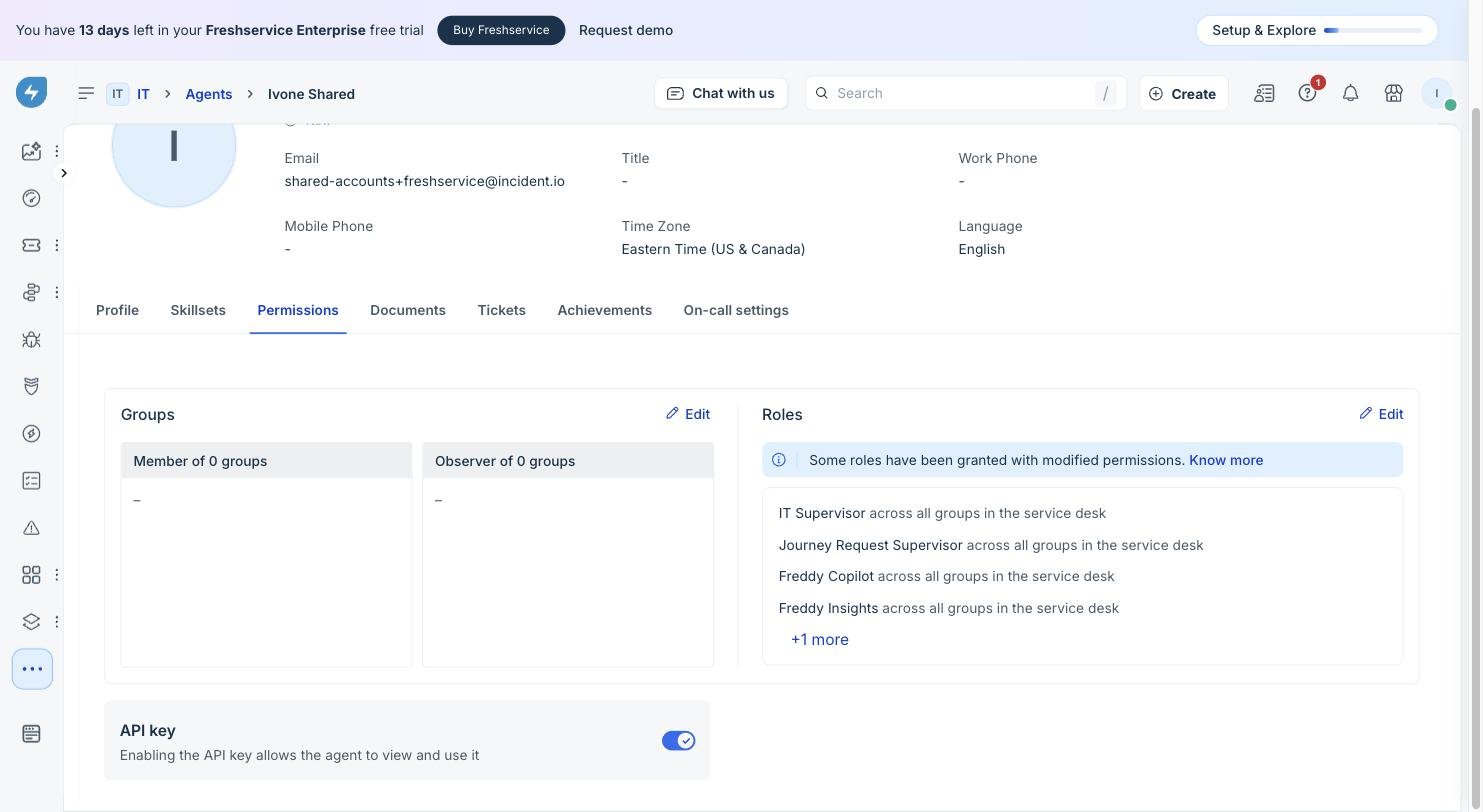
If the key is missing, an Account Admin needs to open Admin → User Management → Agents, edit the agent, and enable API key on the Permissions tab.
Domain: your Freshservice host, for example acme.freshservice.com. Only domains ending in .freshservice.com are accepted.
API key: the key you copied.
Click Connect. We validate the credentials by reading your ticket fields, and store the key encrypted at rest.
Once connected, we sync your Freshservice agents into Catalog every hour as the Freshservice User type. We’ll attempt to match them to your incident.io users using their email address, and use that to assign tickets to the right users.
For incident.io to get updates from Freshservice in real time, you’ll need to set up a Workflow Automator rule. Without this, follow-ups won’t sync back into incident in real time, and comments on incident tickets may not come through for hours.
1
Copy the webhook details from incident.io
Open the Freshservice integration settings and find Configure webhook. Click Generate secret. A secret is only created when you ask for it, so there is nothing to copy until you do. Then copy the webhook URL, the header name, and the secret.
2
Create a ticket workflow in Freshservice
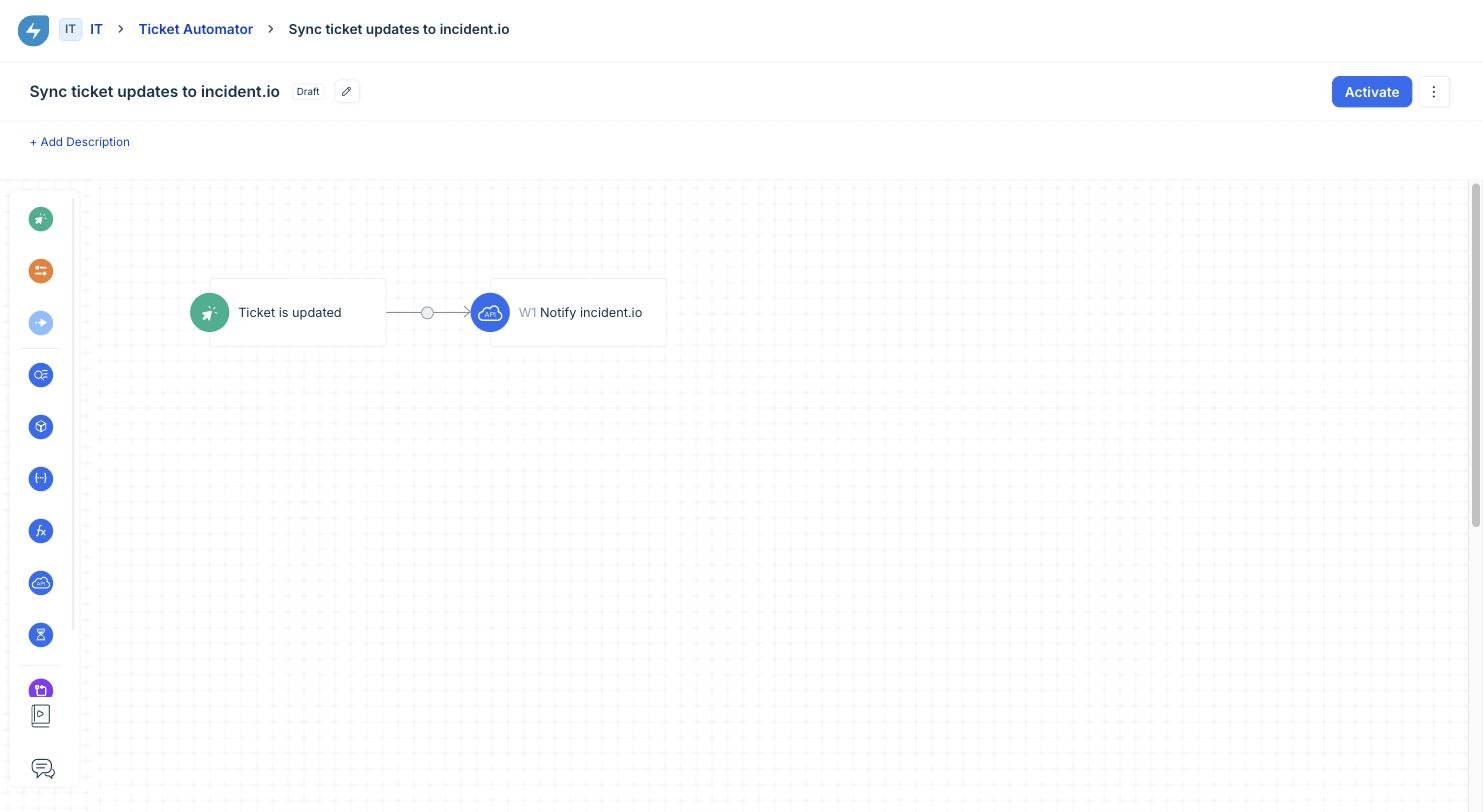
In Freshservice, go to Admin → Workflow Automator. Choose Event Based Workflow on Tickets, then Create → Workflow.In the Event node, add the events you care about:
Ticket is → updated
Note added is of type → Any
Freshservice has no separate “reply added” event. A public note is the requester-visible reply, so Any covers both replies and internal notes.
A Workflow Automator canvas ending in a Web Request
3
Configure the Web Request
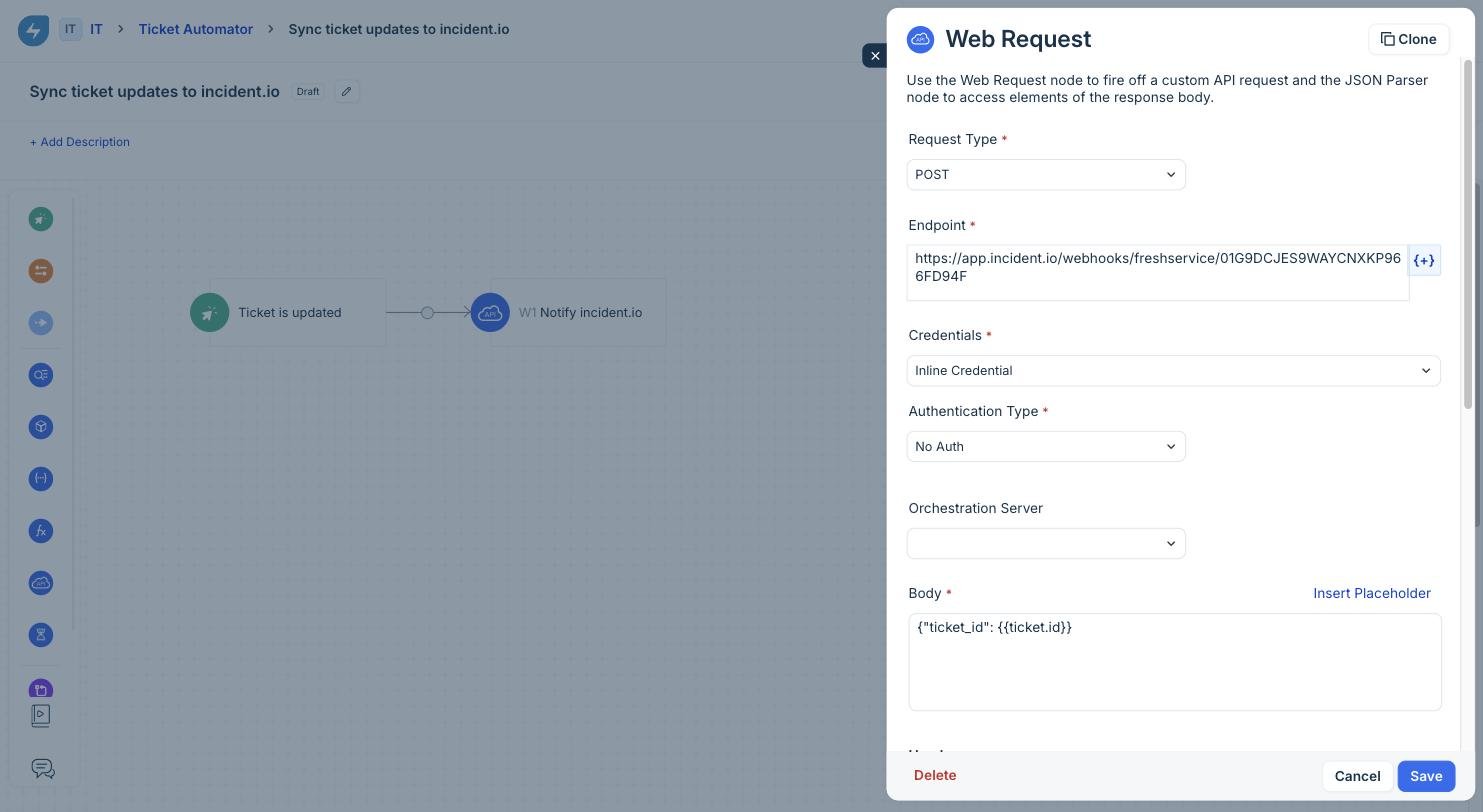
Drag a Web Request node onto the canvas and connect it to the event.Configure it with:
Request Type: POST
Endpoint: the webhook URL from incident.io
Credentials: Inline Credential
Authentication Type: No Auth
Body:
{ "ticket_id": {{ticket.id}} }
Use Insert Placeholder → Ticket ID to add {{ticket.id}} rather than typing it, so the placeholder binds correctly.
The Web Request node: POST, endpoint, inline credential, no auth, and a JSON body
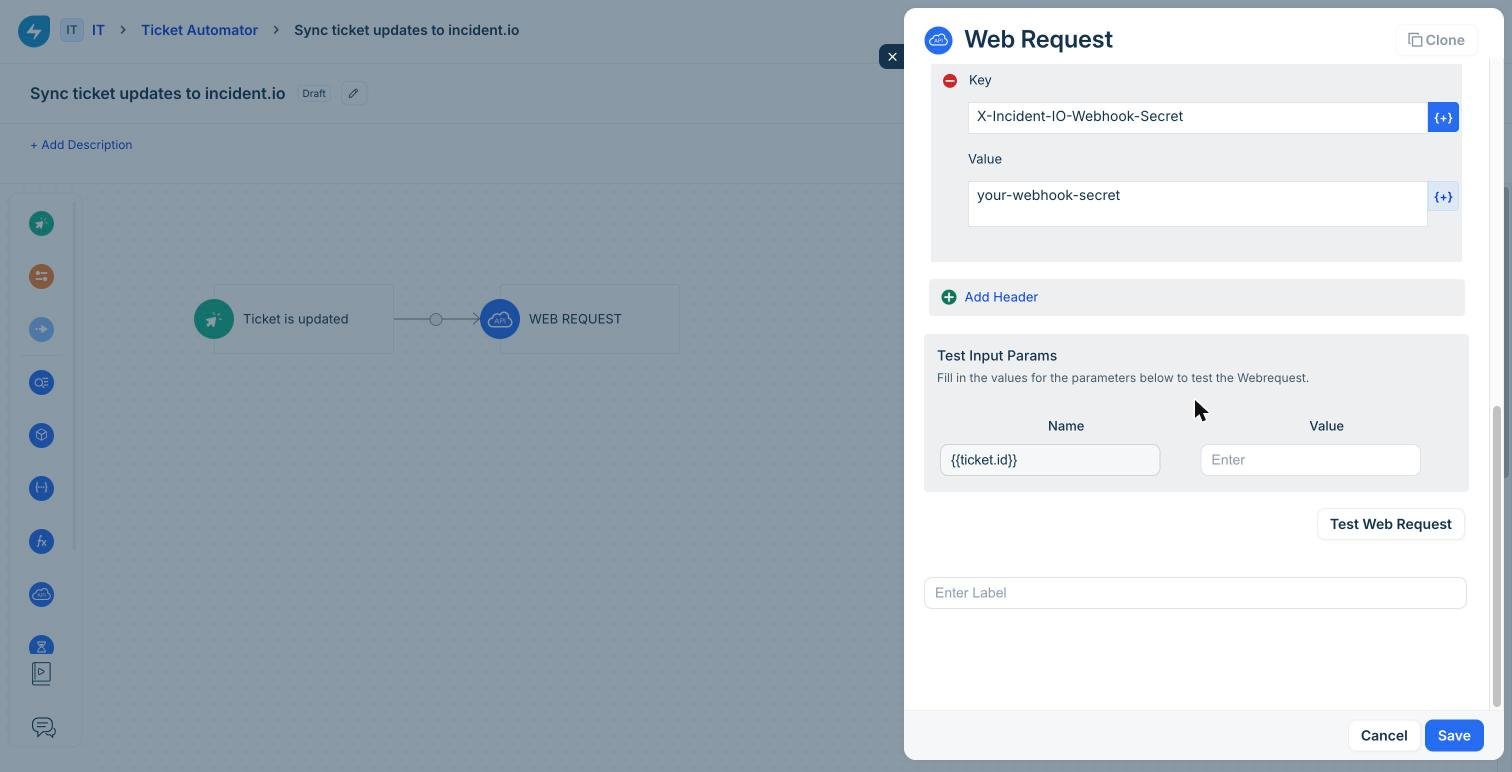
Then scroll down to Headers, click Add Header, and add:
Key: X-Incident-IO-Webhook-Secret
Value: the secret from incident.io
The Headers section only appears once Request Type is set to POST. If you go looking for it while the node is still on the default GET, it will not be there.
The secret goes in a custom header, not in the authentication block
Do not use Freshservice’s Basic Auth or API key authentication types here. incident.io authenticates with the custom header, which is why Authentication Type stays on No Auth.Give the node a Label. It is required, and the node will not save without one. Save, then activate the workflow.
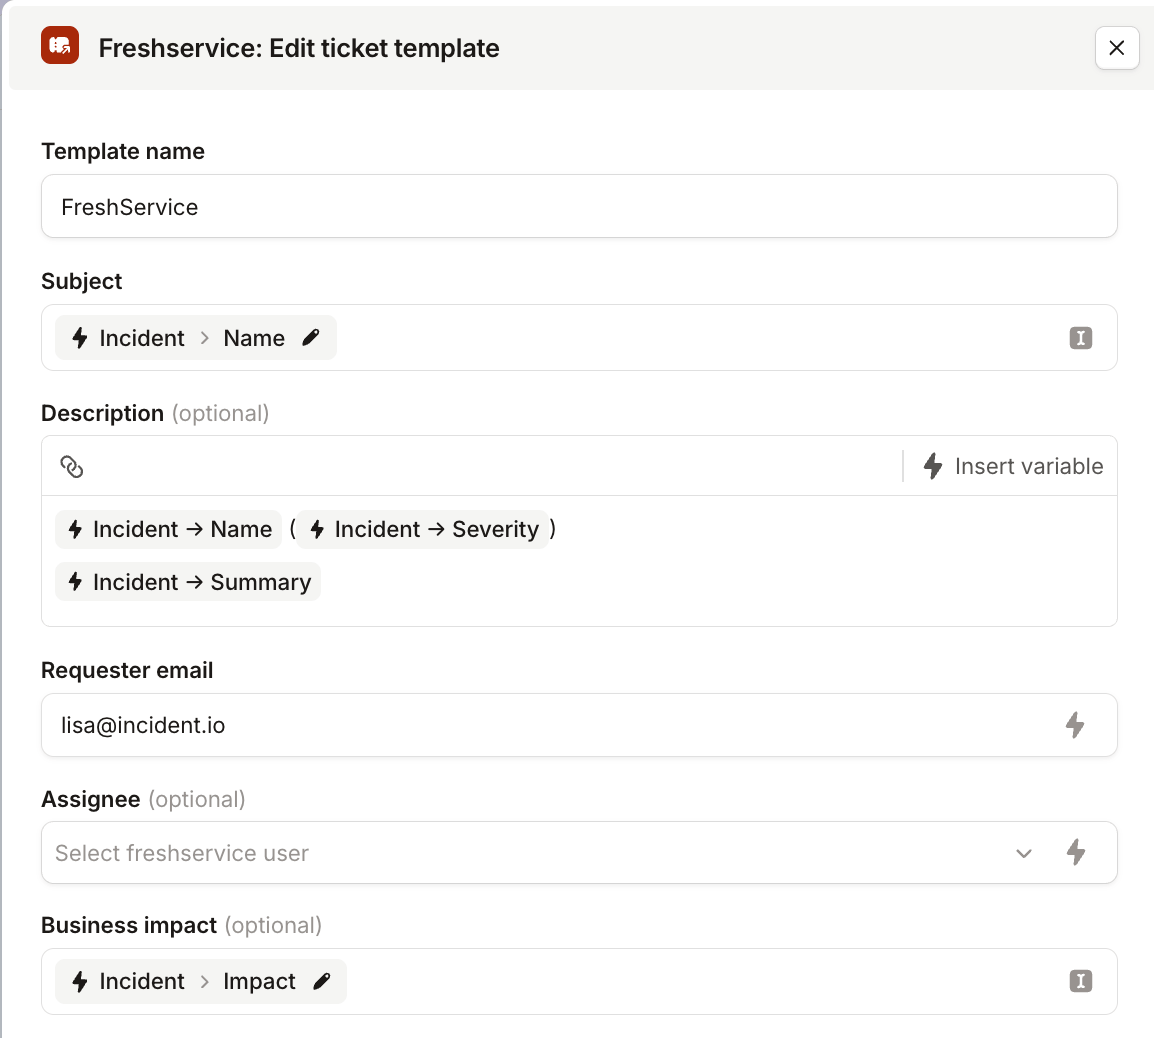
An incident ticket is a single Freshservice ticket representing the incident, created when the incident starts and kept current as it progresses. Service Desk and auditors see the incident in Freshservice, with status and updates on it, while responders keep working in Slack.Go to Settings → Incident tickets and create a template so we know how to populate your ticket fields. Use conditions to pick which template applies, for example only exporting Critical incidents, or routing security incidents somewhere different
An incident ticket template, with fields pulled from your Freshservice instance
incident.io is the source of truth for the state of the incident, and any custom fields. Resolving or editing the Freshservice ticket does not change the incident’s status, severity, or title, and we write your template values back over conflicting edits.We sync content in both directions to help everyone stay in the loop
Sharing an incident update posts a private note on the ticket, so the requester doesn’t see it. The first update on an incident is skipped.
Notes and public replies on the ticket appear on the incident timeline as ticket comments, once we sync that ticket.
You can also export follow-ups as Freshservice tickets, so the work sits in the same queue as everything else your team is tracking. When someone resolves or closes the ticket in Freshservice, the follow-up completes in incident.io.You can export them manually from the dashboard or from Slack / Microsoft Teams, or set up an export template to send them automatically based on incident attributes.If the incident already has a Freshservice incident ticket, we try to create the follow-up as a child of it. Some Freshservice plans and parent ticket types don’t support children, so if Freshservice rejects it we create a standalone ticket instead.You can attach an existing Freshservice ticket as a follow-up by pasting its URL into the incident channel. Agent, helpdesk, and support ticket URLs all work.
Does this create incidents from Freshservice tickets?
Not on its own: this integration exports incidents and follow-ups to Freshservice.To go the other way, point Freshservice at a custom HTTP alert source. Create the source in incident.io, then add a Workflow Automator rule that fires a Web Request at it when a ticket you care about is raised, the same way you would for the webhook above. From there an alert route decides which alerts page someone and which create an incident, so Freshservice tickets get the same filtering and grouping as any other alert source.
Why are notes from Freshservice slow to appear?
Freshservice cannot register webhooks via API. Without a Workflow Automator rule pointing at our webhook URL, we only pick up follow-up changes on a poll, and incident-ticket notes wait until a sync is triggered. Set up the webhook so updates land as they happen.
Was this page helpful?
Assistant
Responses are generated using AI and may contain mistakes.