

- Timeline: get a sense of the incident, and what the investigation and your responders did as it played out.
- Accuracy: understand how the investigation did over time and the reason for its score.
- Engagement: see how responders used the investigation.
Opening the timeline
Open the timeline from either of these places:- An incident’s Investigation tab. Select View timeline.
- The Investigations page. Select an investigation in the table.
Timeline
The Timeline tab tells the story of the incident from start to finish, split into two:- Responders, on the left: everything that happened in the incident outside the investigation, from your responders and from other bots and integrations.
- Investigation, on the right: every step the investigation took.
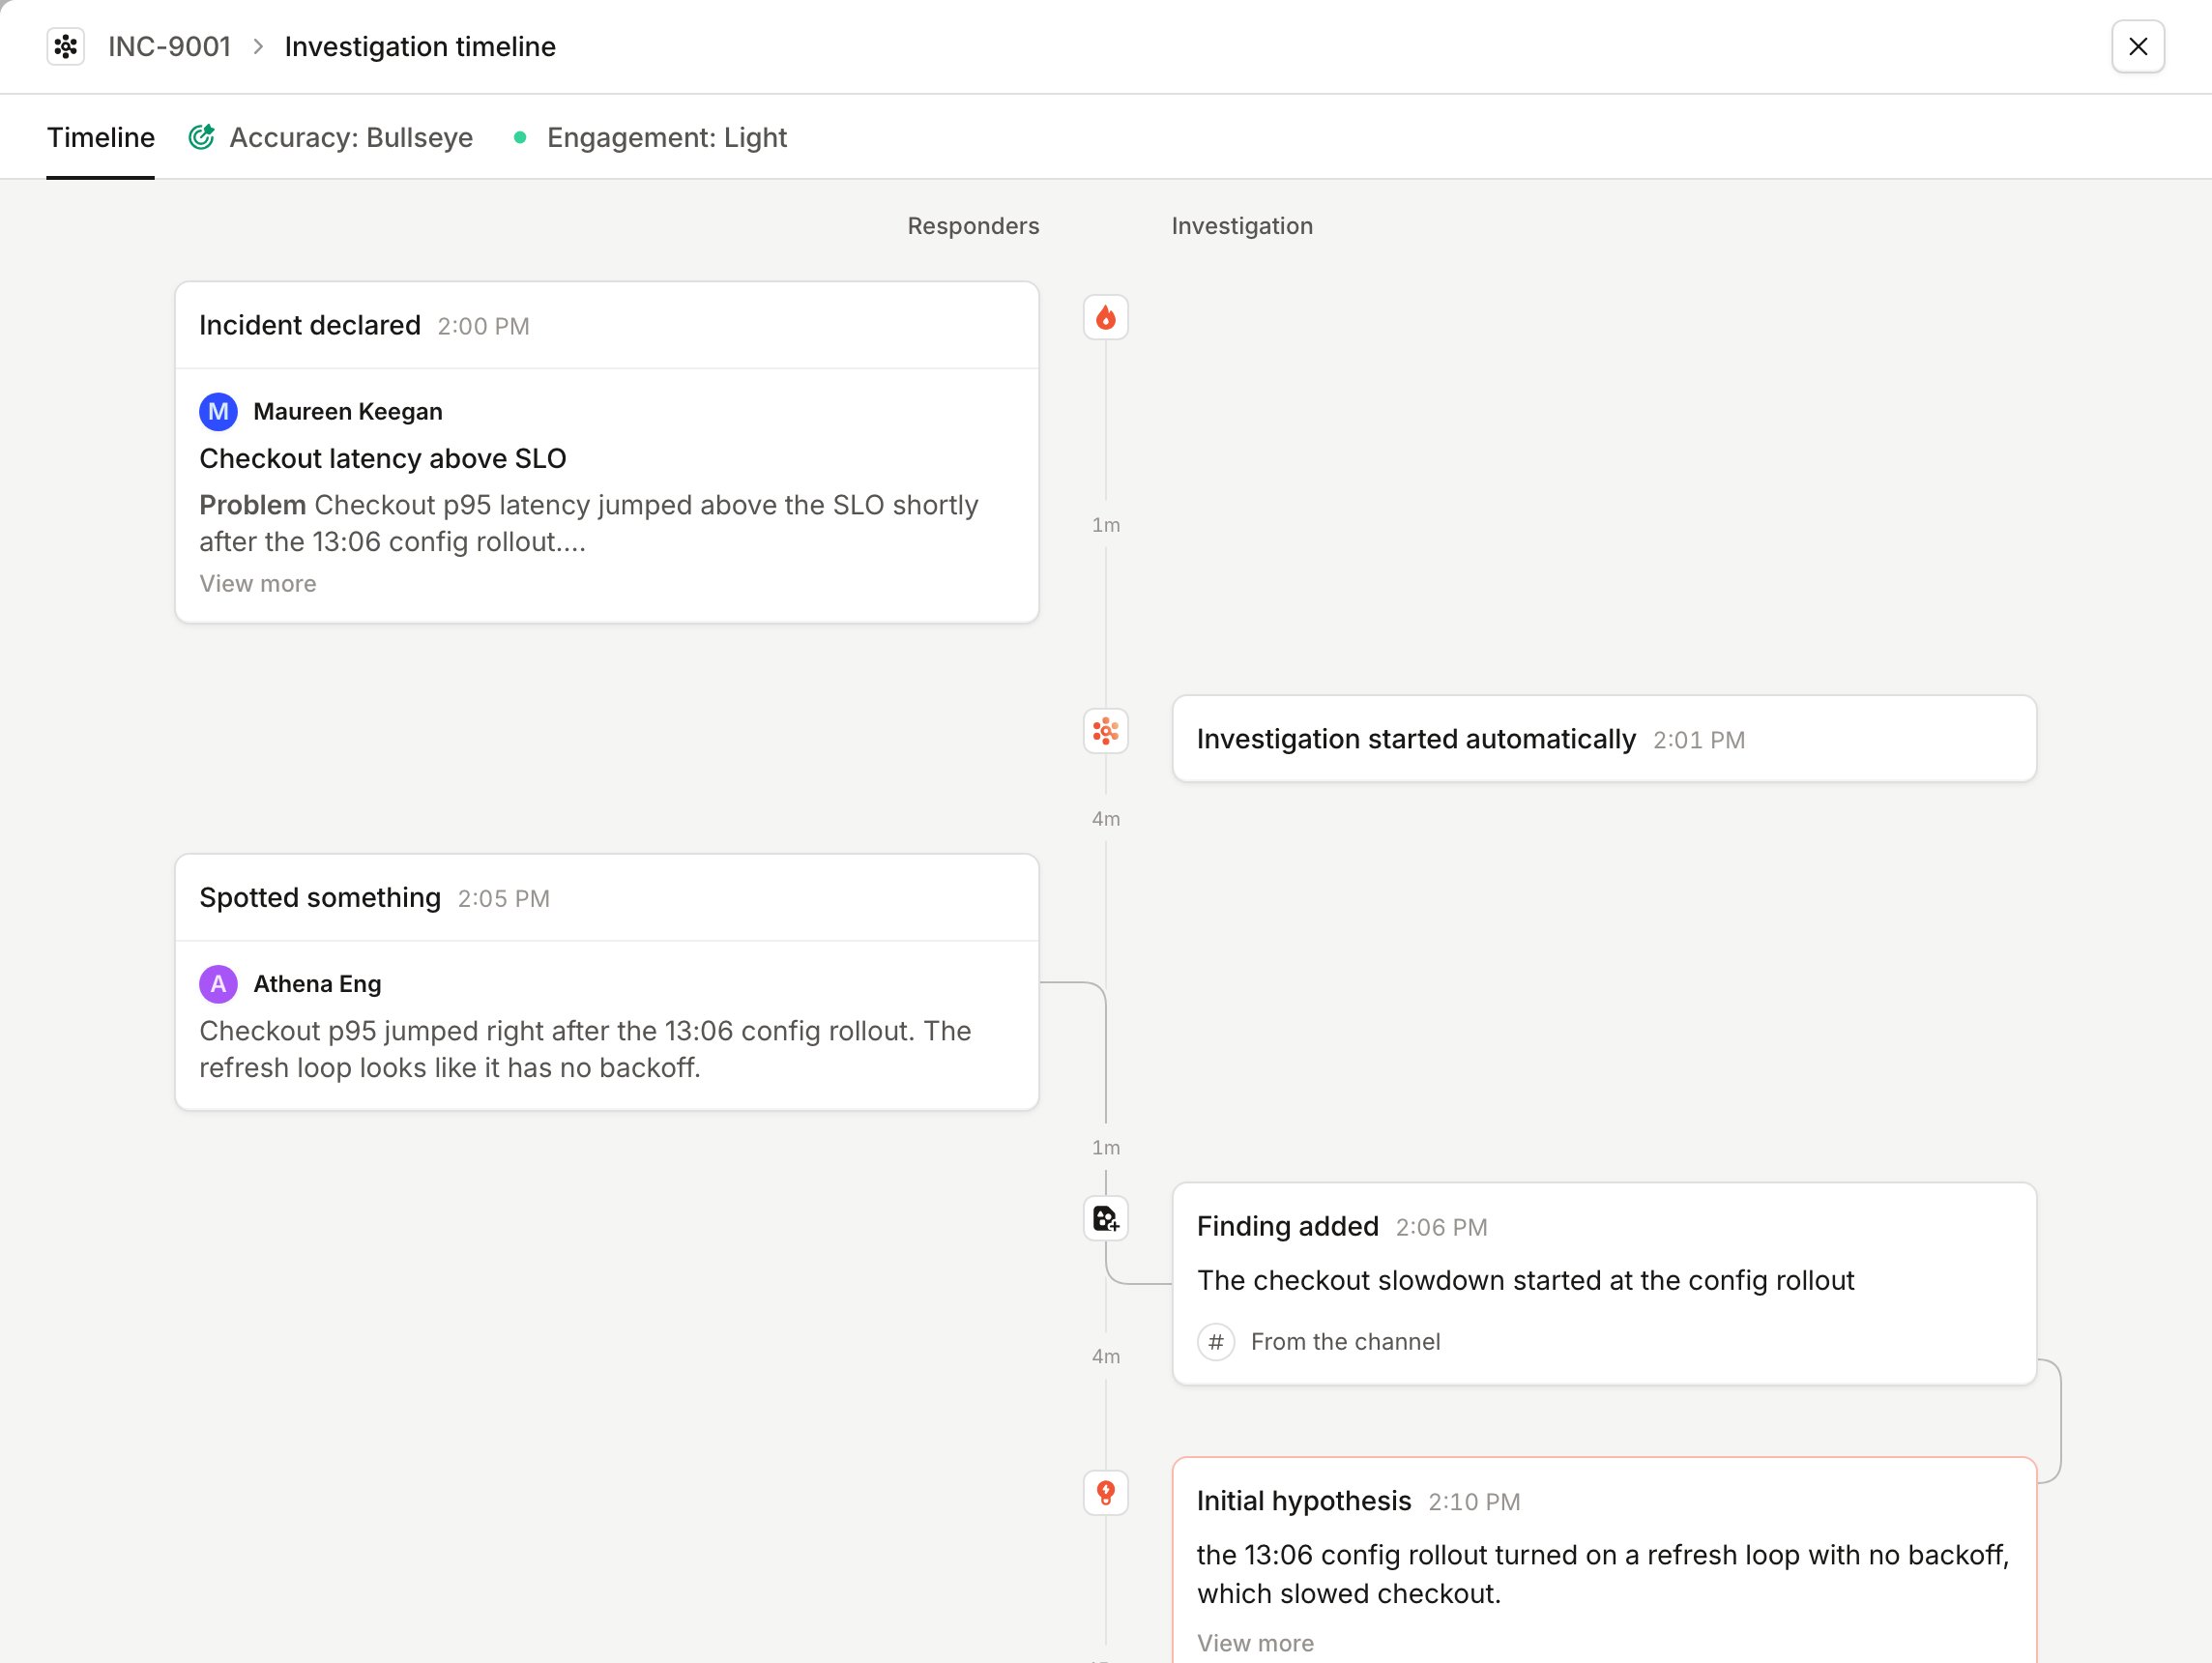
- Trace cause and effect. Hover over an event to understand why it happened, and whether it led to any changes in the incident.
- Dig into a hypothesis. Select a hypothesis to see its full write-up, the findings it rests on, and the alternatives it considered.
- Find the moment the root cause was diagnosed. Look for Root cause diagnosed on the timeline. See Measuring diagnosis for how we locate it.
- See when the investigation first helped. First useful signal marks the first point the investigation made a difference: a heads-up with new, accurate information, a merge suggestion your responders accepted, or naming the root cause.
- Review responder feedback. Feedback on the investigation appears at the end of the timeline.
Accuracy
The Accuracy tab shows how the investigation’s hypothesis developed, and how close it came to what really caused the incident. Once the investigation is scored, the tab’s label shows its grade (e.g., Accuracy: Bullseye). On the left is every version of the hypothesis, in order. Versions of the same hypothesis are grouped together (1.1, 1.2, and so on), and hypotheses that were replaced are grayed out. The tab opens on the scored version, marked with its grade.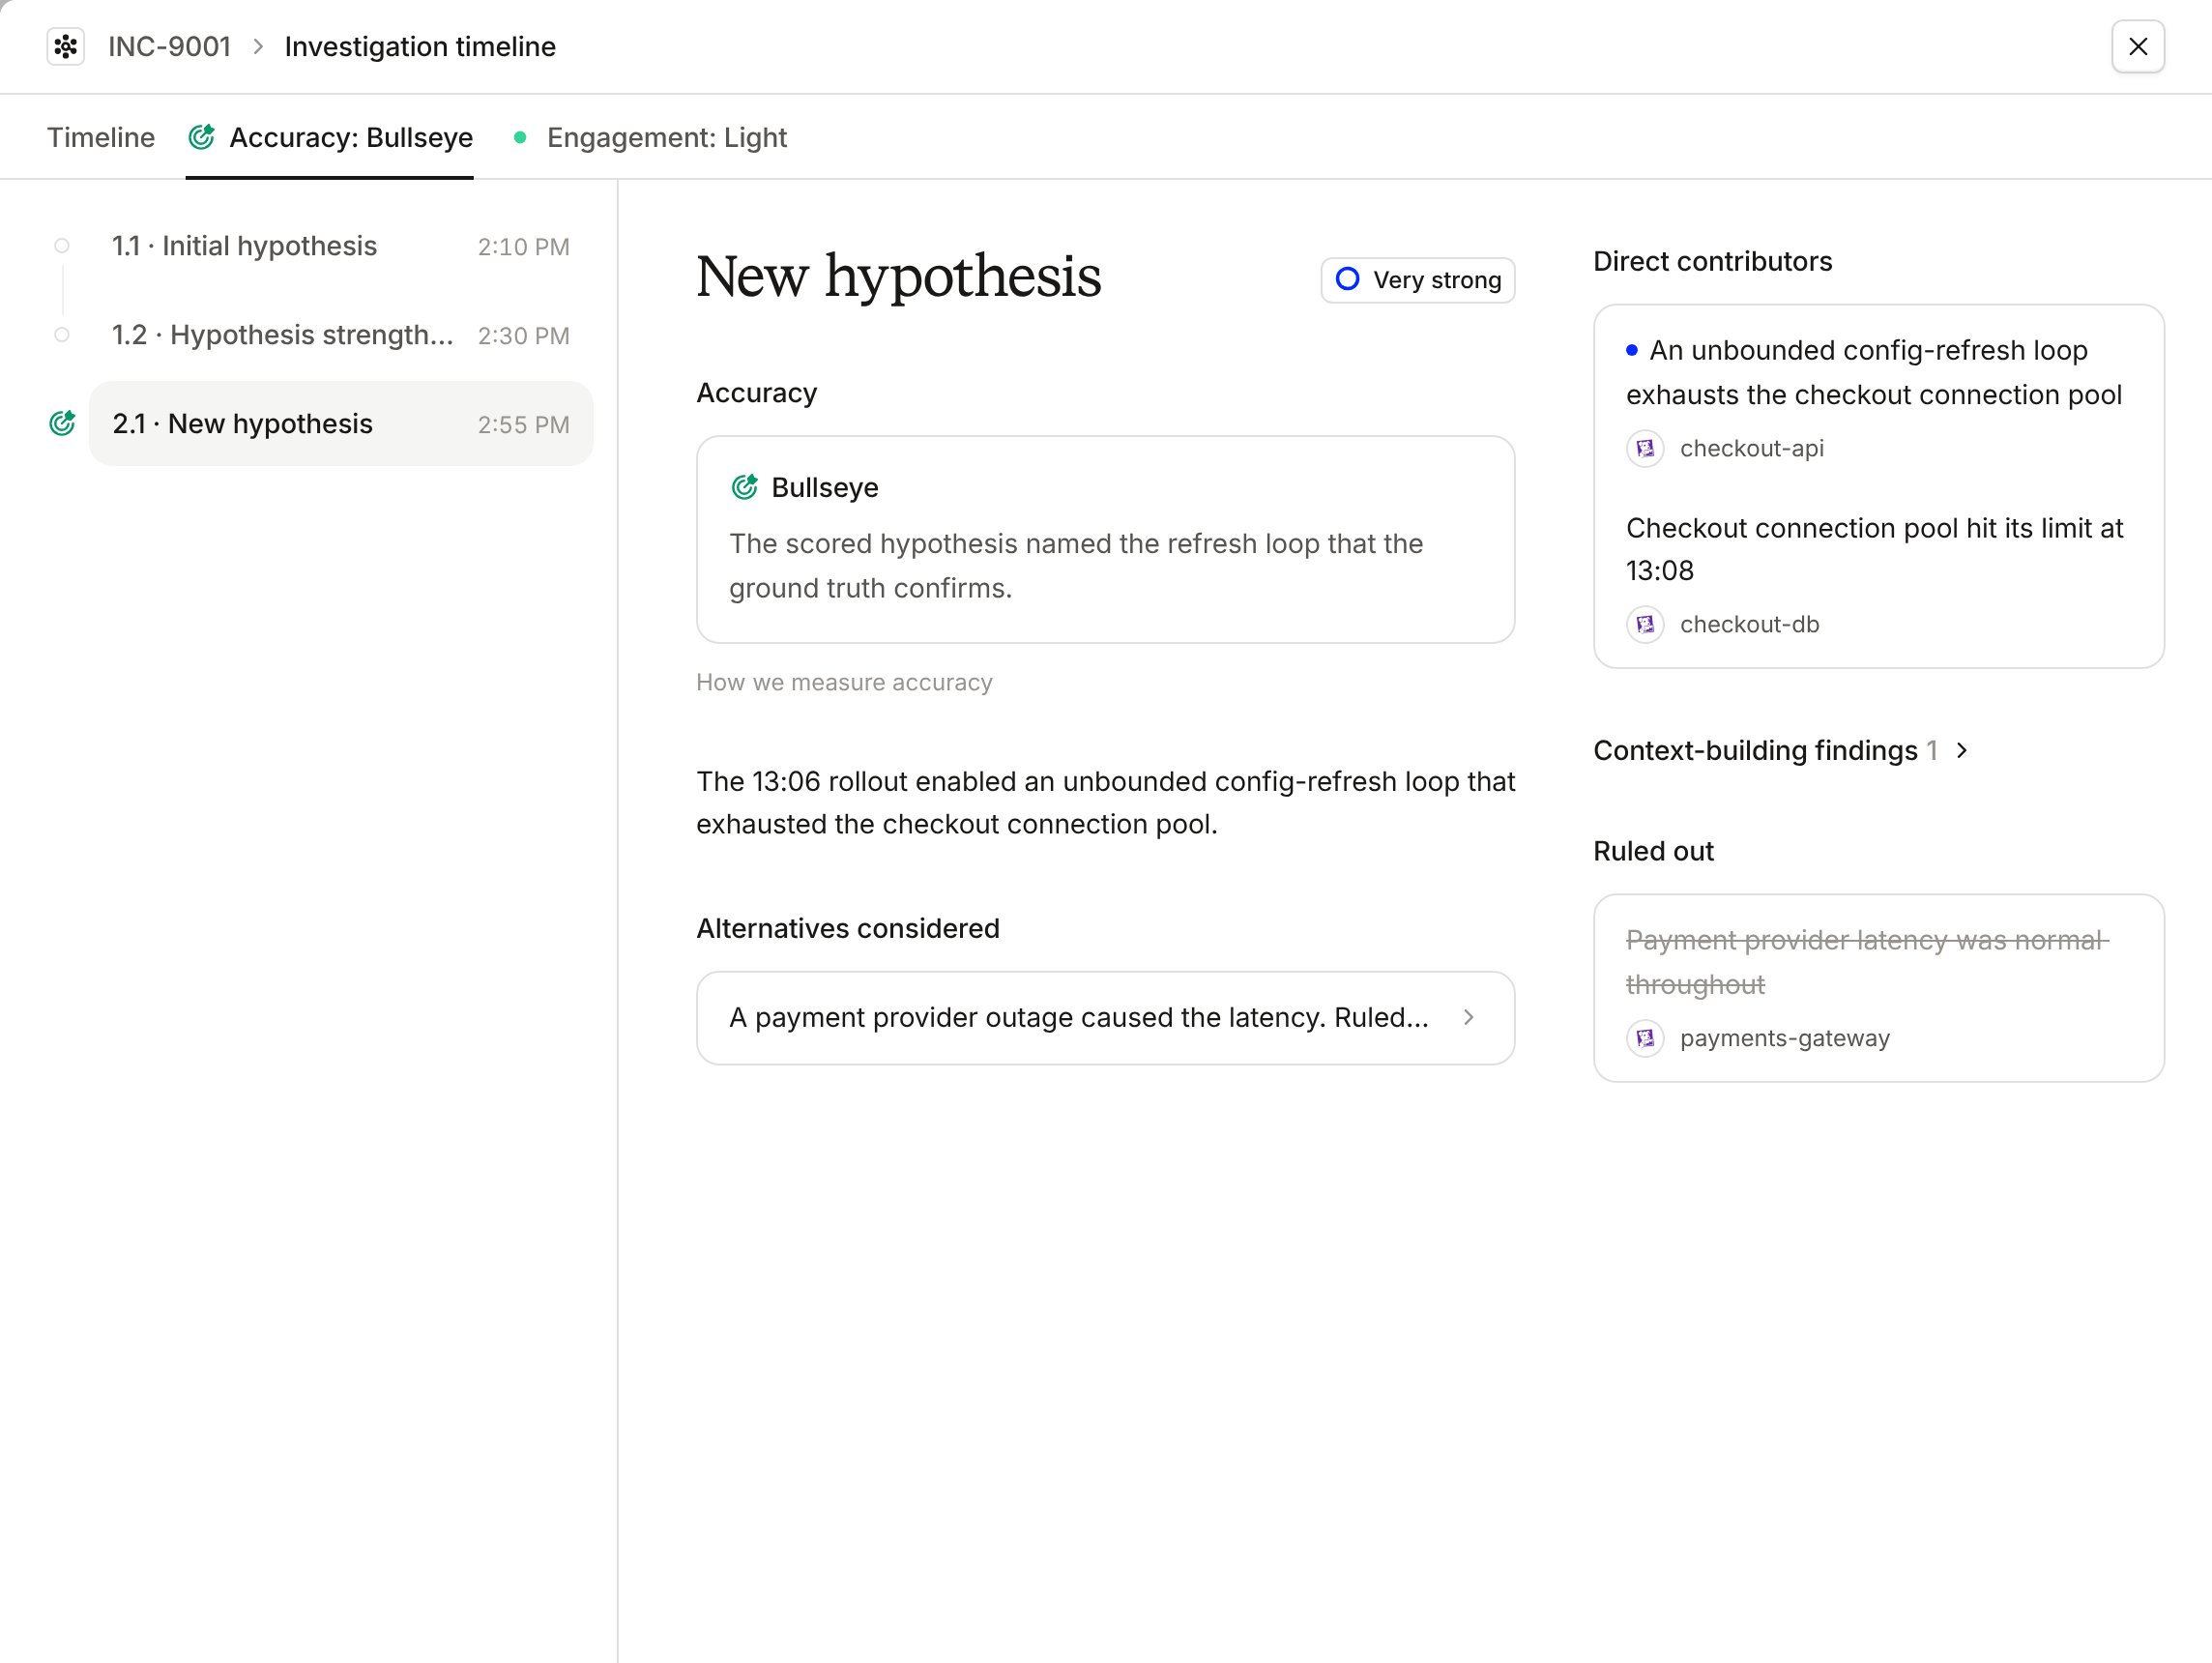
- Its conviction. How well-evidenced the hypothesis was at that stage. See Building conviction.
- Accuracy. On the scored version, its grade and why it scored that way. See Measuring accuracy for how we score it.
- The hypothesis. The full write-up of what the investigation believed had happened.
- Alternatives considered. The other explanations the investigation weighed, and why it set them aside.
- The findings behind it. Direct contributors are the findings that establish the hypothesis. Context-building findings fill in the picture around it. Ruled out lists findings the investigation disproved.
Engagement
The Engagement tab shows how your responders used the investigation. The tab’s label shows its engagement band (e.g., Engagement: Strong). See Measuring engagement for how we score it.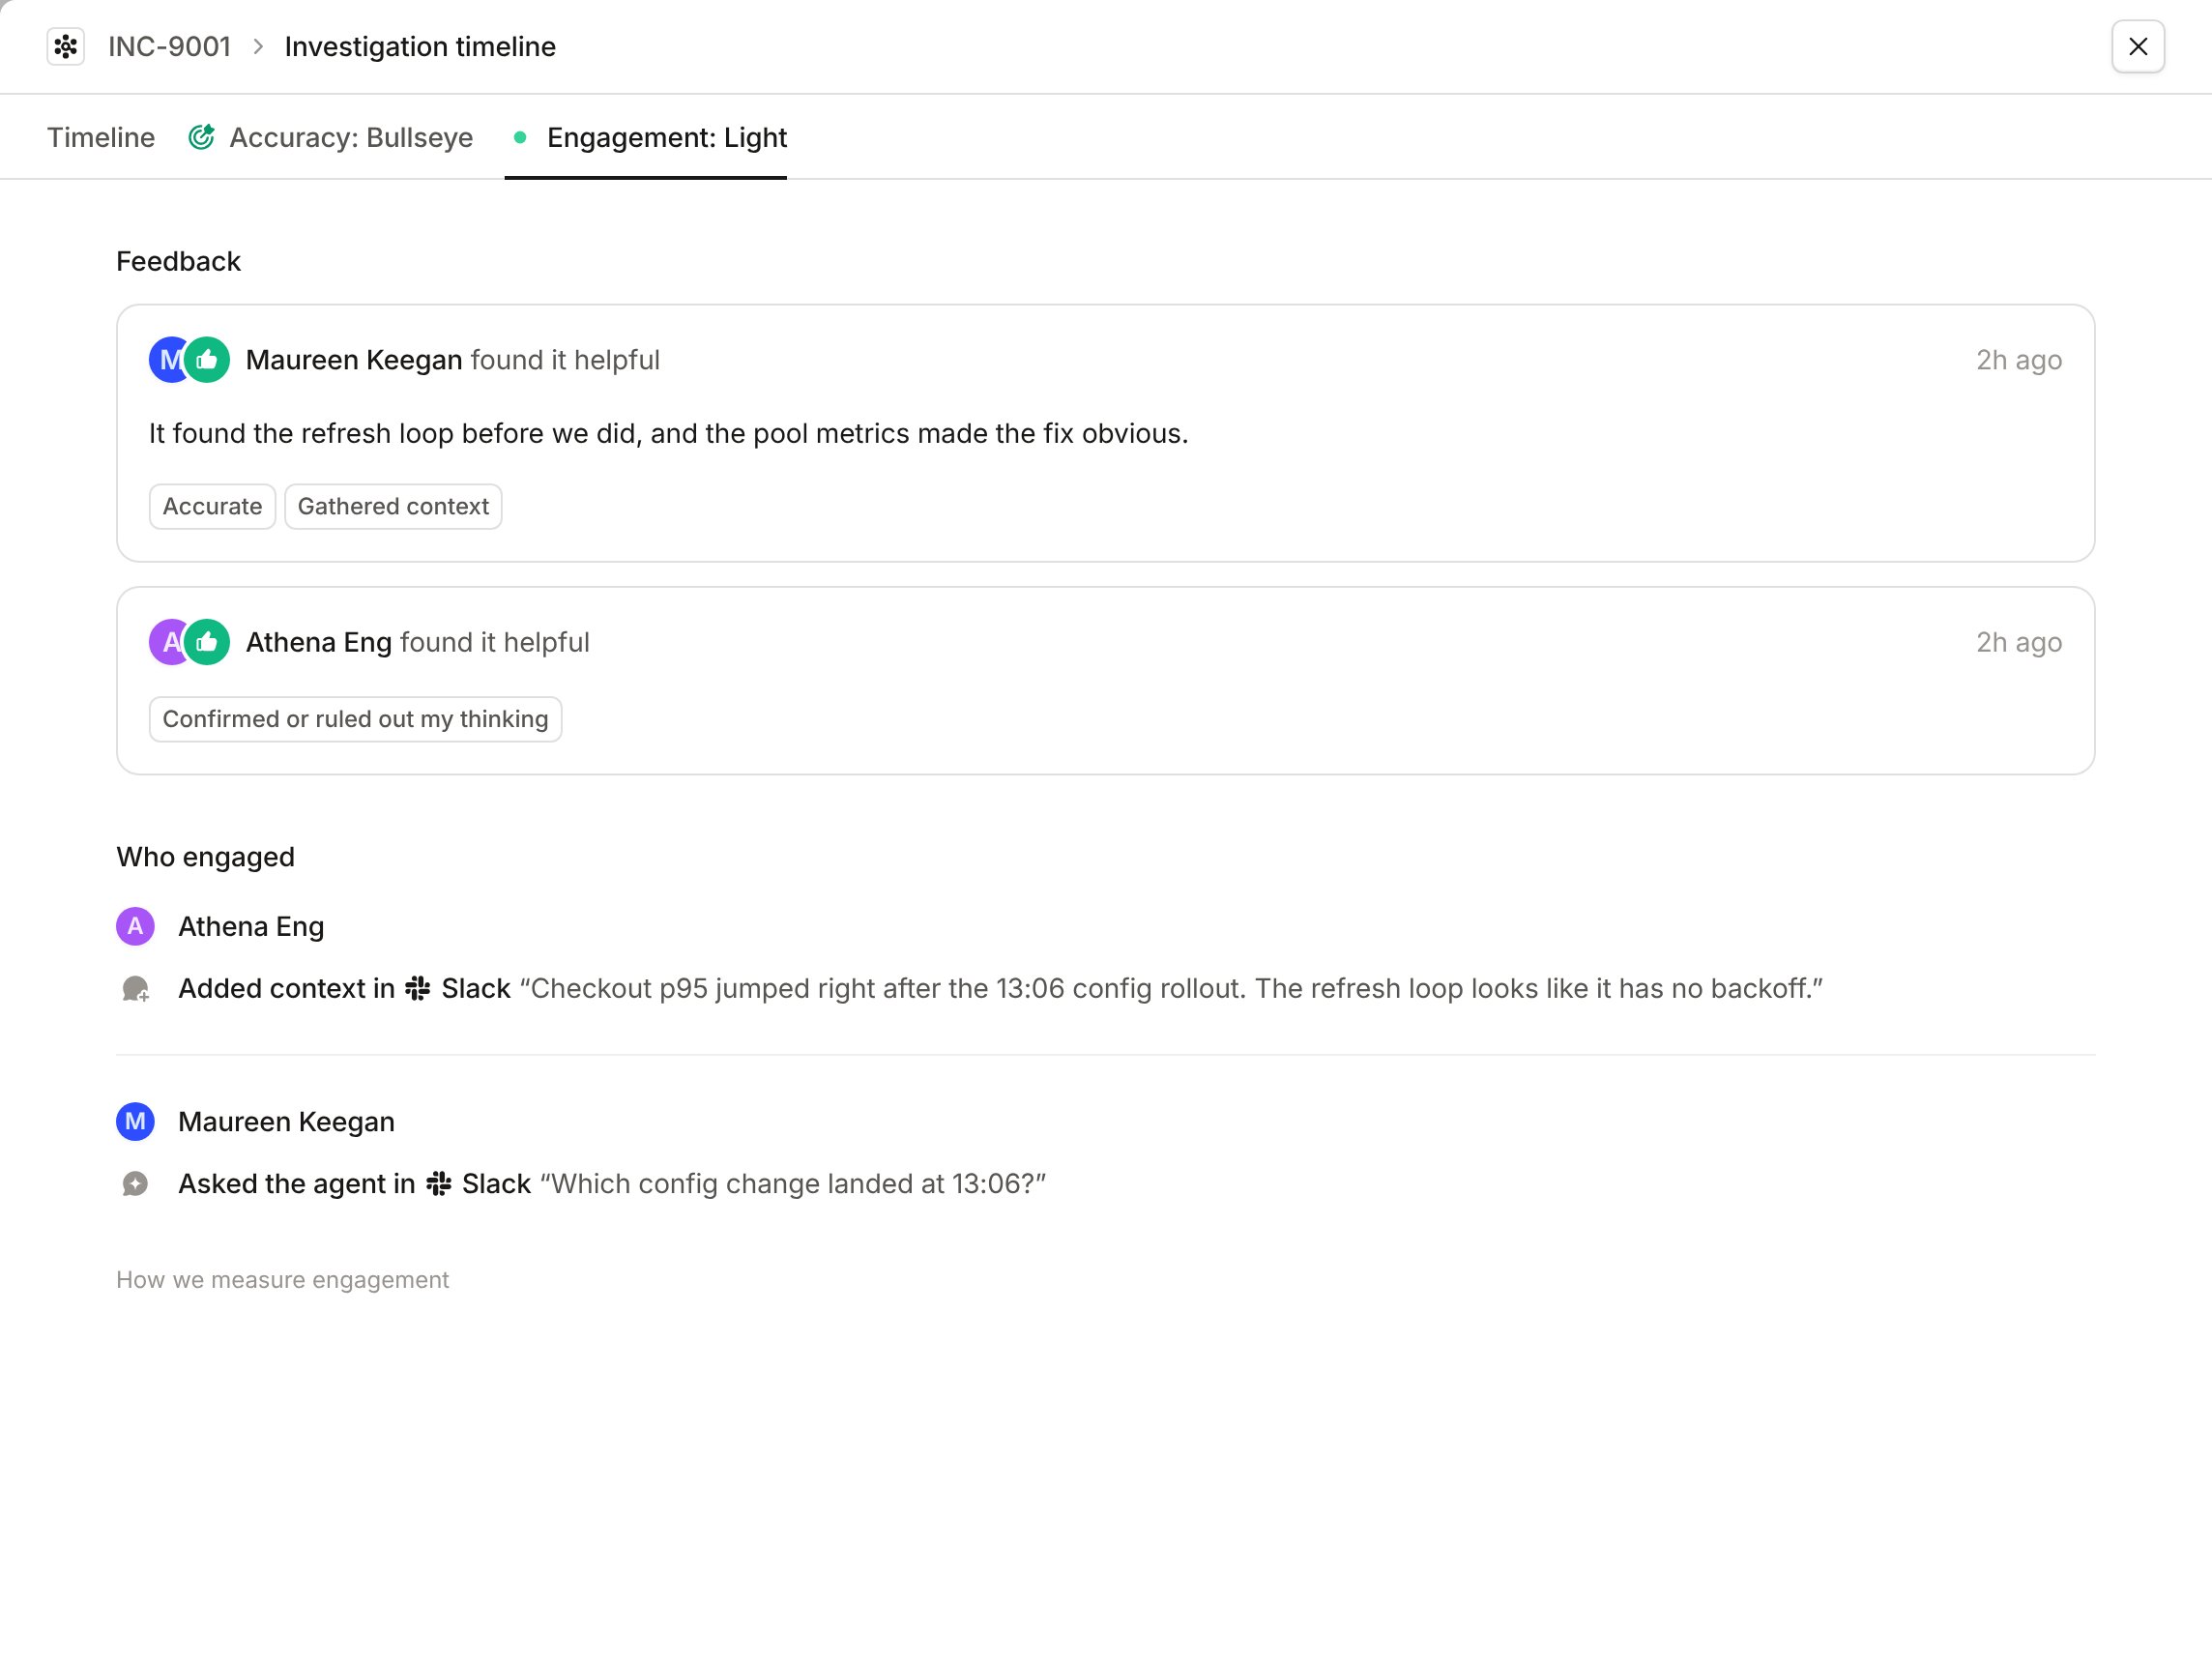
- Feedback: each responder who rated the investigation, whether they found it helpful, and any comment they left.
- Who engaged: each responder who used the investigation, with everything they did, oldest first. That covers adding context, asking the agent, replying to or opening a link from a heads-up, accepting or dismissing a merge suggestion, and pulling the investigation into a local agent. Each action shows where it happened, such as Slack, Microsoft Teams, the dashboard, or the desktop app.
FAQs
Why is only one version of the hypothesis scored?
Why is only one version of the hypothesis scored?
We score each investigation on a single version of its hypothesis, against the cause your responders established.
The other versions show how the investigation got there. See Measuring
accuracy.
Related
How investigations work
The process behind a result, and how an investigation builds conviction in real time.
Measuring accuracy
How we grade investigations against what really caused your incidents.
Measuring engagement
How we measure the way responders actually use an investigation, from reading it to acting on it.