

Getting started
Connect the issue tracker you want to use from Settings → Integrations, then open Settings → Incident tickets. Each tracker has its own setup steps:- Jira Cloud
- Jira Server and Data Center
- Linear
- Azure DevOps
- GitHub
- GitLab
- ServiceNow
- Salesforce Service Cloud
- Freshservice
- Shortcut
Creating and editing templates
Create at least one template before enabling incident tickets. Choose a connected issue tracker, then configure its destination and required fields. Use fixed values, incident variables, or expressions to populate supported fields. For Jira, the available fields depend on the selected project and issue type. Create multiple templates when incidents need different projects, issue types, or field mappings. For example, route security incidents to a restricted project and operational incidents to an engineering project.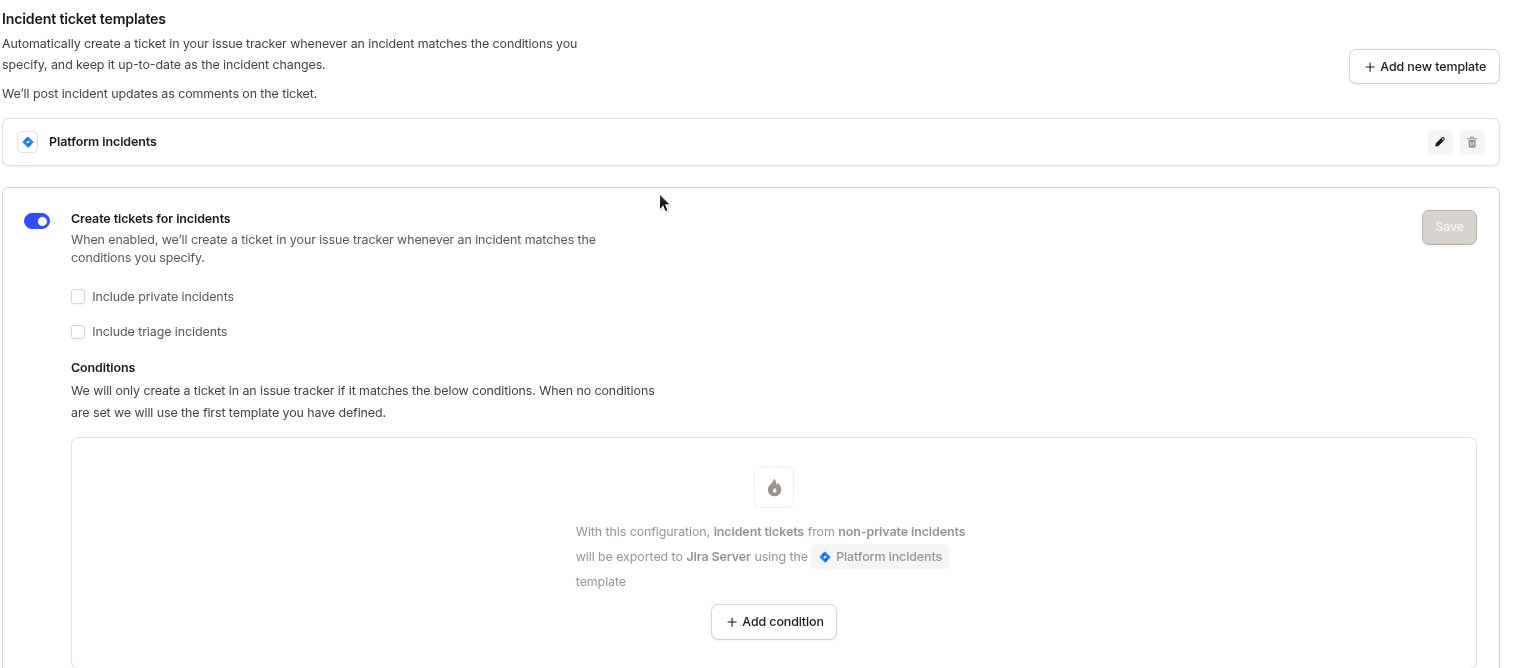
Setting the ticket status
Add the status field to your template to move the ticket between statuses as the incident changes. Bind it like any other field, usually to an expression over the incident’s status. For example, close the ticket when the incident is resolved. We set the status when we create the ticket, and again on every sync after that. What the field is called depends on the tracker:
Linear statuses belong to a team, so the field appears once your template targets a team. Salesforce Service Cloud sets the Case status through the fields on your Case object rather than a dedicated field.
Both Jira Cloud and Jira Server move an issue between statuses using workflow transitions. Your Jira workflow may have no route to the status you asked for, or the transition may need a field we can’t set such as Resolution. We show that on the incident’s ticket in the dashboard, and keep the ticket’s other fields in sync.
Syncing changes back to the incident
Sync individual fields back from the ticket to the incident. Open a field in the template and select Sync changes on this field back to the incident. When someone changes that field in the ticket, we apply the new value to the incident.


Resolving the incident when the ticket is completed
Select Resolve the incident when the ticket is completed to resolve the incident once the ticket reaches a completed status. The incident moves to closed, or into your post-incident flow where you use one. If the incident’s resolve form has a required field that isn’t set, we post in the incident channel with what’s missing.Using conditions
After creating a template, enable Create tickets for incidents.


If you add at least one condition, incident.io does not create a ticket when no condition matches.


Reuse a ticket from an alert
Jira Cloud, ServiceNow, and Azure DevOps can reuse the ticket an alert already created. If you use one of them as an alert source and have incident tickets configured for it, an incident created from one of its alerts reuses that alert’s ticket instead of creating a duplicate. We keep the existing ticket in sync like any other incident ticket. This happens automatically when all of the following are true:- The incident was created from a single alert from that tracker. If several are grouped into one incident we can’t tell which ticket to use, so we create a new ticket instead.
- The ticket isn’t already linked to another incident or follow-up, and still exists in the tracker.
- For Jira Cloud, the alert’s issue is in the same project and of the same issue type that your incident ticket template targets.
Private incidents
Enable Include private incidents to create tickets for private incidents. Anyone with access to the destination project can see the ticket and its incident data. Make sure the project has appropriate access controls before enabling this setting.Tracker specifics
Azure DevOps
Each template targets a project and a work item type. Those two choices determine which fields the template offers. Comments added to the work item sync back into incident.io once the service hook is set up.ServiceNow
Incident tickets are created on theincident table, and the template offers that table’s own columns as fields. The incident name becomes short_description, and opened_by is the integration user.
Where your template doesn’t set them, we create the record with state 1 (New), urgency 2 (Medium), and impact 2 (Medium). Bind those fields in your template to choose your own values.
Work notes, comments, and image attachments added to the ServiceNow record sync back into incident.io.
Linear
An incident ticket can be a Linear project instead of an issue. Set Create as to Project on the template, and that incident’s follow-ups move into the project as they’re linked. A follow-up whose own template sets a project keeps that project.Salesforce Service Cloud
Incident tickets are Salesforce Cases, and the template offers the fields on your Case object.Shortcut
Incident tickets are Shortcut stories, and the template offers the story’s Title, Description, Team, Project, Requester and Owner.FAQs
Why doesn't changing an incident's severity update its ServiceNow priority?
Why doesn't changing an incident's severity update its ServiceNow priority?
Most ServiceNow configurations calculate Priority from Impact and Urgency. ServiceNow rules can
therefore overwrite a value written directly to Priority. In your incident ticket template, map the incident
severity to both Impact and Urgency instead. ServiceNow will use those values to calculate the expected
priority.