You might be aware that you can export follow-ups to Jira but did you know that you can automatically create tickets representing an incident too?
Often it can be hard to keep track of which tickets or follow-ups relate to which incident, or have a central place in your project tracking where you can add comments and extra information.
By having a single incident ticket created automatically you can attach, link, and refer back easily back to this one ticket. We will also keep fields and variables in sync and update the ticket with the latest information.
You can also use templates and conditions to create different tickets in different projects depending on custom fields, and incident types within incident.io.
Getting started
To get this set up, follow the setup process and once connected head to Settings → Incident tickets.
You may not have a default template - before you can save, you will need to add a template and potentially any conditions you wish to match against.
Creating and editing templates
When we sync information about an incident with Jira we will need to know what project, issue type, and any required fields to use when we create it.
By filling out the template you can specify any required and optional fields along with the ticket description itself using either static text or fields powered by our variables.
This gives you the flexibility to show more or less in the description for certain incidents. For example you might want a completely different set of information for a maintenance event vs a critical incident.
 You can create multiple templates (depending on your billing plan) and use conditions to select which one to use in certain circumstances. This will allow you to route your tickets to different Jira projects based on incident conditions.
Using conditions
You’re now ready to enable ’ Create tickets ’:
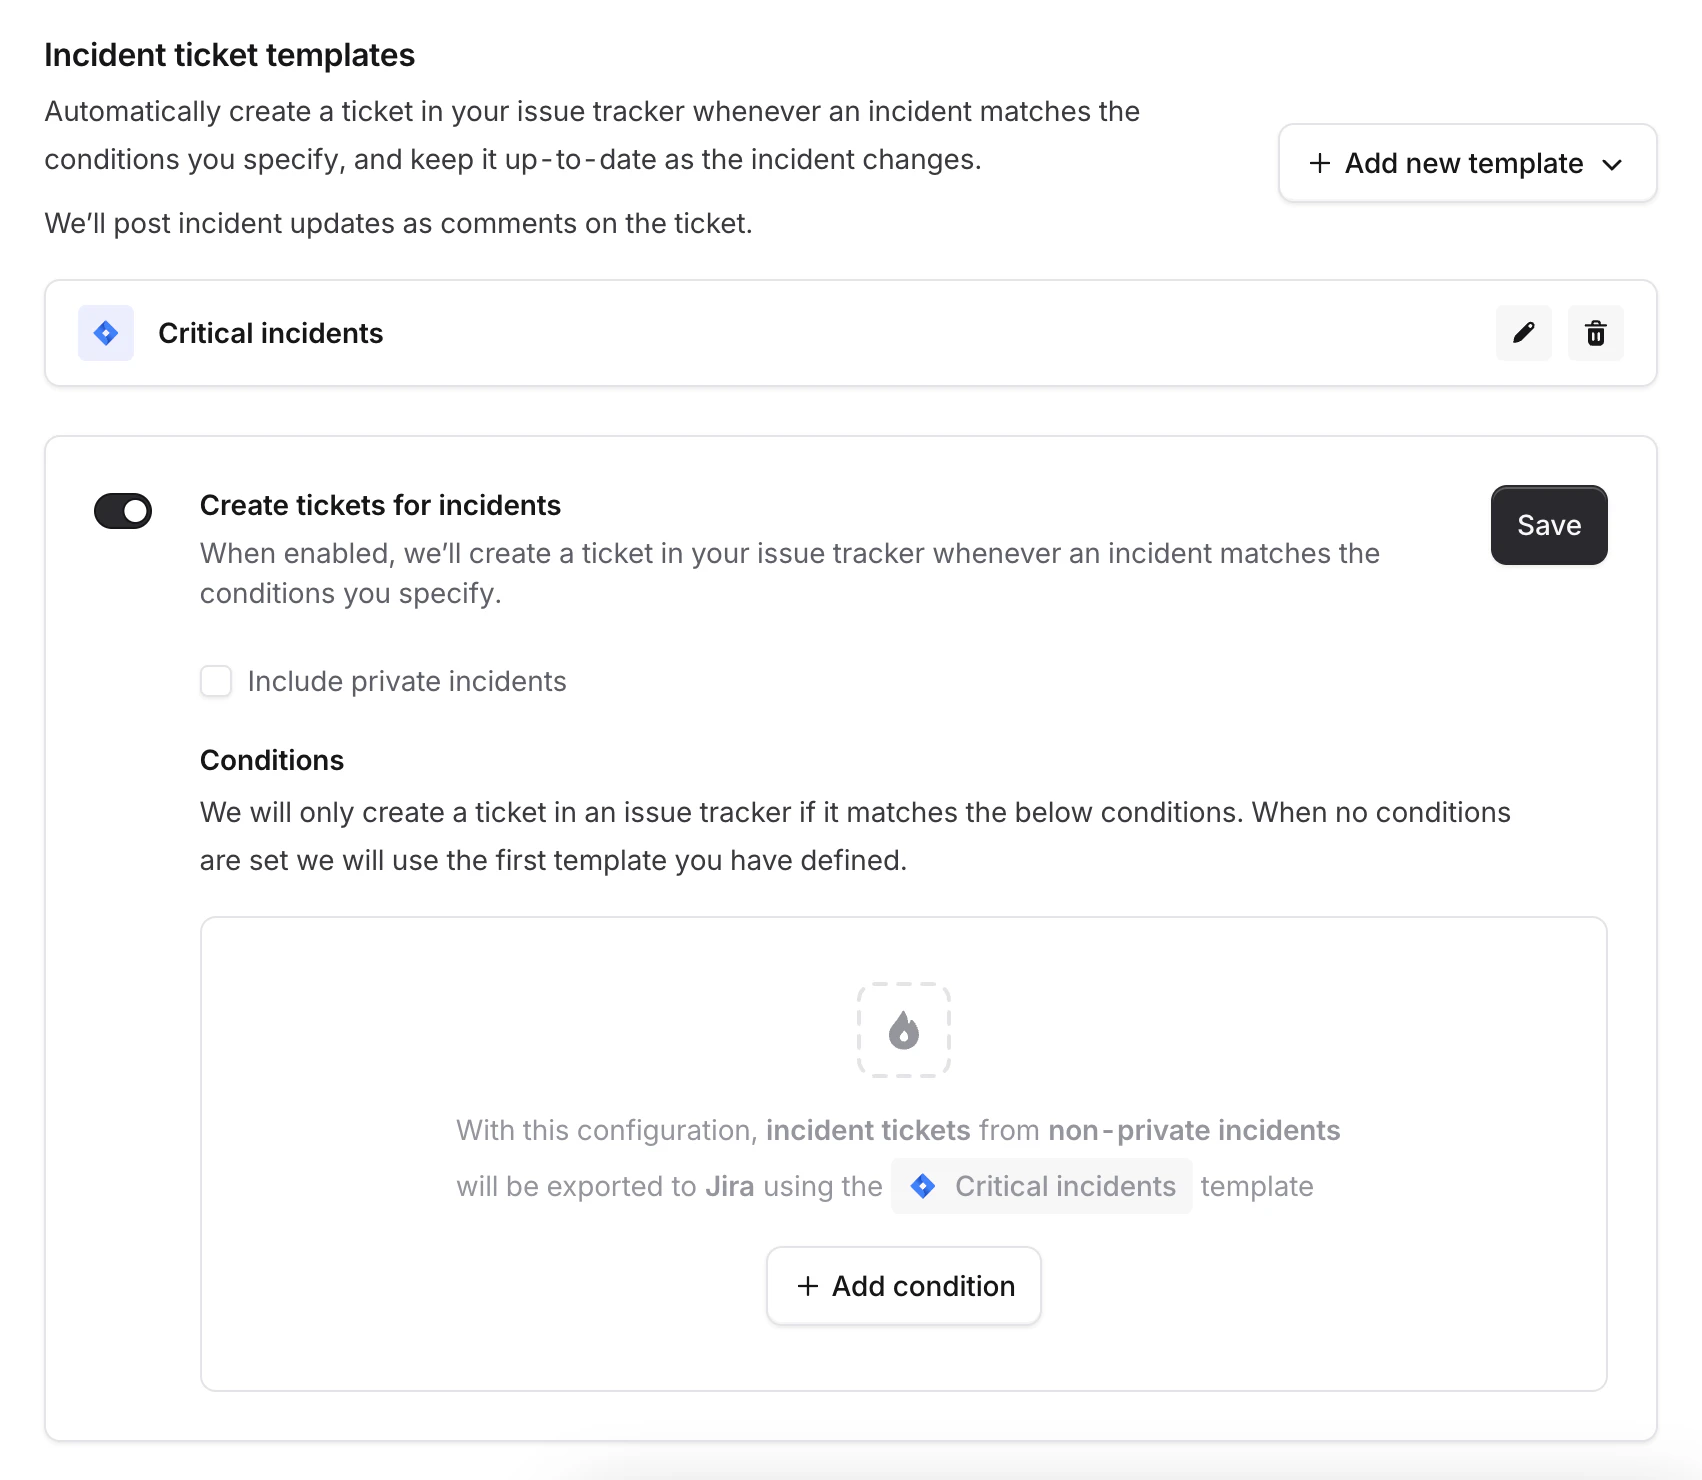 If there are no conditions specified we will use the first template in the list and create a ticket for all incidents.
If you only wish to create a ticket for certain incidents, or create tickets in different projects then you’ll need to set up some conditions.
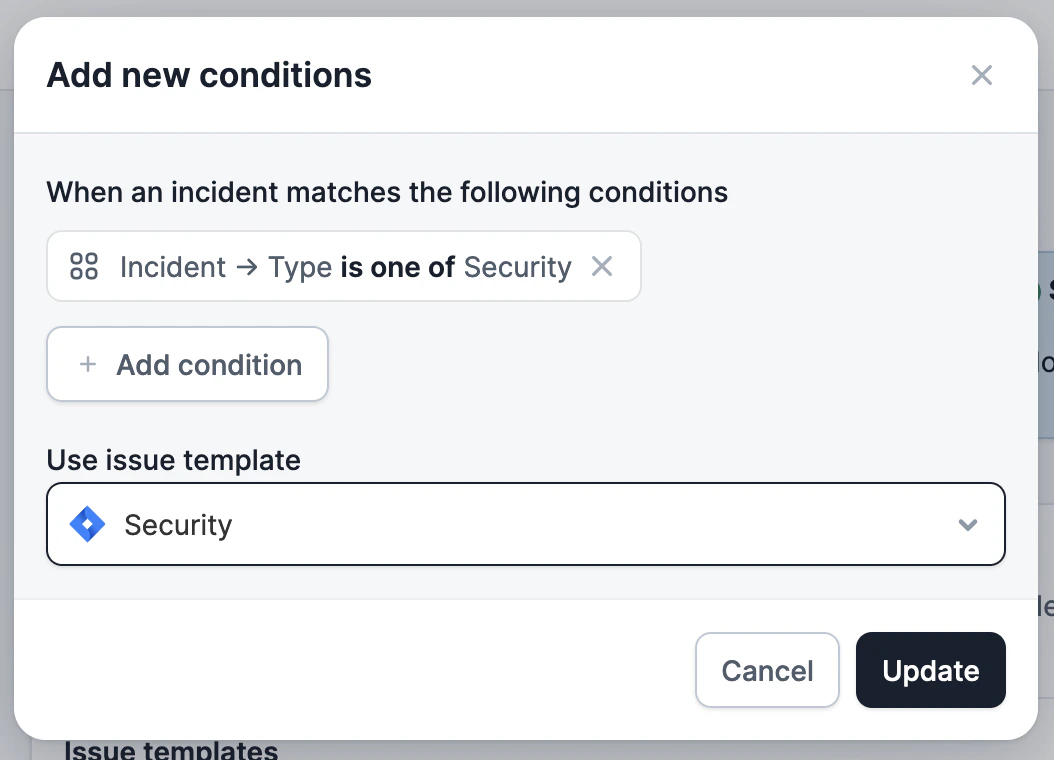
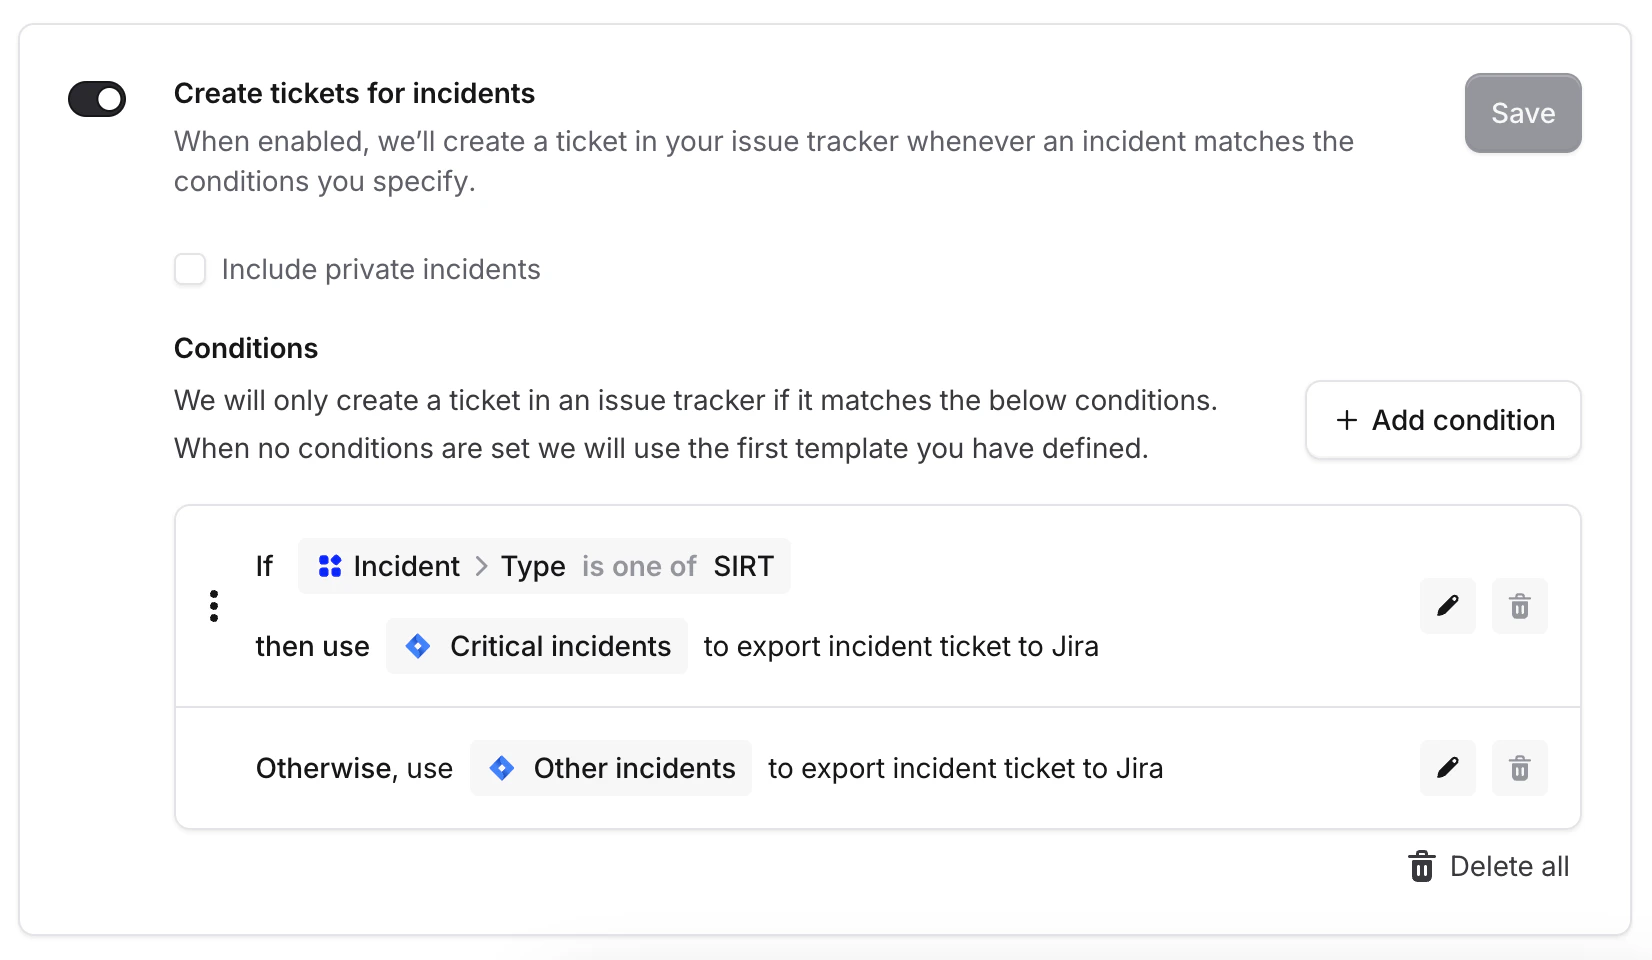
For example, if we wanted to use a security template for security type issues we can create the following condition:
If there are no conditions specified we will use the first template in the list and create a ticket for all incidents.
If you only wish to create a ticket for certain incidents, or create tickets in different projects then you’ll need to set up some conditions.
For example, if we wanted to use a security template for security type issues we can create the following condition:
 And once saved see how it will affect the creation of tickets:
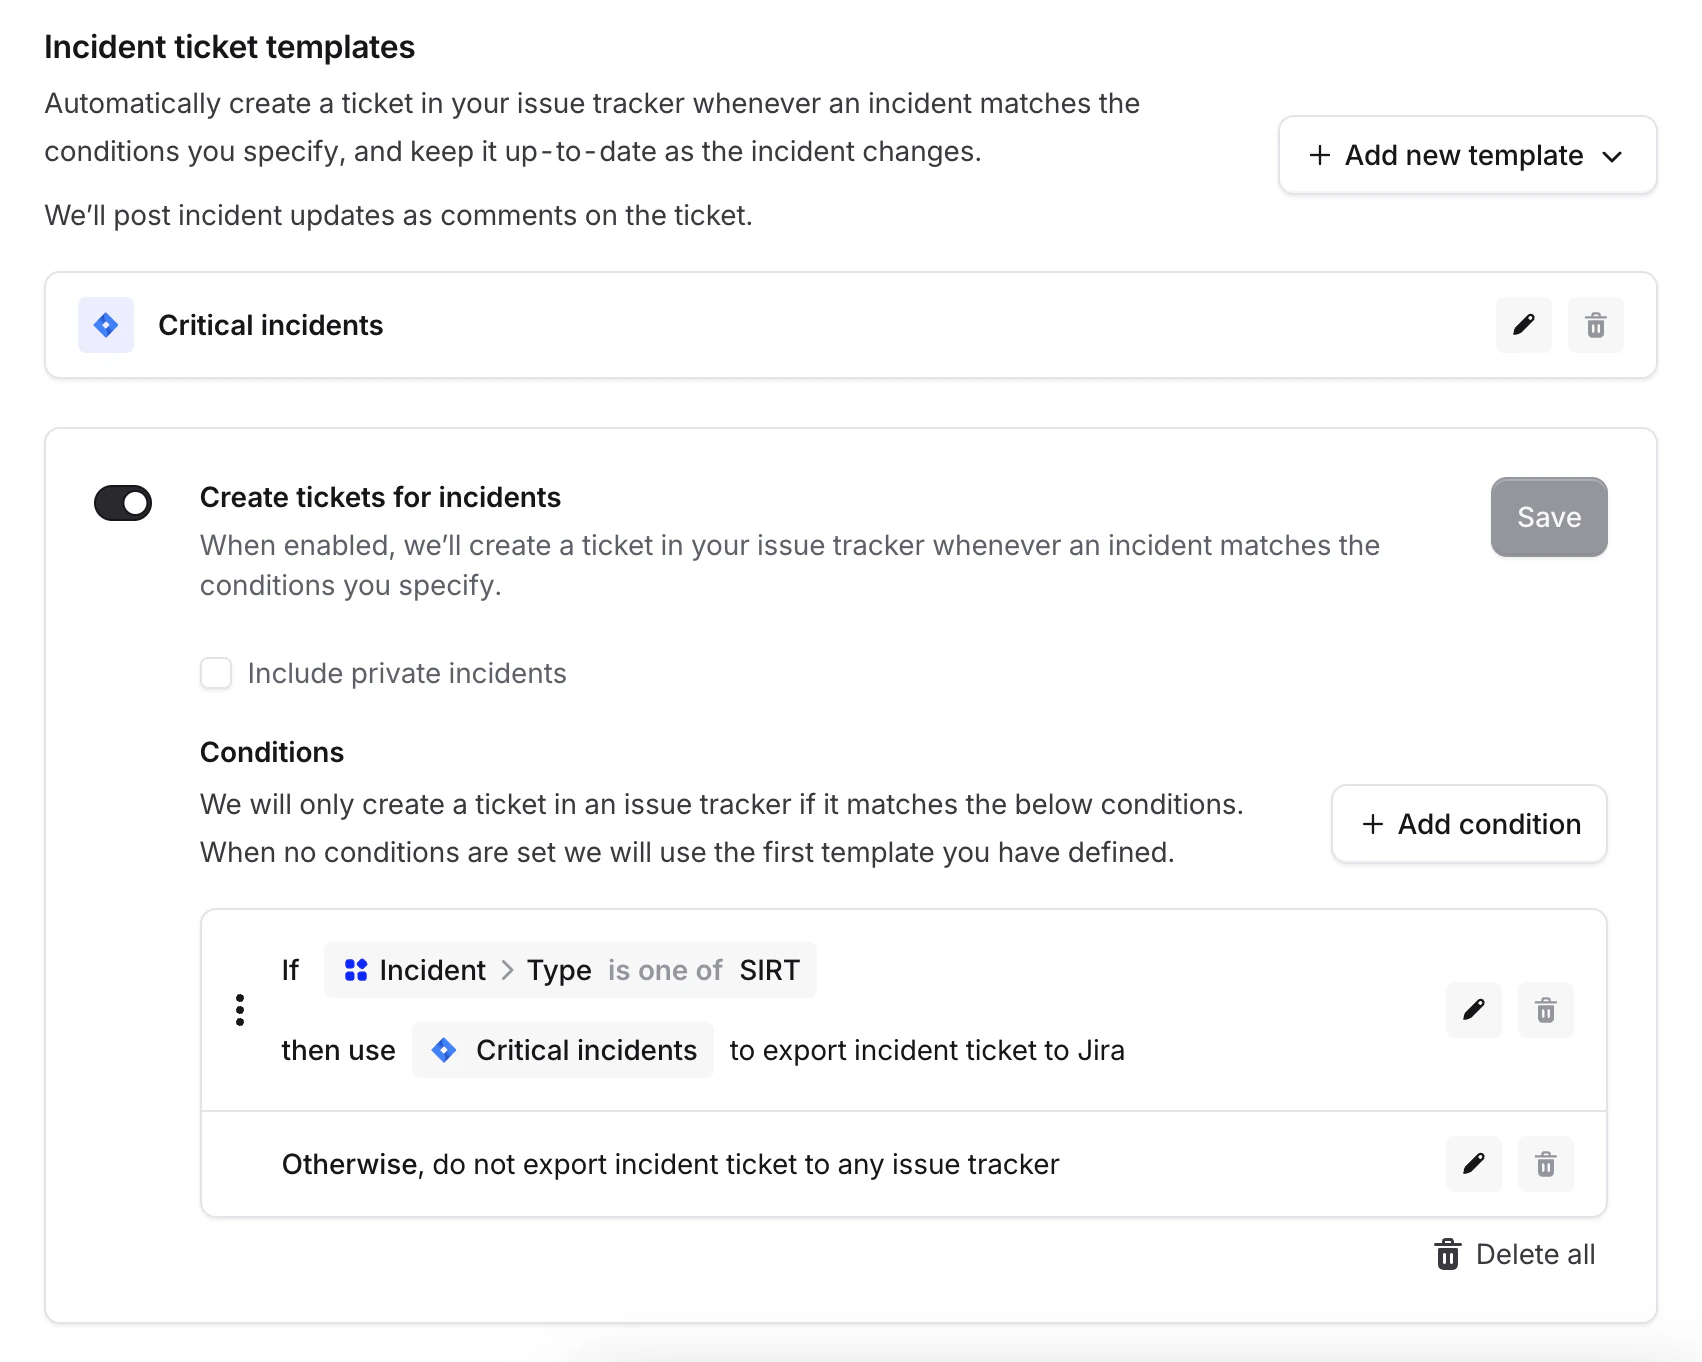
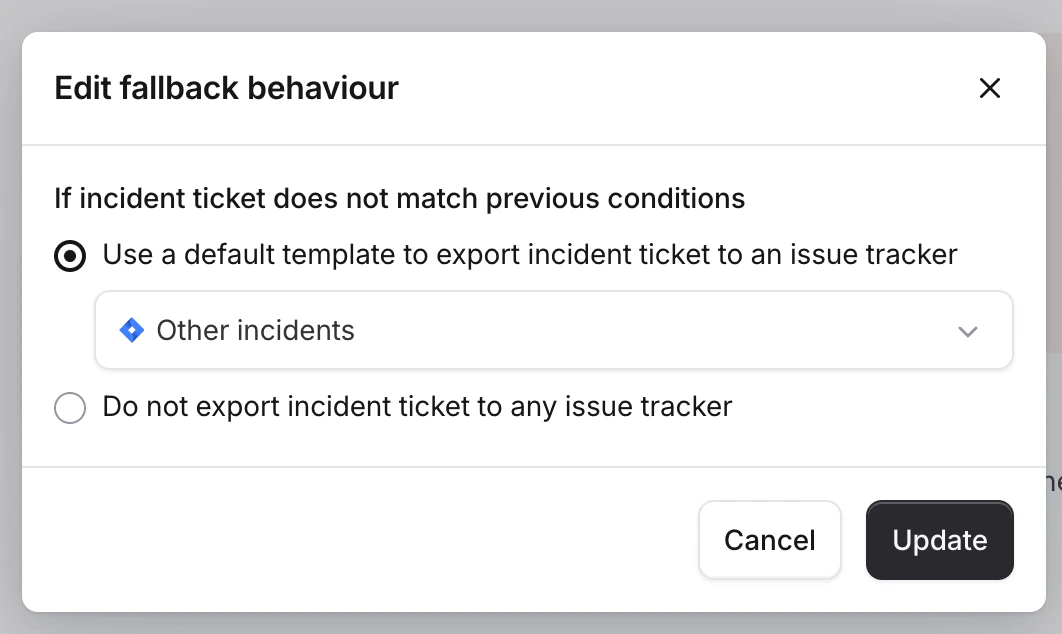
By default if you have created at least one condition we will not create a ticket if there is no match.
Reusing a Jira ticket from an alert
If you use Jira as an alert source and have incident tickets configured for Jira, an incident created from a Jira alert will reuse that alert’s Jira issue as its incident ticket, rather than creating a second, duplicate ticket. We then keep that existing issue in sync with the incident just like any other incident ticket.
This happens automatically when all of the following are true:
- The incident was created from a single Jira alert. If several Jira alerts are grouped into one incident we can’t tell which issue to use, so we create a new ticket instead.
- The alert’s issue is in the same project that your incident ticket template targets.
- The alert’s issue is the same issue type that your template targets.
- The issue isn’t already linked to another incident or follow-up, and still exists in Jira.
If any of these aren’t true, we fall back to creating a new incident ticket from your template as usual.
Private incidents
If you do wish to create tickets for private incidents you can enable this with the checkbox.
However be aware that anyone with access to the chosen Jira project will be able to see them, so take care.