Creating (and editing) incident tickets
Once incident.io is connected to ServiceNow, you’ll want to head over to Settings → Incident tickets. You’ll first need to create an incident ticket template. When we sync information about an incident back to ServiceNow, we will need to know how to populate your required fields (i.e. description, caller), as well as any optional ones.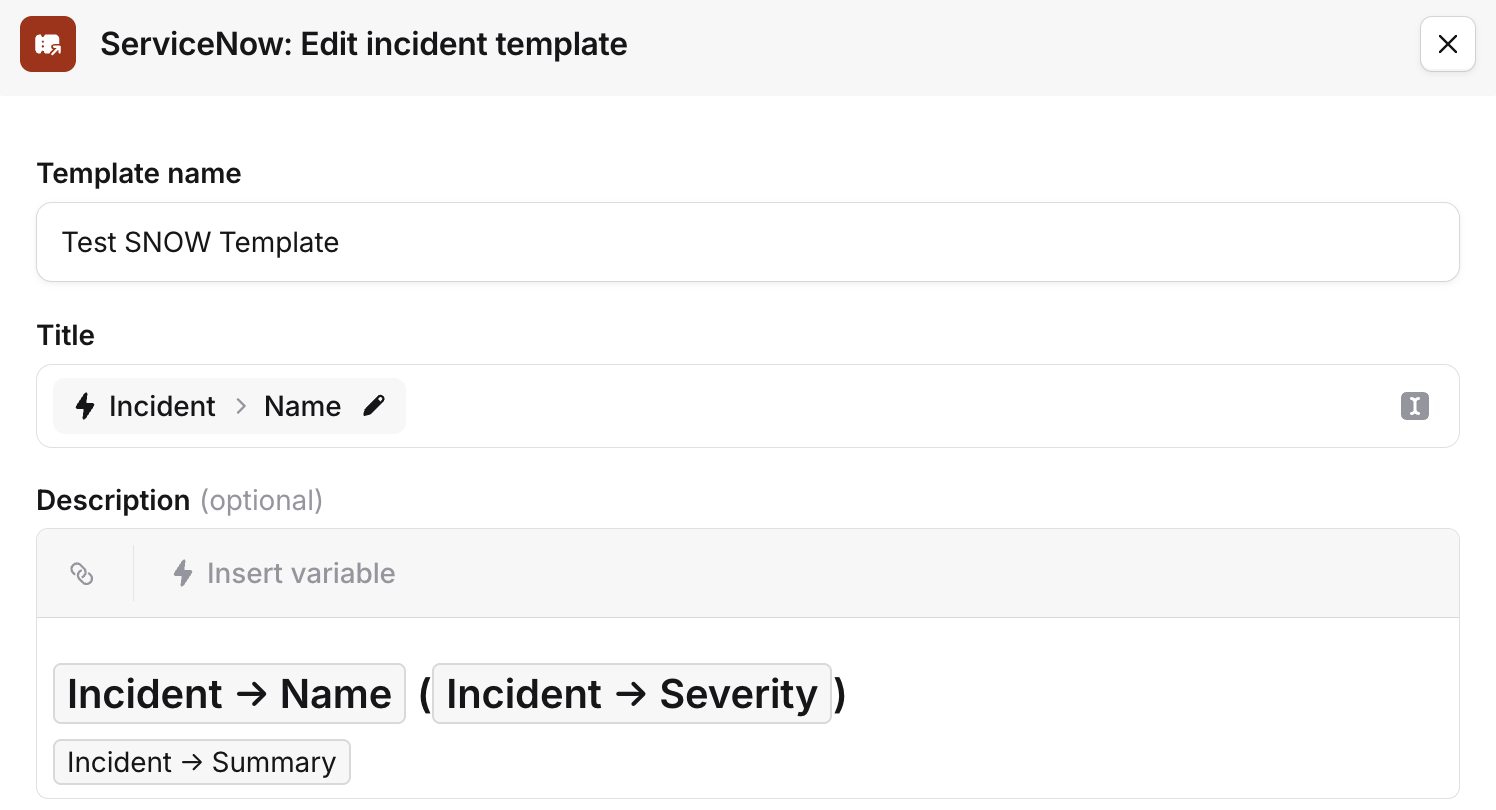
- You could route any engineering-related incidents to Jira
- Then, route any security-related incidents to ServiceNow
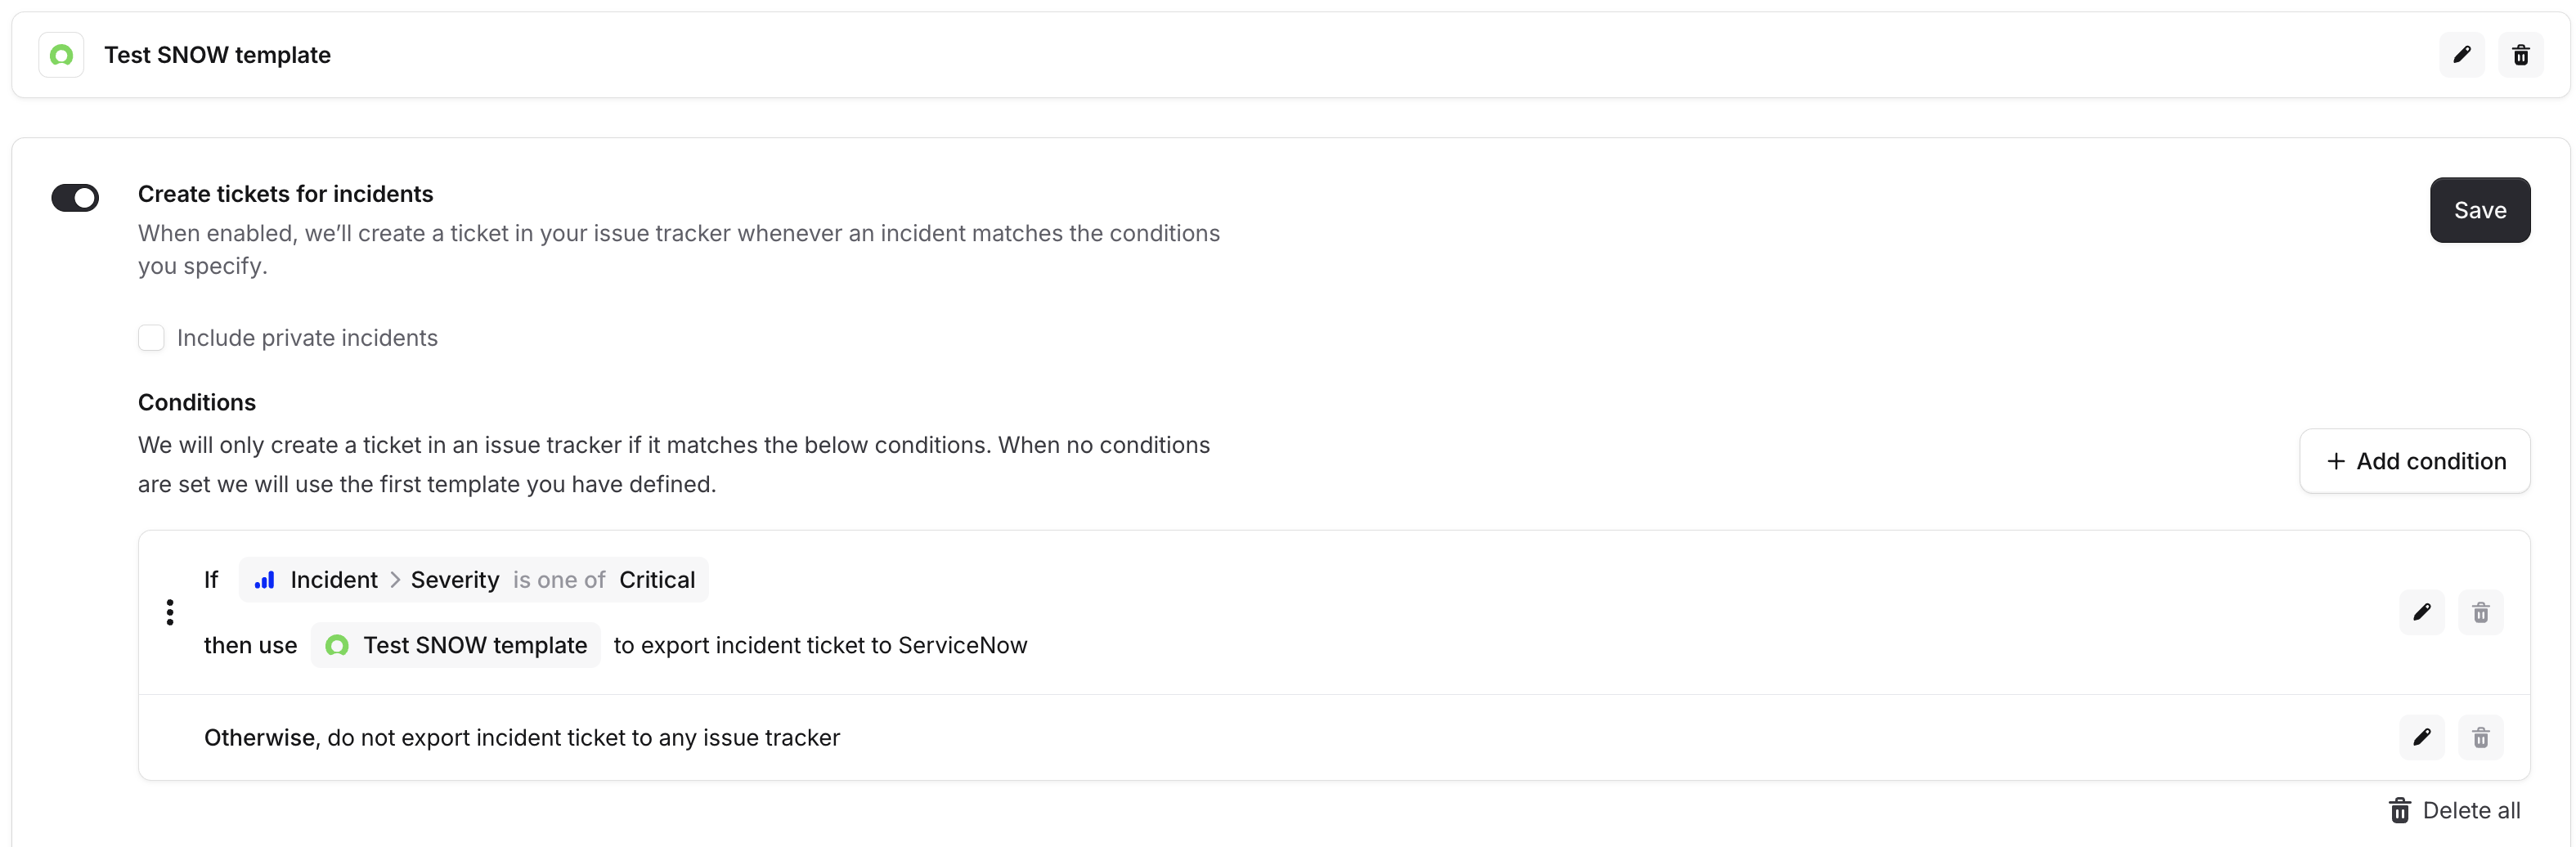
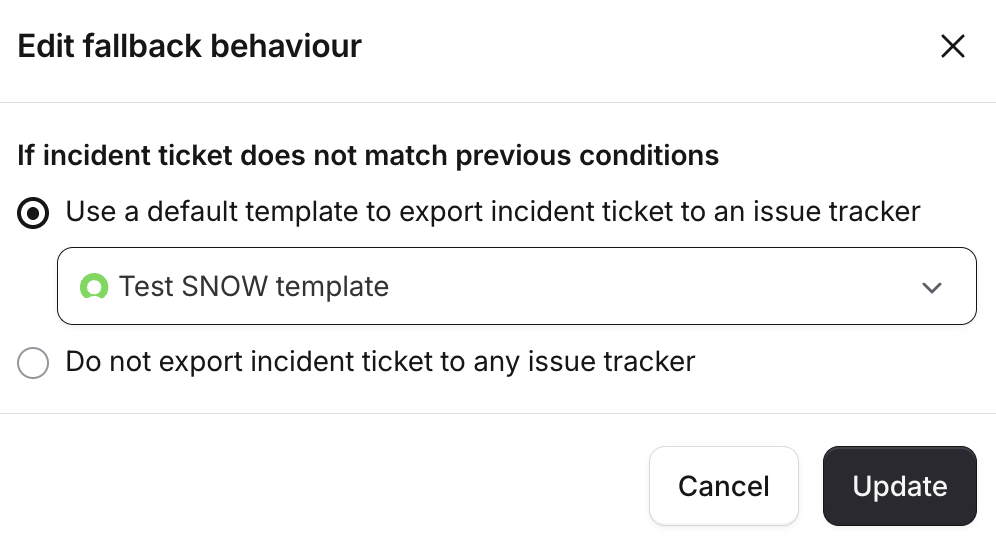
By default if you have created at least one condition we will not create a ticket if there is no match.
- You could export any engineering-related incidents to Jira
- Then, export any security-related incidents to ServiceNow
- If no match, default export to the ServiceNow incident ticket template
Reusing a ServiceNow ticket from an alert
If you use ServiceNow as an alert source and have incident tickets configured for ServiceNow, an incident created from a ServiceNow alert will reuse the ServiceNow incident behind that alert as its incident ticket, rather than opening a second, duplicate one. We then keep that existing ServiceNow incident in sync just like any other incident ticket. This happens automatically when all of the following are true:- The incident was created from a single ServiceNow alert. If several ServiceNow alerts are grouped into one incident we can’t tell which ServiceNow incident to use, so we create a new ticket instead.
- The ServiceNow incident isn’t already linked to another incident or follow-up, and still exists.
Private incidents
If you do wish to create incidents for private incidents created in incident.io you can enable this with the checkbox.
Field mappings between incident.io and ServiceNow
For some additional context when building your incident ticket templates, please view our mappings for fields in incident.io to ServiceNow.Incidents
- Incident name:
short_description - Description is as set in your template
Incident state: fixed value 1 (New)urgency: fixed value 2 (Medium)impact: fixed value 2 (Medium)opened_by: fixed value integration_user
Follow-ups
- Follow-up title:
short_description - Follow-up description:
description - Linked incident’s
external_issue_reference:parent state: fixed value 1 (Open)
State mappings
- 1 (New), 2 (InProgress), 3 (OnHold), 4 (Pending), 5 (AwaitingProblem), all become “Open” in incident.io.
- 6 (Resolved), 7 (Closed) become “Completed”