

- Which services or systems are affected
- Which teams are involved
- Which customers are impacted
- Whether personal data is involved
- How many customers are affected
- Links to relevant documents or resources
Create a custom field
- Go to Settings → Custom fields
- Click Add custom field
- Give the field a short, explicit Name, and a Description explaining what it represents. The description shows as help text wherever responders see the field
- Choose a Field type
- For Single-select and Multi-select fields, choose where the options come from
- Click Save
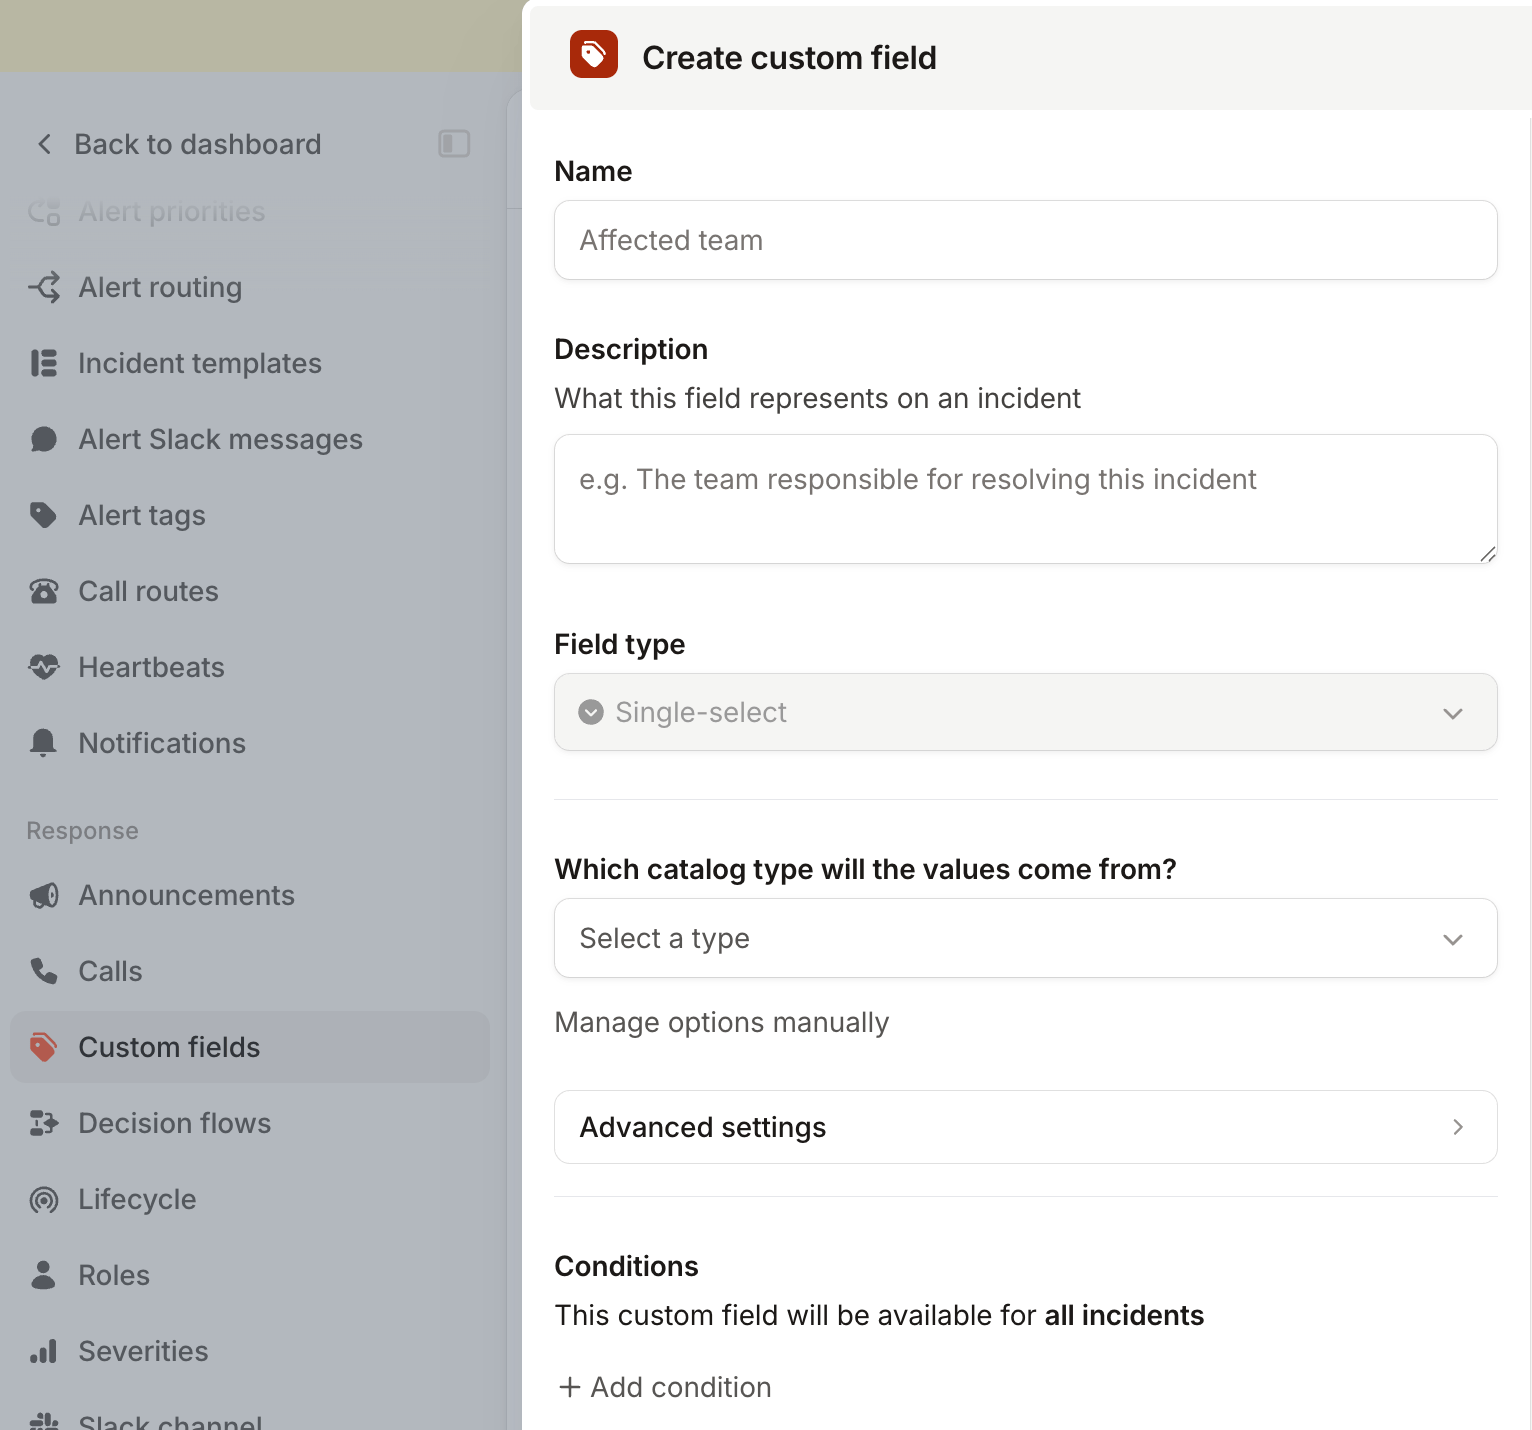
Choose a field type
Pick the field type based on the information you want responders to provide, and how you plan to use it later. Single-select Responders choose one value from a list of options. For example, anAffected region field with the options US, EMEA, and APAC.
Use Single-select when there should be one structured answer.
Multi-select
Responders choose one or more values from a list.
For example, an Affected services field containing API, Web app, and Payments, with several services selected on the same incident.
Text
Responders enter free-form text.
Use Text when there’s no predefined set of answers, such as an external reference or a short piece of extra context.
Link
Responders enter a URL.
Use Link for a resource associated with the incident, such as a dashboard, document, or ticket. When filtering incidents, you can filter on whether a Link field is set or blank.
Number
Responders enter a number.
For example, a Customers affected field. Filters on a Number field can compare values with operators like greater than, less than, or equal to.
Manage options for select fields
Single-select and Multi-select fields draw their options from your Catalog by default. Pick either type and we’ll ask Which catalog type will the values come from?, so all you need to do is select a type. To set the options yourself instead, click Manage options manually underneath that dropdown. That reveals How should options be managed?, where you can switch between all three approaches. From a catalog type (recommended) Keep the field backed by a Catalog type when the values already exist as objects in your Catalog, such as Services, Teams, Customers, or Regions. The field’s options come directly from the entries in that Catalog type, so you don’t maintain a second copy of the list in custom field settings. If you have aService Catalog type containing Payments API, Checkout, and Authentication, an Affected service field backed by that type offers exactly those entries.
Changes to the Catalog flow through to the field:
- Renaming an entry changes how the value appears on incidents, including historical ones
- Archiving an entry stops it being selected on new incidents, and incidents that already use it keep the value
Environment field with the options Production, Staging, and Development is a good fit: a stable list that doesn’t need to exist as objects in your Catalog.
Set the options here or through the API. Drag them to set the order they appear in, and use Add new group to organize a long list.
A list anyone can add to
Choose A list anyone can add to when responders should be able to create new options mid-incident. A Customer field is a common example, where a responder needs to add a customer that hasn’t come up before.
New options can be added during an incident from Slack / Microsoft Teams or the dashboard. That’s more flexible, but the set of values is less tightly controlled than a fixed list or a Catalog-backed field.
Filter options based on another field
A Catalog-backed field can hold a lot of entries. AnAffected teams field pointing at a Team Catalog type might offer hundreds of teams, which is a long way to scroll mid-incident.
If your Catalog records the Division each Team belongs to, you can narrow that list: responders pick a Division first, and Affected teams only offers the teams in it.
Edit the field you want to narrow, then set Filter options based on the value of another custom field to the field it should depend on. The dropdown names the relationship it will follow, so Division (Team → Division) filters Teams by their Division attribute.
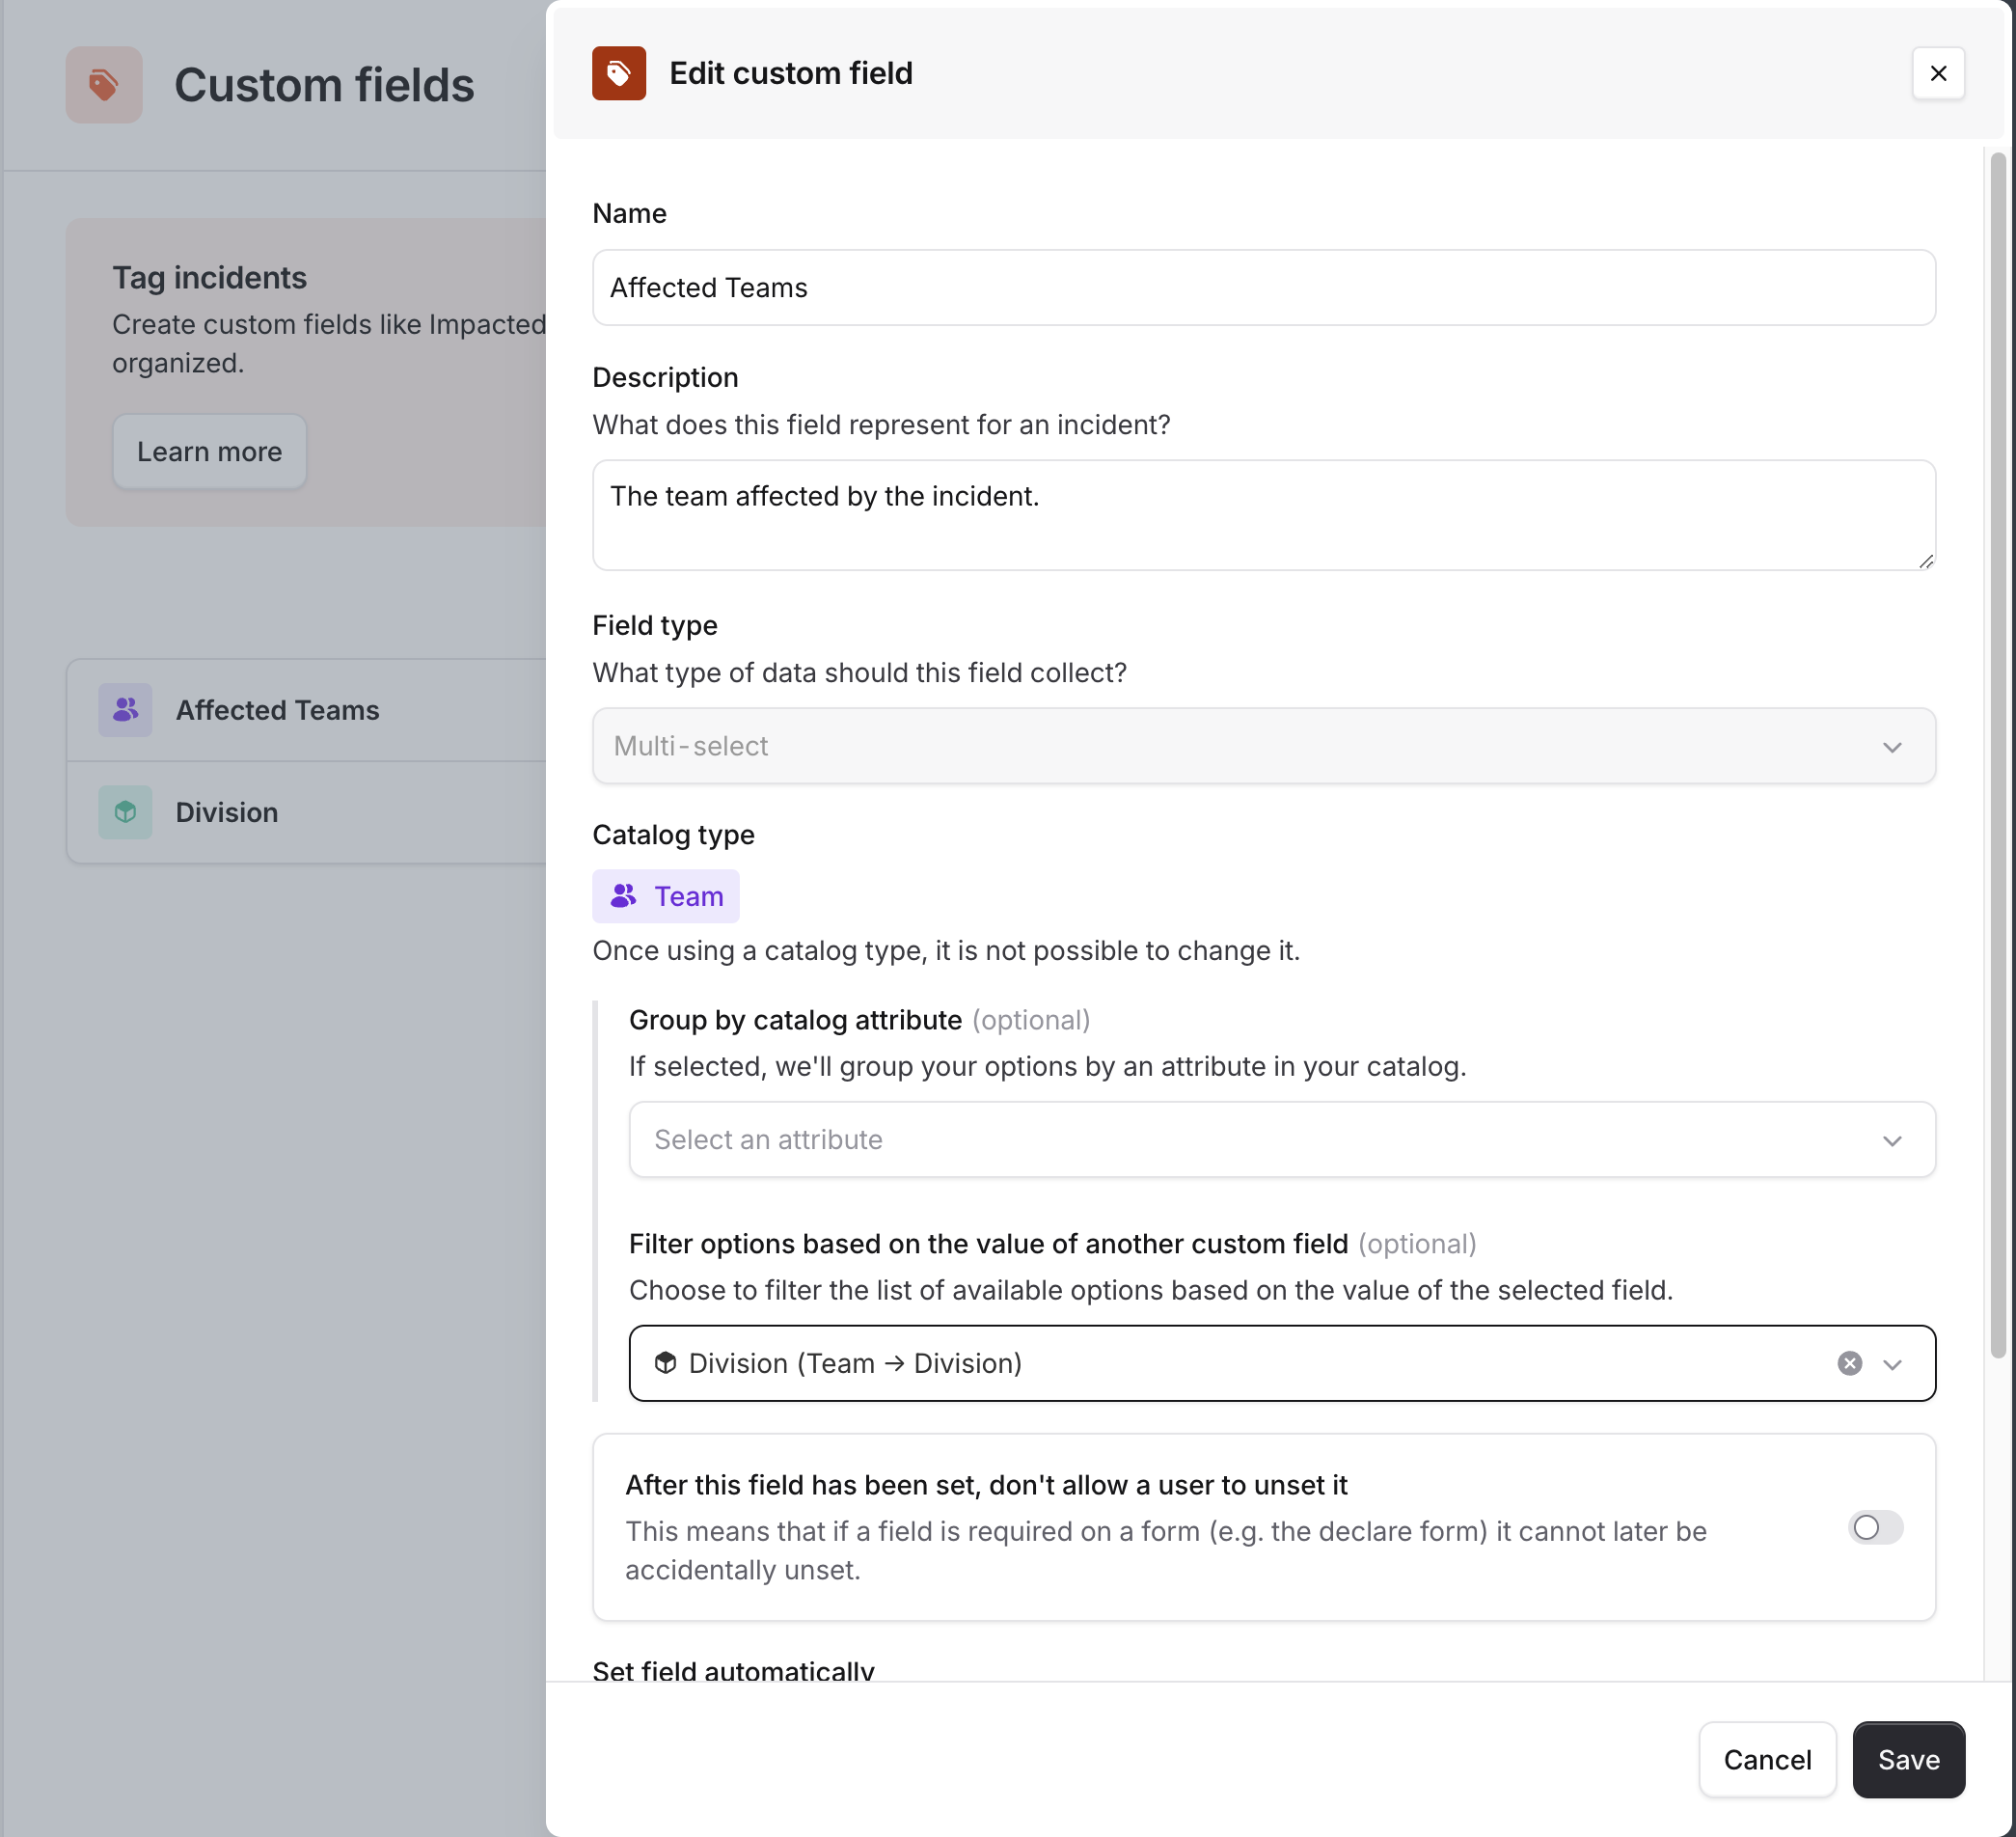
Affected teams only once Division is set, and responders get a short, relevant list instead of a long one. See adding custom fields to incident forms.
Add custom fields to incident forms
Configure where each field appears under Settings → Forms. Custom fields can be added to the Declare, Accept, Update, Resolve, Retrospective, and Custom fields forms. For each placement, choose to Show this field always or only when the incident matches conditions, and to Require this field never, always, or when the incident matches conditions. So you could:- Always show
Affected servicewhen declaring an incident - Only show
Data classificationfor incidents that meet particular conditions - Require
Root cause categorybefore an incident can be resolved - Make the same field optional on one form and required on another

Set a custom field automatically
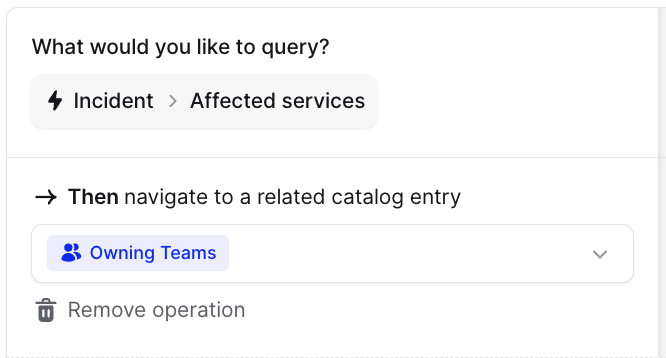
Custom fields don’t always need to be filled in by hand. Set a Catalog-backed field with an expression and we’ll derive its value from something you already know about the incident, saving your responders a dropdown. Say your Catalog holds Services and the Team that owns each Service. A responder selectsPayments API as the affected service, and we set Affected team to Payments for them.
To set a field automatically:
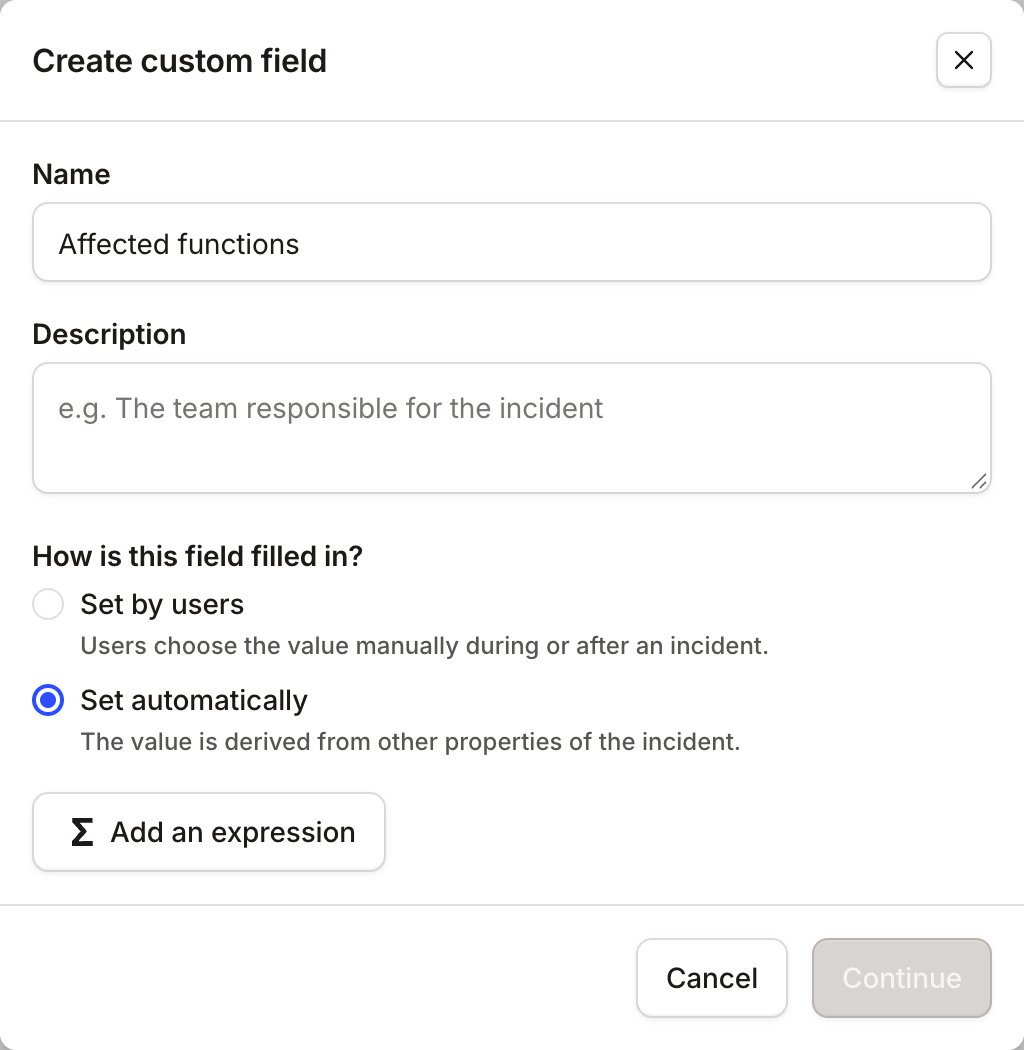
- When creating or editing a Catalog-backed field, select Set automatically, then Add an expression
- Use the expression builder to navigate through your Catalog to the value you want, starting from another custom field on the incident
- Choose whether users can override the calculated value
Affected services field and follows the Catalog relationship to the owning Team.
- Users can override: the expression acts as a sensible default. Use this where the relationship is usually right, but a responder may occasionally need something different, as with
Affected team - Users can’t override: the field is controlled entirely by the expression. Use this for values that always follow the same relationship, like deriving
Affected functionfromAffected team. A field nobody can override doesn’t need to appear on a form at all
Use custom fields in automation
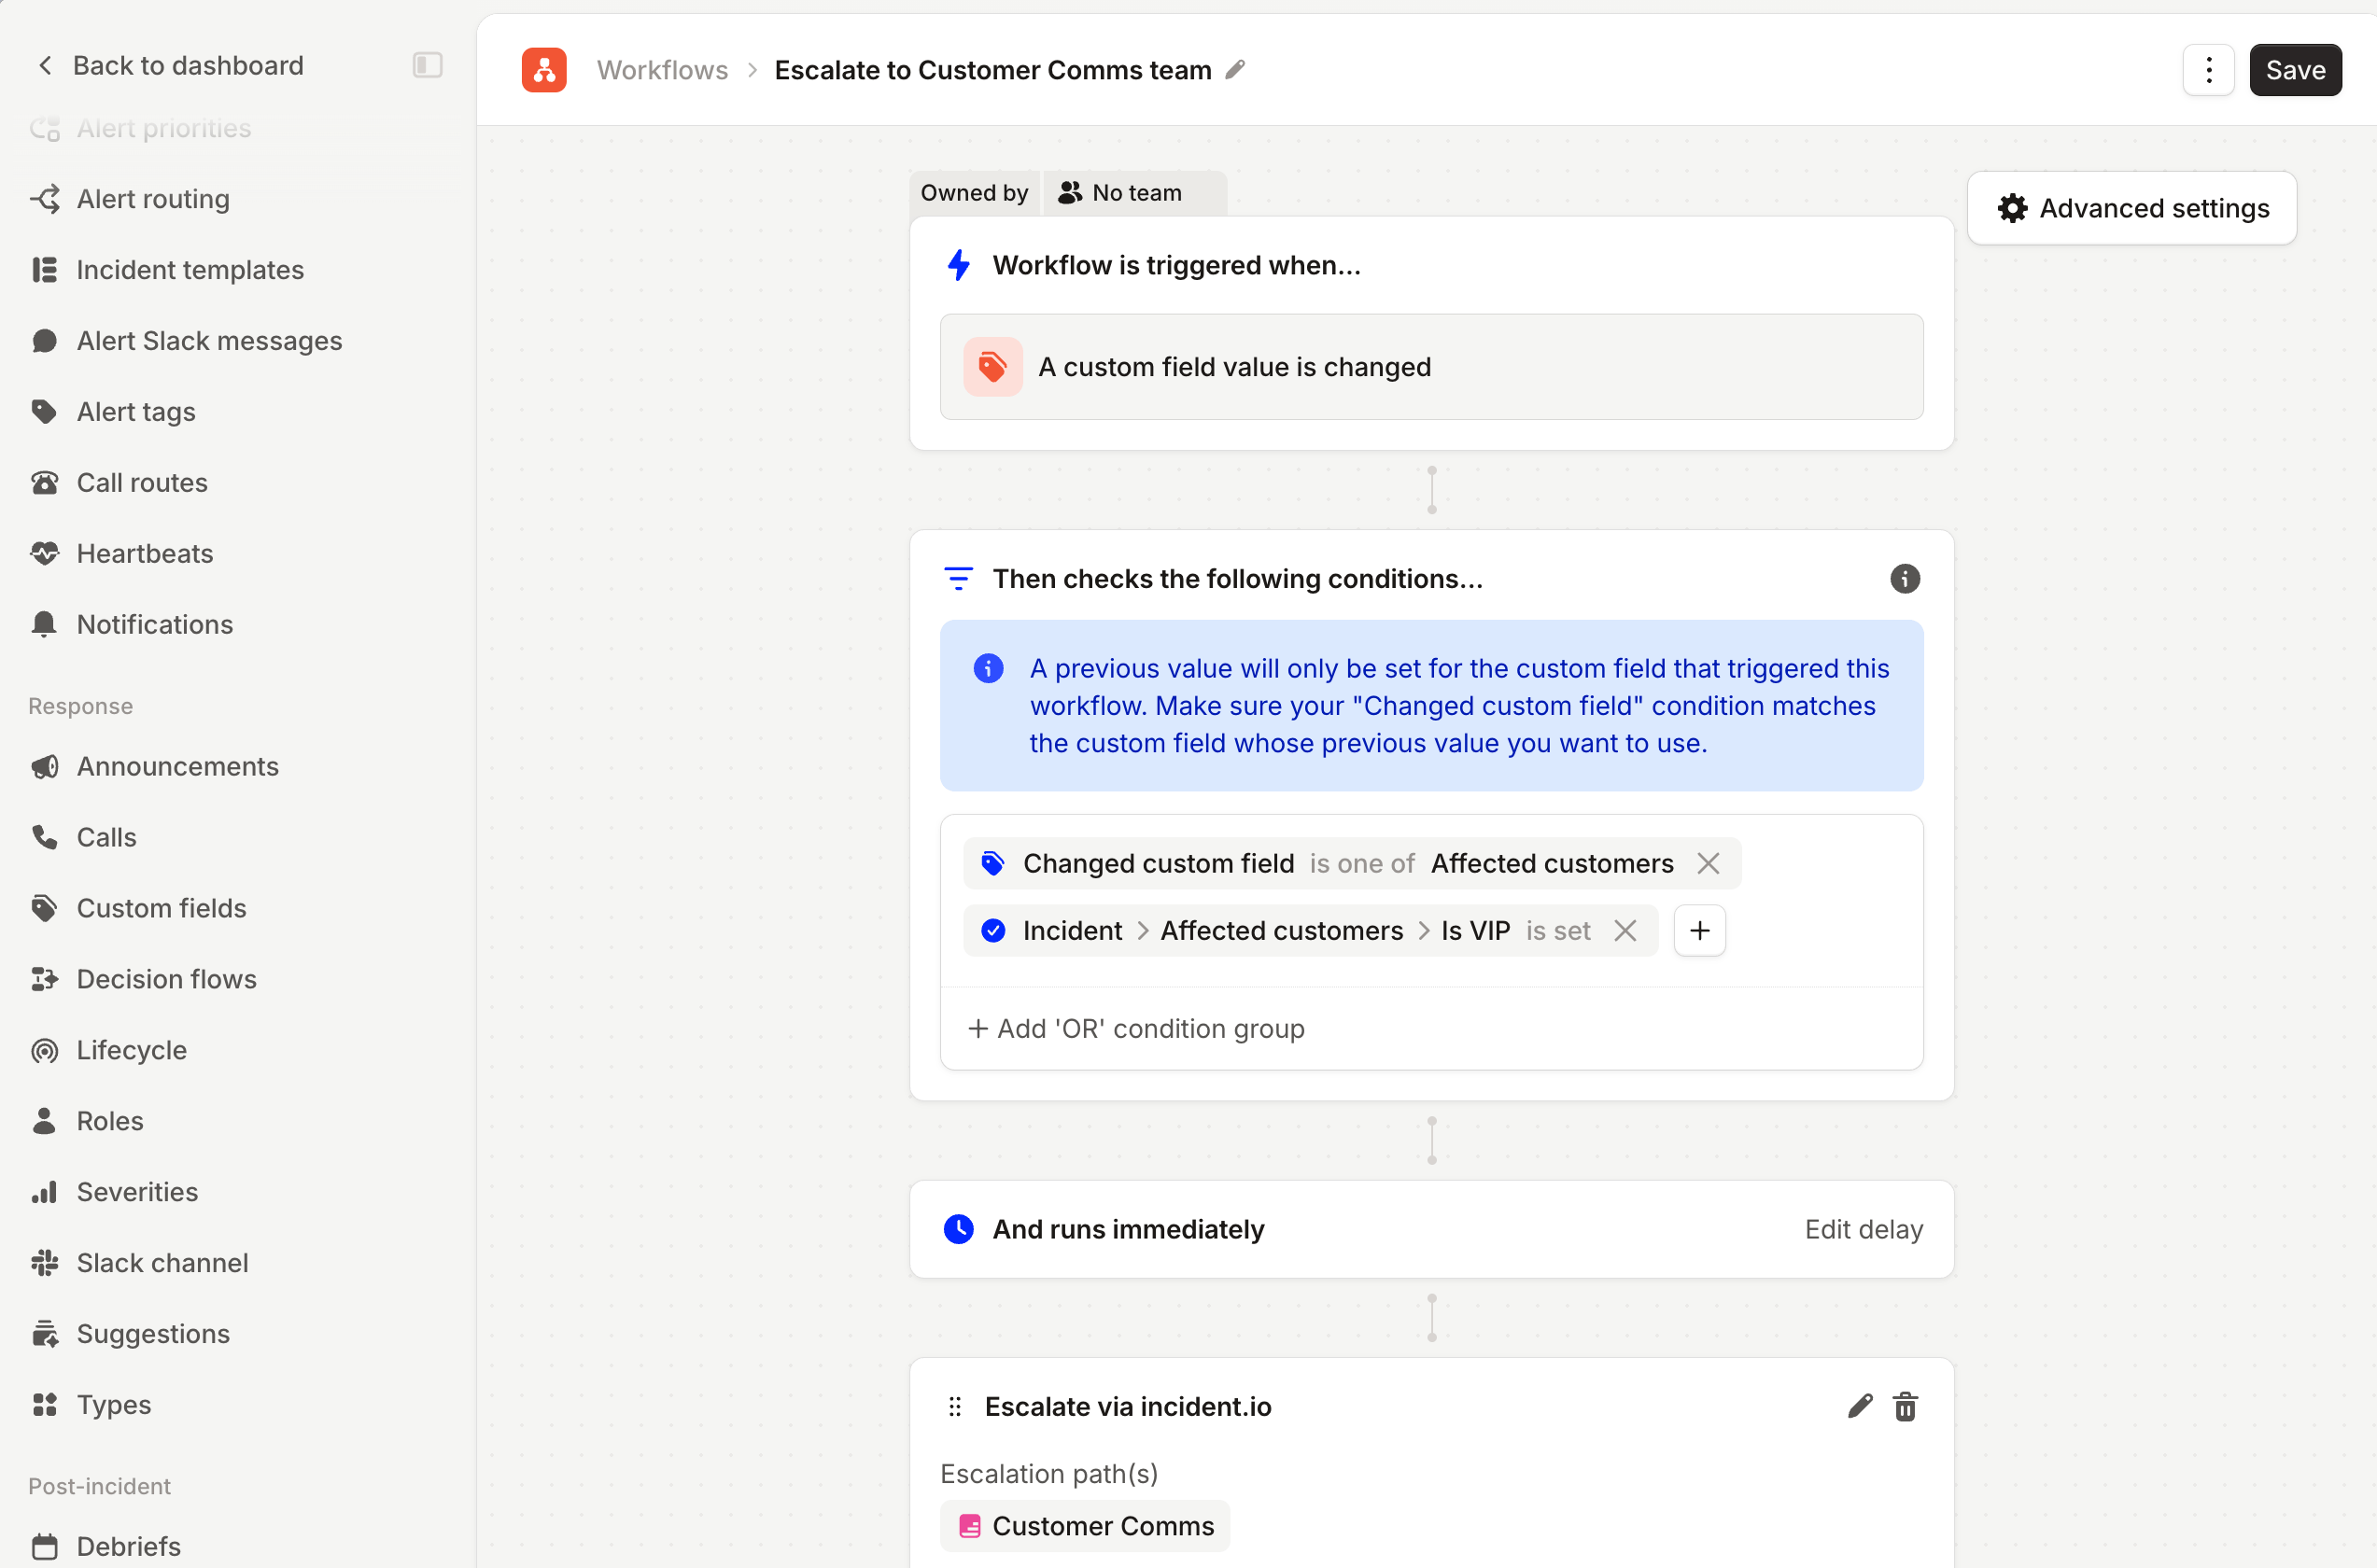
Custom fields are available in Workflow triggers and conditions, so you can run different automation depending on what’s been captured on an incident. For example:- Escalate to a particular team when one of their services is affected
- Notify customer support when a high-value customer is affected
- Send different comms based on the affected region
- Trigger additional processes when an incident involves sensitive data
Use custom fields for reporting
Custom fields add dimensions and filters to your incident data, so you can answer questions like:- Which services are involved in the most incidents?
- Which customers are affected most often?
- Which teams respond fastest?
- How many incidents involved personal data?
- Which incidents affected more than 100 customers?
FAQs
What happens if I rename a field or a custom field option?
What happens if I rename a field or a custom field option?
Renaming is safe. A renamed field keeps its values and its references in Workflows and other configuration, and the
new name shows on historical incidents.The same goes for options: the new label appears everywhere that option is used. Rename
Production to Prod, and
incidents that selected Production will display Prod.Can I change a custom field's type?
Can I change a custom field's type?
No. Once a field is created as Single-select, Multi-select, Text, Link, or Number, its type is fixed. Create a new
field if you need a different type.A fixed-list select field can be converted to a Catalog-backed field using the Convert to catalog type flow, but
that conversion is one-way.
Can I change a fixed list to a list anyone can add to?
Can I change a fixed list to a list anyone can add to?
Not directly. Once a select field has been created with a fixed list, you’ll need to create a new field and move the
existing values across: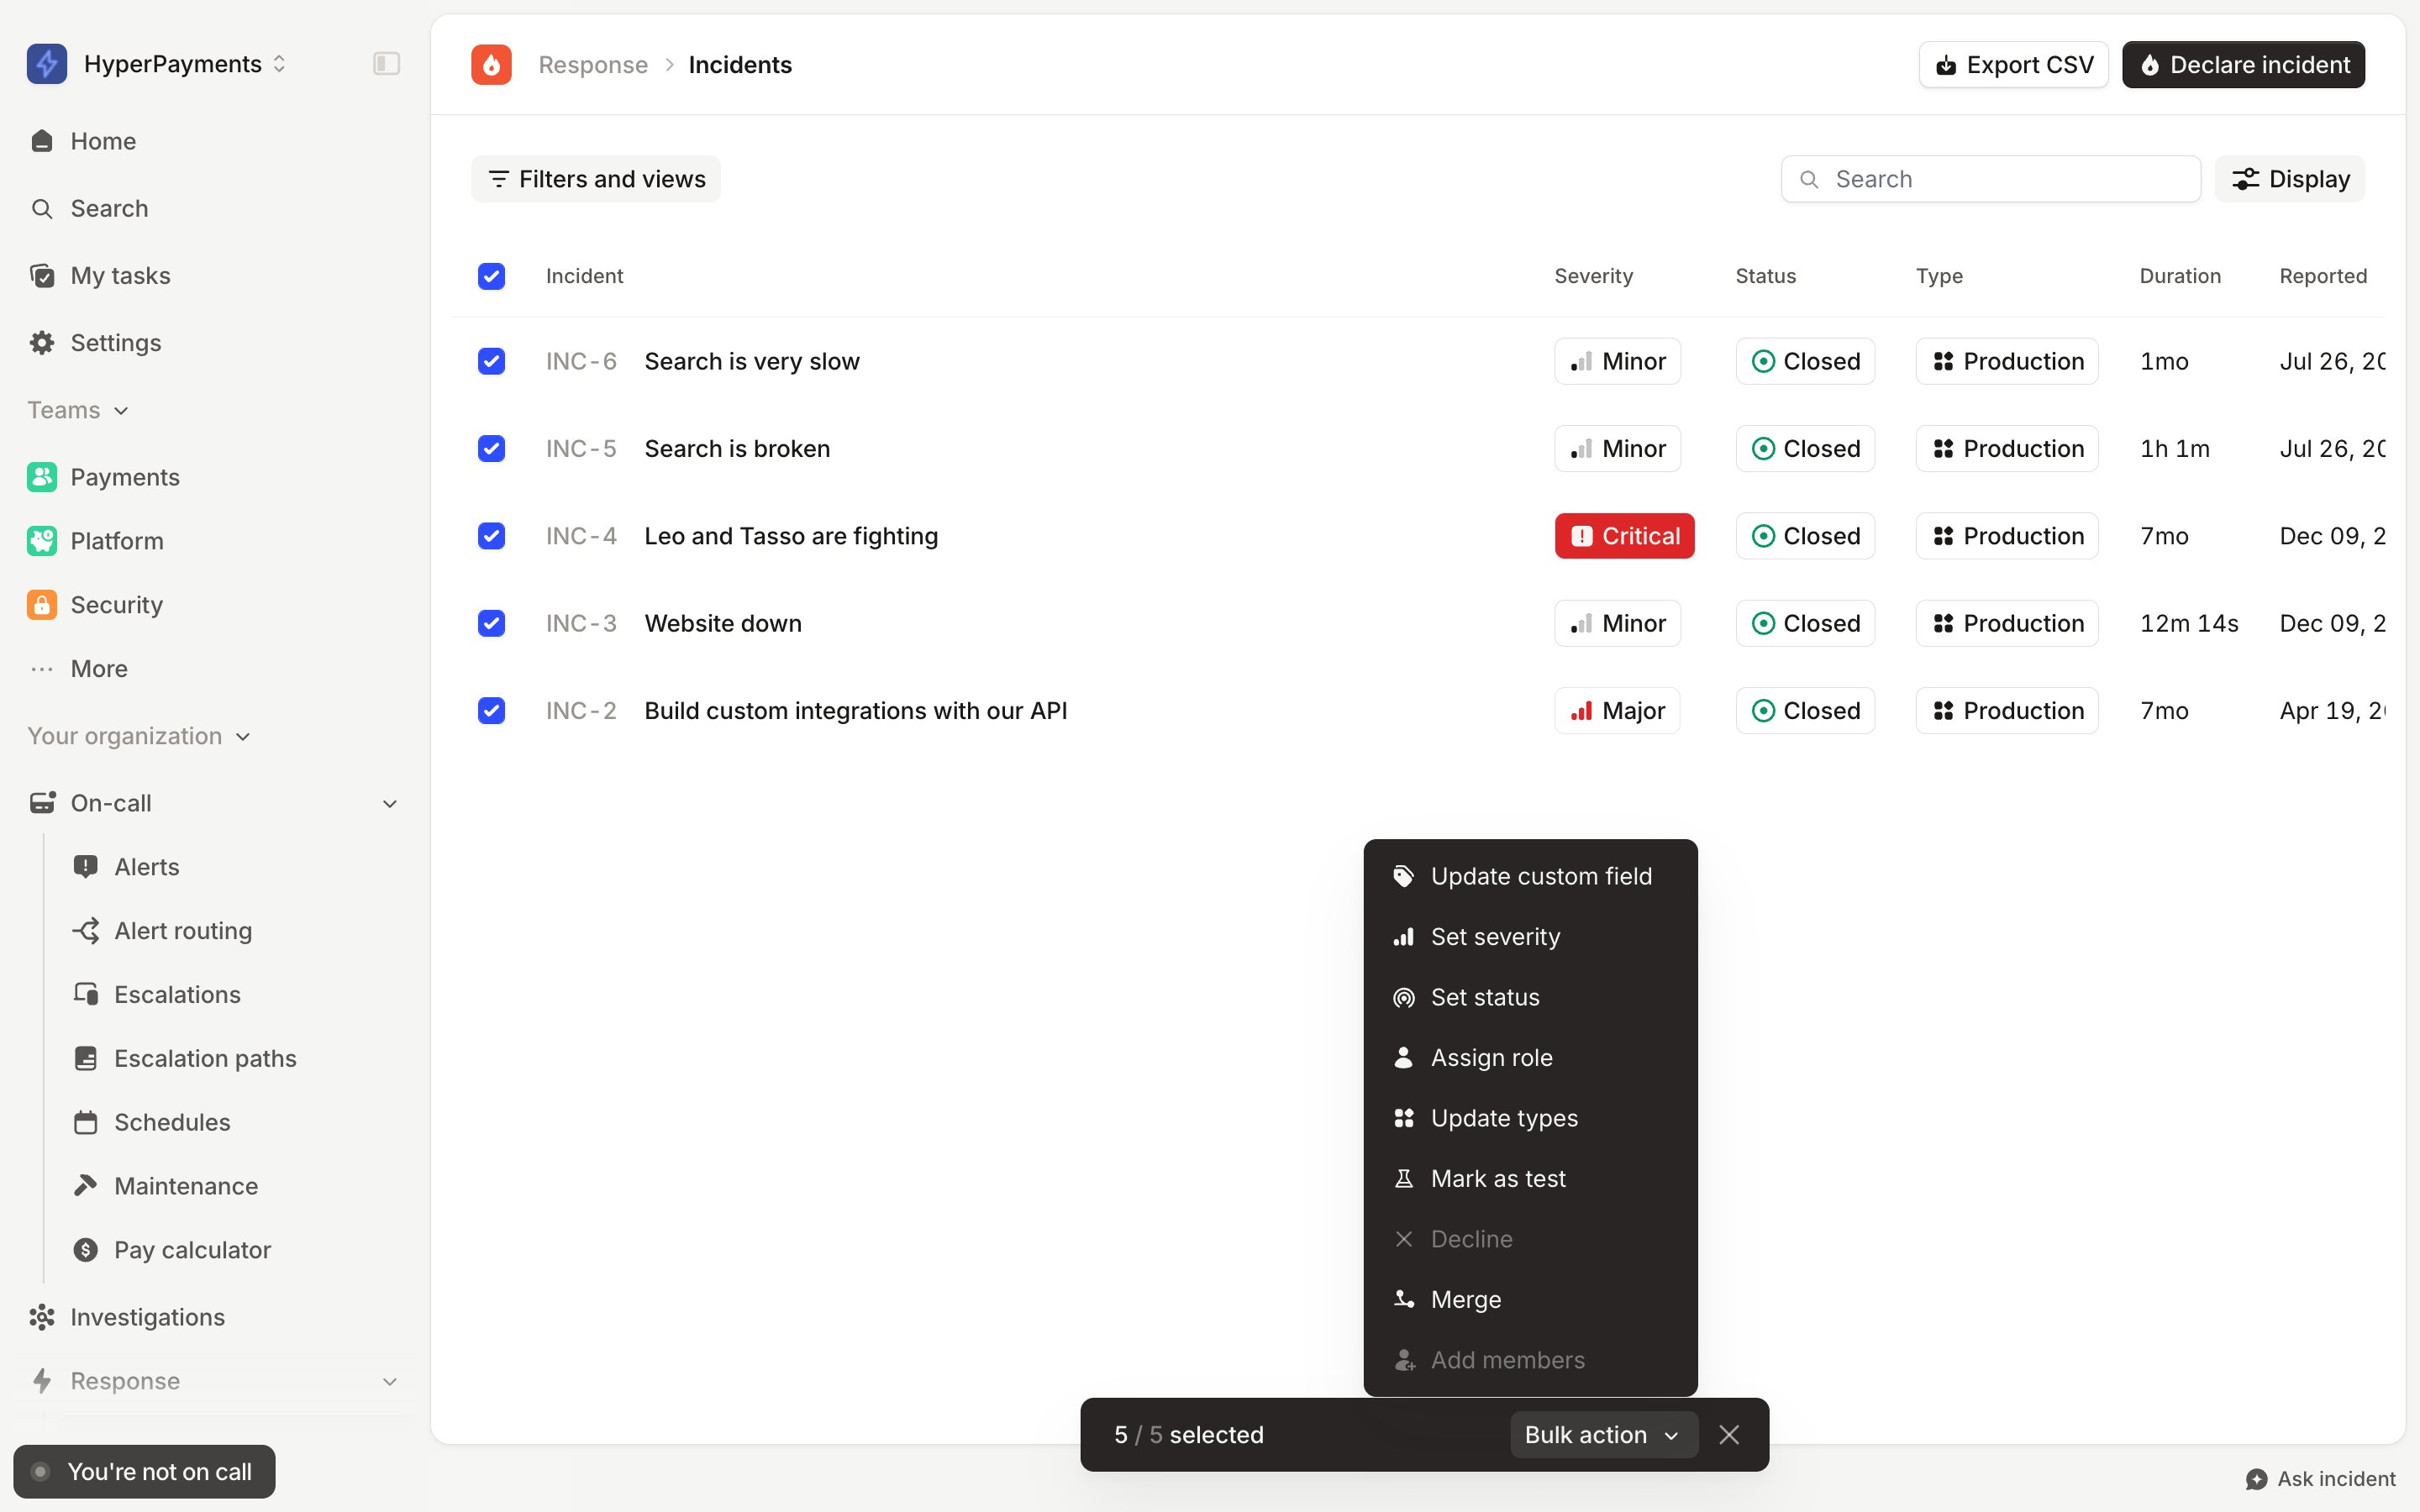
- Create a new custom field with A list anyone can add to
- Go to Response → Incidents
- Use Filters and views to filter for incidents holding a specific value in the old field
- Bulk update those incidents to set the new field’s value
- Repeat for each distinct value in the old field
Can I create conditional custom fields?
Can I create conditional custom fields?
Yes. Use incident forms to show or require a field only when the incident matches
conditions, including the value of another custom field. For example, you could reveal a
Data classification field
only on cyber incidents. See adding custom fields to incident
forms.To narrow the options available in one field based on another, see filtering options based on another
field.What happens if I delete a field or remove an option?
What happens if I delete a field or remove an option?
You can delete a field as long as nothing depends on it. If a Workflow, announcement rule, status page, or other
resource references it, we’ll stop you until those dependencies are removed, and it’s worth clearing the field out
of any saved views or Insights filters too. Deleting removes the field from use but doesn’t rewrite historical
incident data, and there’s no way to restore it, so treat deletion as permanent.Removing a single custom field option is less drastic: responders can’t select it on new incidents, but incidents that already
use it keep and display the value. Check whether the option is referenced by Workflows first, since removing it can
leave configuration that no longer matches as you expect. Re-creating an option with the same name doesn’t restore
the original, it’s treated as a new option.
Related

Incident forms
Control which fields appear on each form, and when.

Getting started with Workflows
Automate off the back of the fields you’ve captured.

Using the Catalog
Model the services, teams, and customers your fields point at.

Supported measures
See which Insights panels can report on the fields you’ve captured.