

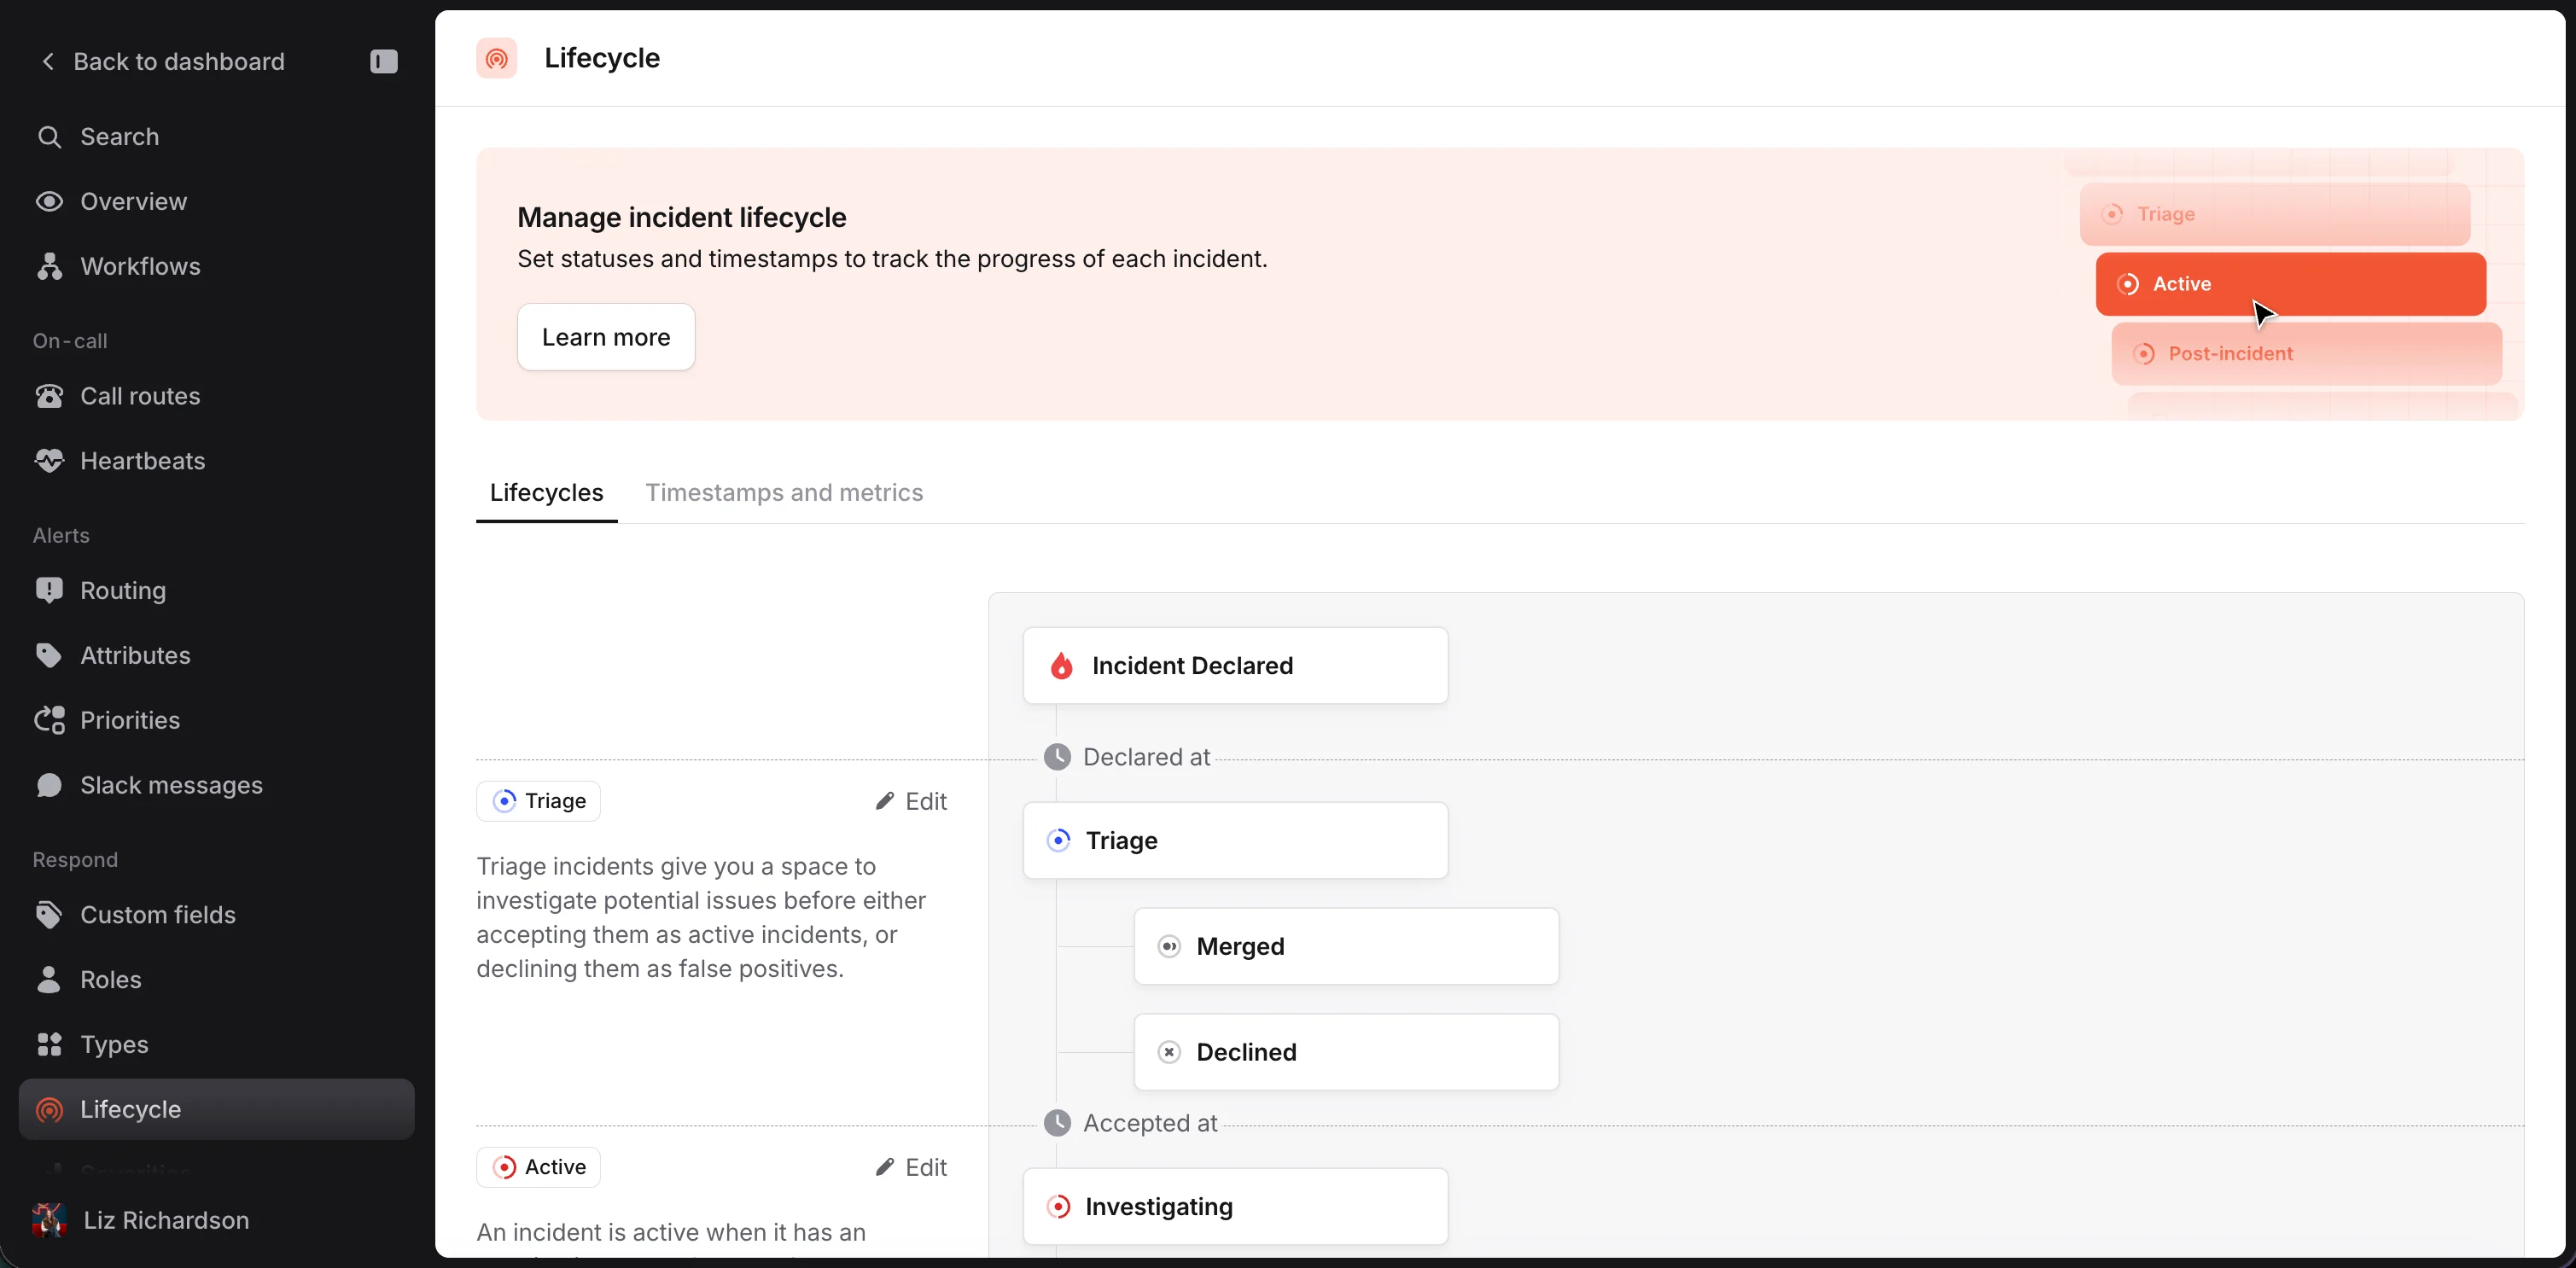
1. Triage
You can learn more about triage incidents here. Incidents created automatically from an alert or via our API will start in triage. You can configure whether or not incidents created manually can go through triage here.2. Active
These statuses indicate the condition of your incident at a single point in time, while there’s still ongoing impact and responders are working towards a resolution. The default statuses are: Investigating, Fixing, and Monitoring.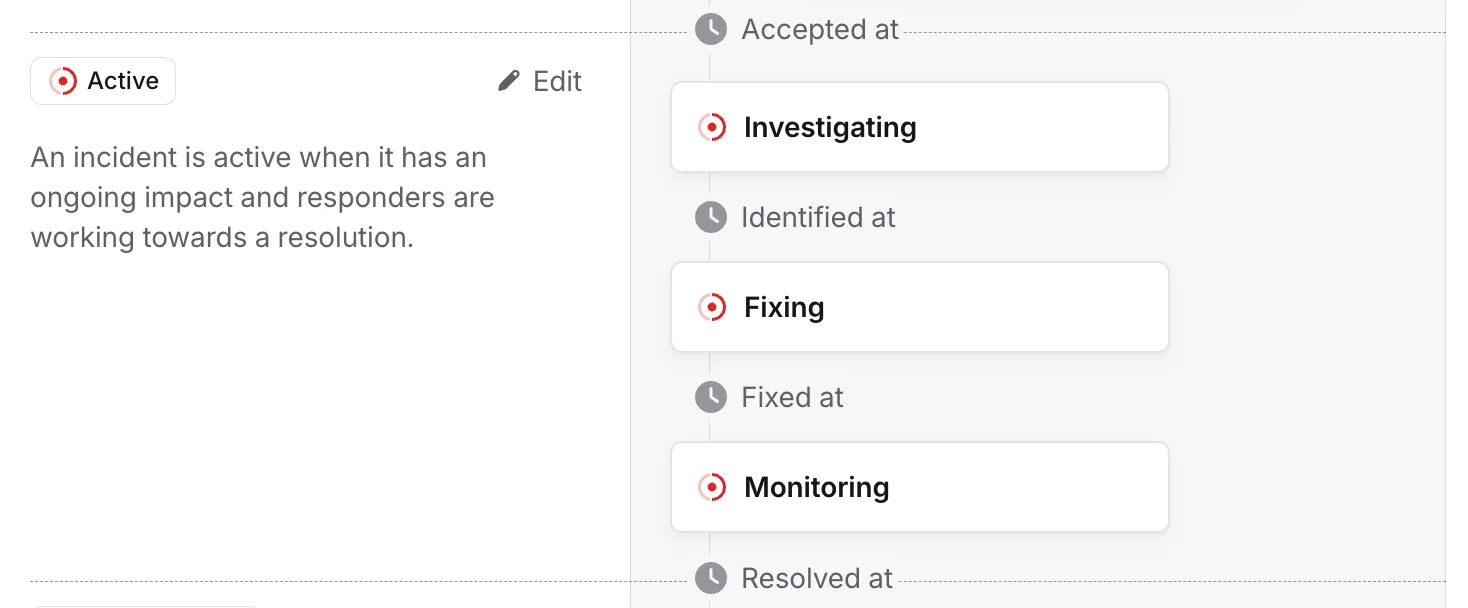
3. Post-incident
Once the immediate impact is over, an incident can then enter a post-incident flow, where you can define tasks for responders to complete now that there’s time to reflect on what went wrong, and how to prevent it happening again. Define your process in Settings > Improve > Post-incident flow, and set the rules for which incidents should automatically enter the flow. Responders can always opt-in or opt-out of the flow.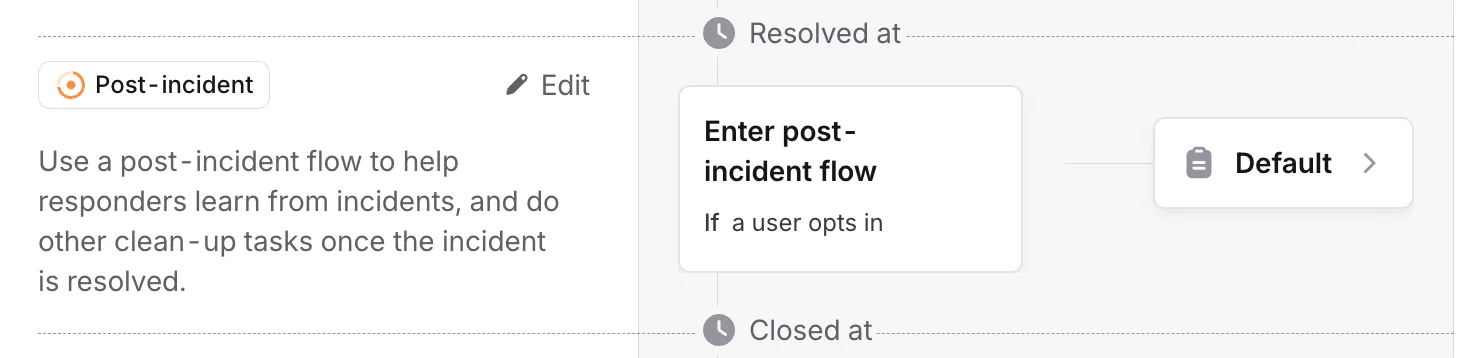
Team ownership and permissions
If you run different lifecycles for different teams, you can give a lifecycle an owning team so that only that team can change it. When editing a lifecycle, use the Lifecycle owner field to choose which team (or teams) own it. Once a lifecycle has an owning team, only the following can change its statuses, post-incident flow, and other configuration:- Anyone with the Manage incident lifecycles permission granted globally, such as an admin
- Members of an owning team who have the permission granted to that team
Your default lifecycle can’t be owned by a team: it applies to every incident across your organization, so changes to it always require the permission granted globally. The same goes for reassigning ownership of any lifecycle.
4. Timestamps and metrics
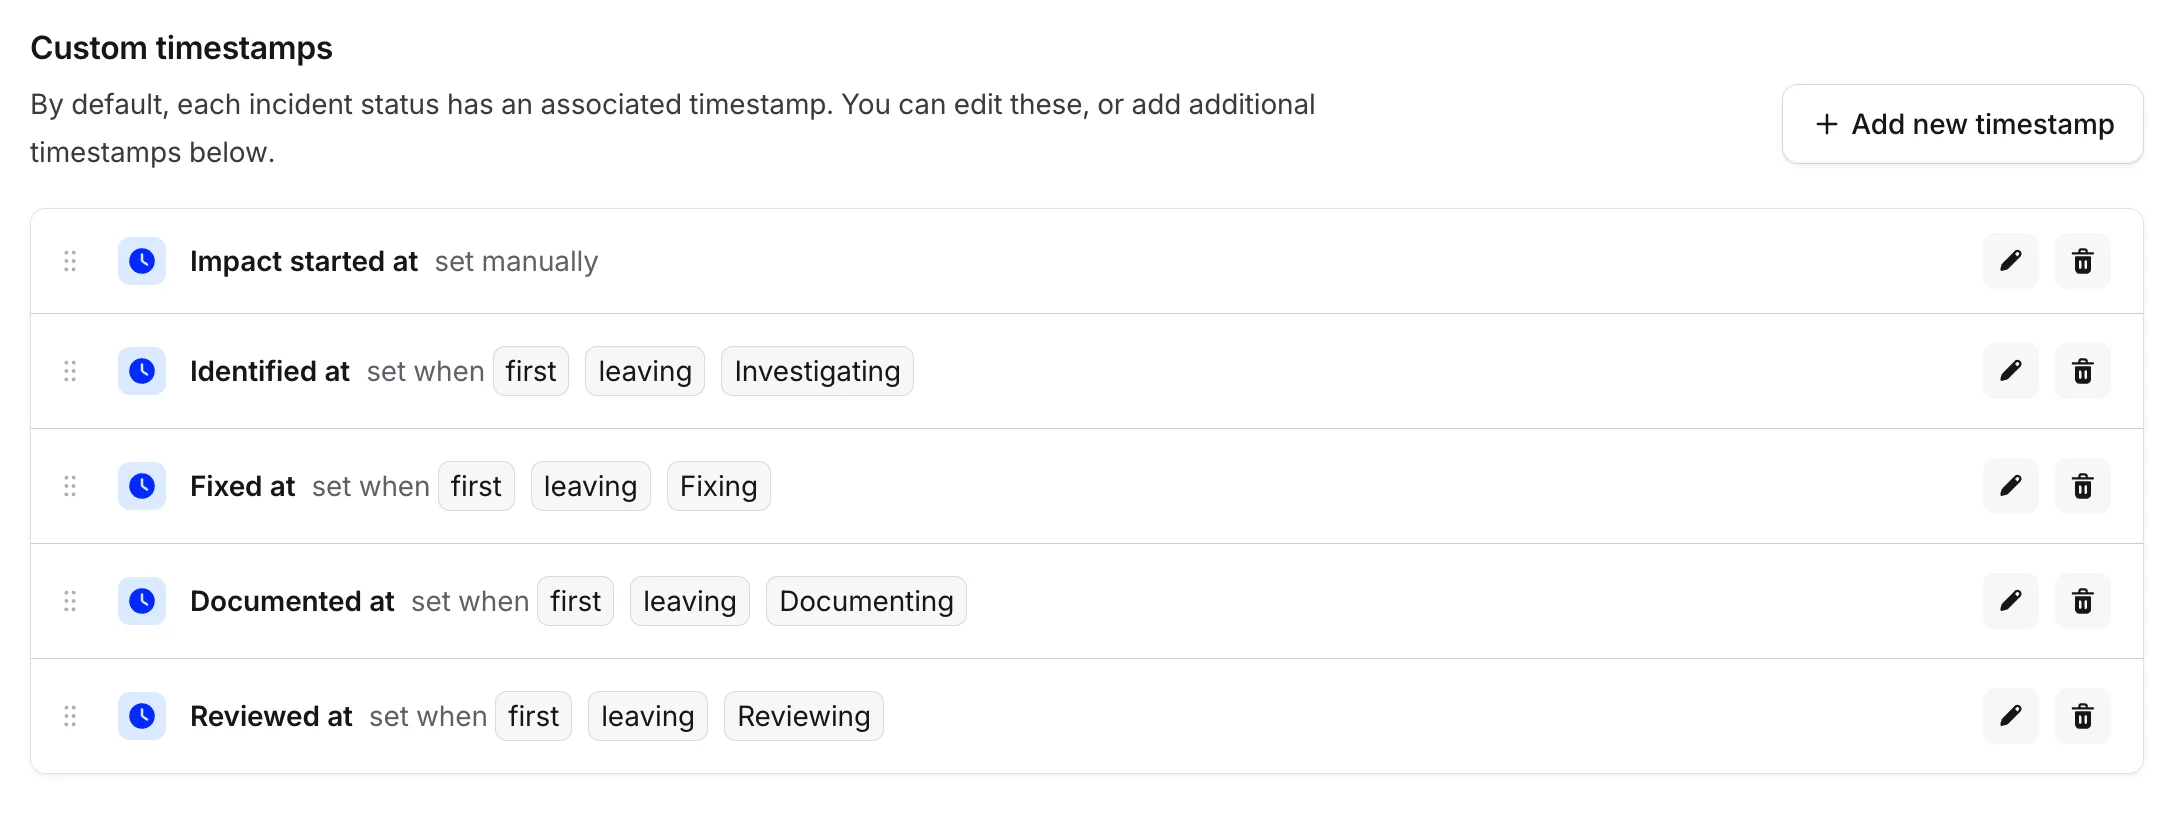
- Manually - set by a responder, from the Incident Homepage
- Automatically - based on an incident status transition
