Configuring the Post-Incident Flow
To define the steps that you’d like to take to learn from your incidents, head into your Settings > Improve > Post-incident flow. By default, we create a flow with two parts:Documenting and Reviewing.
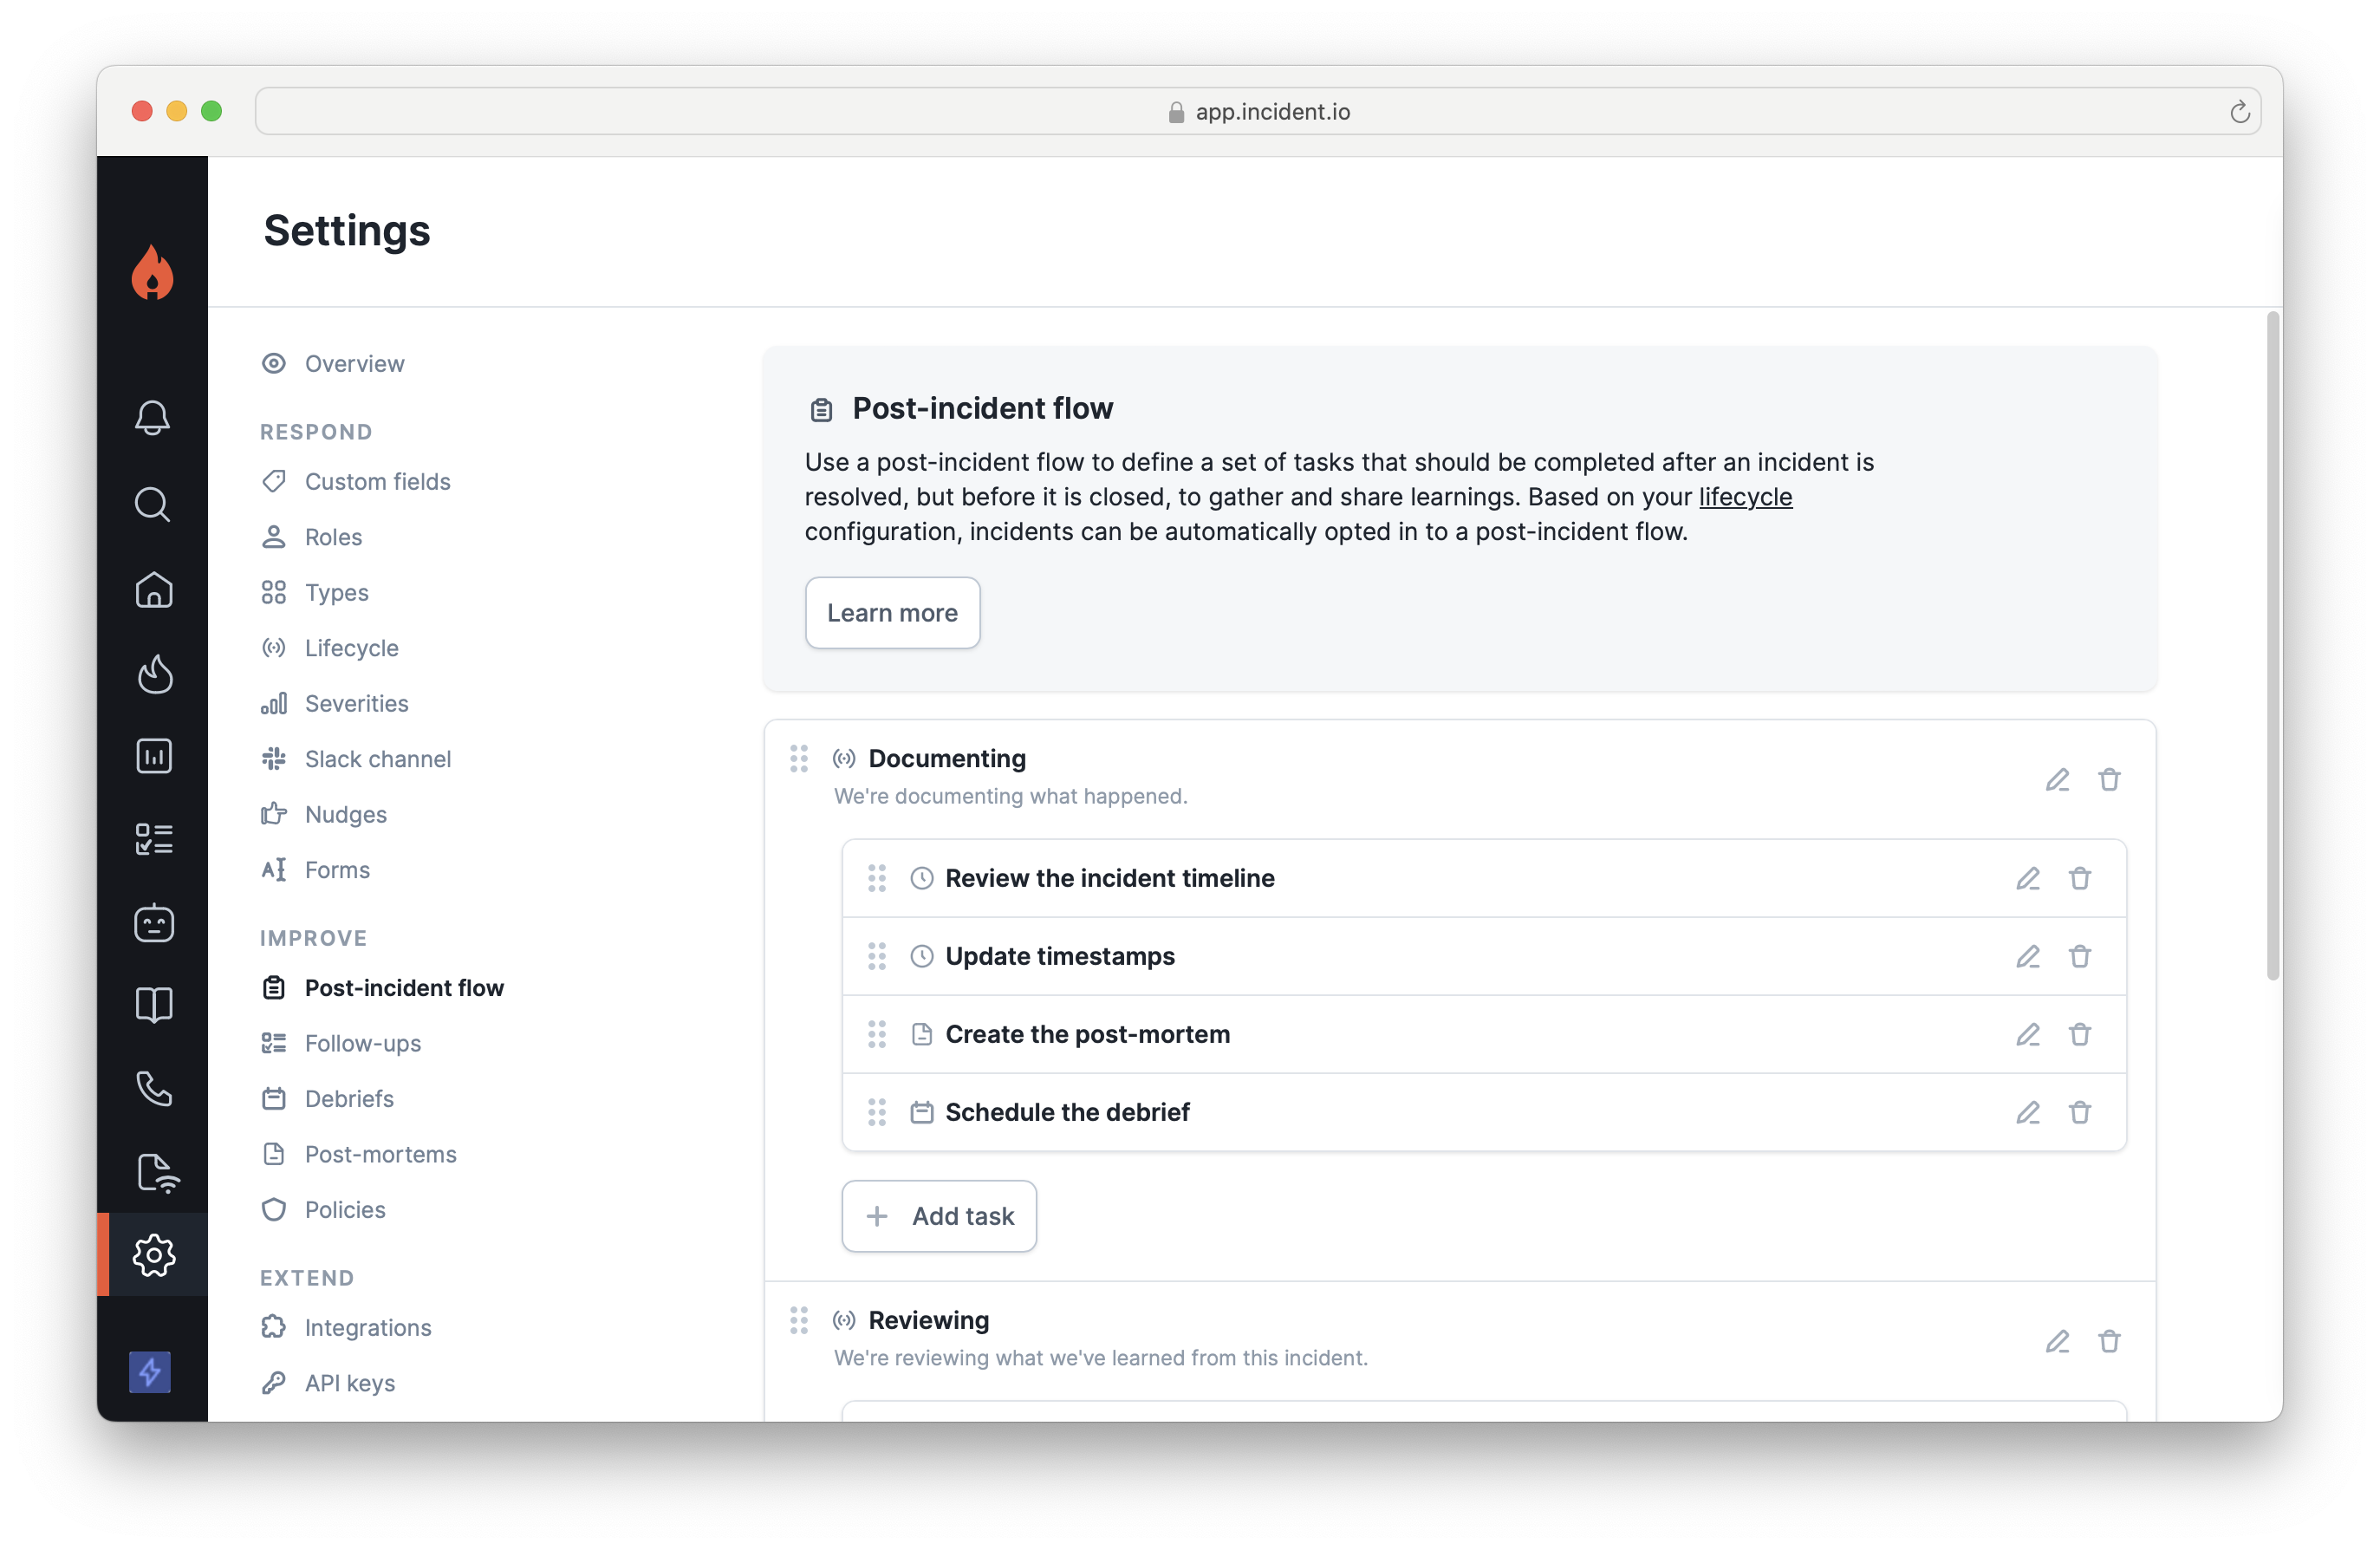
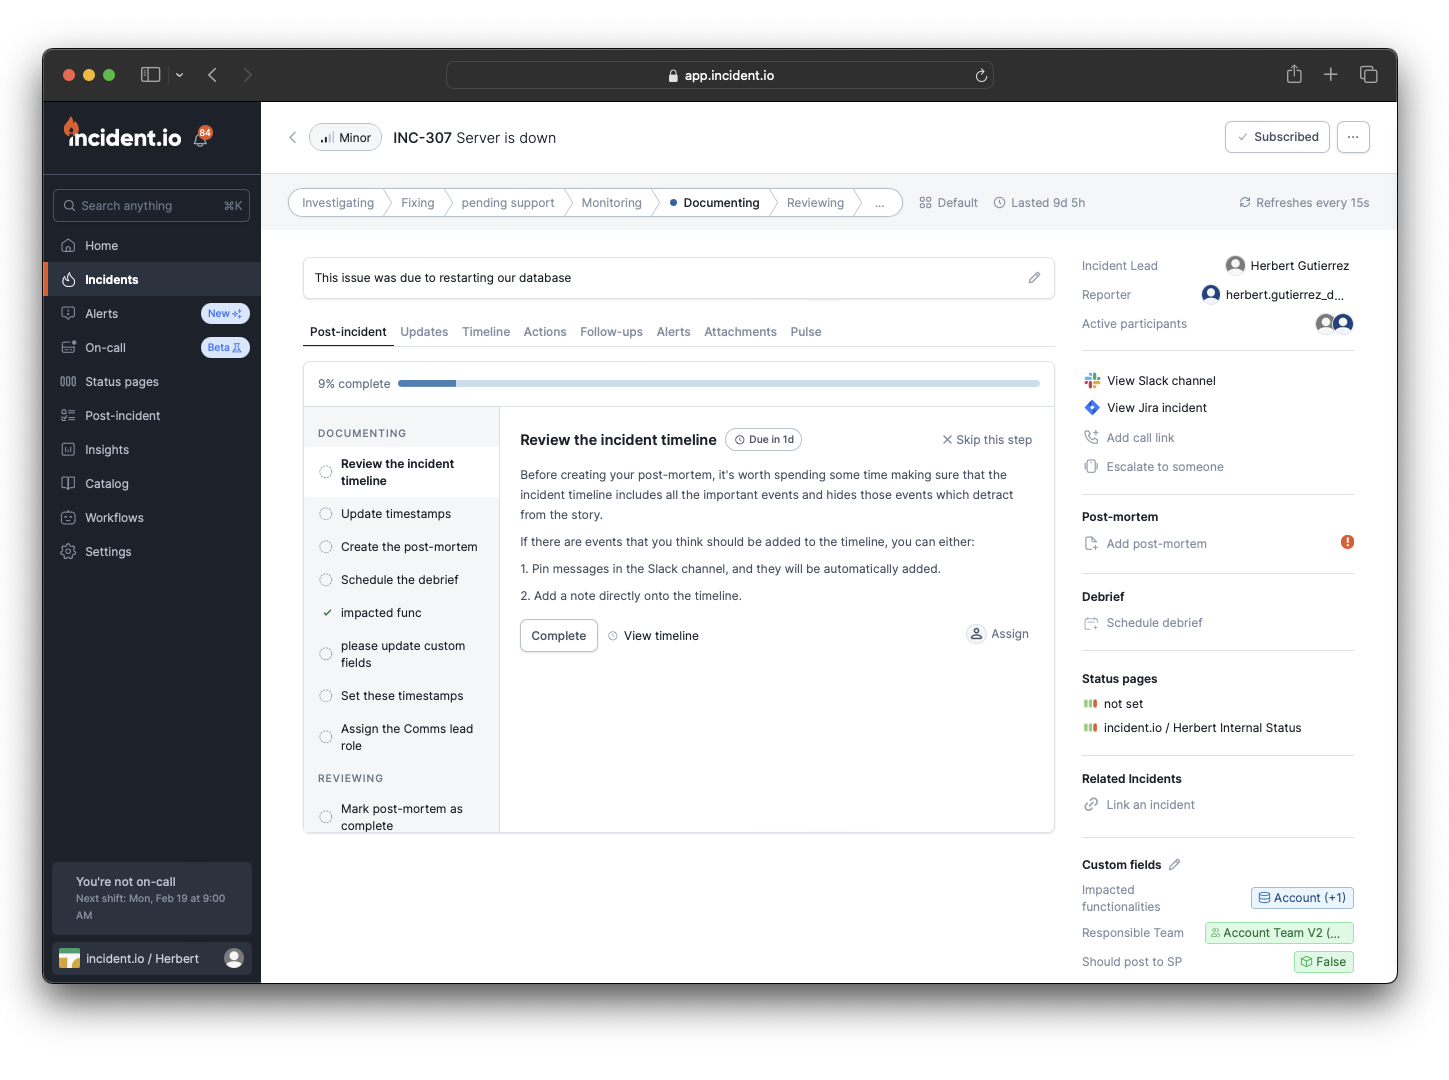
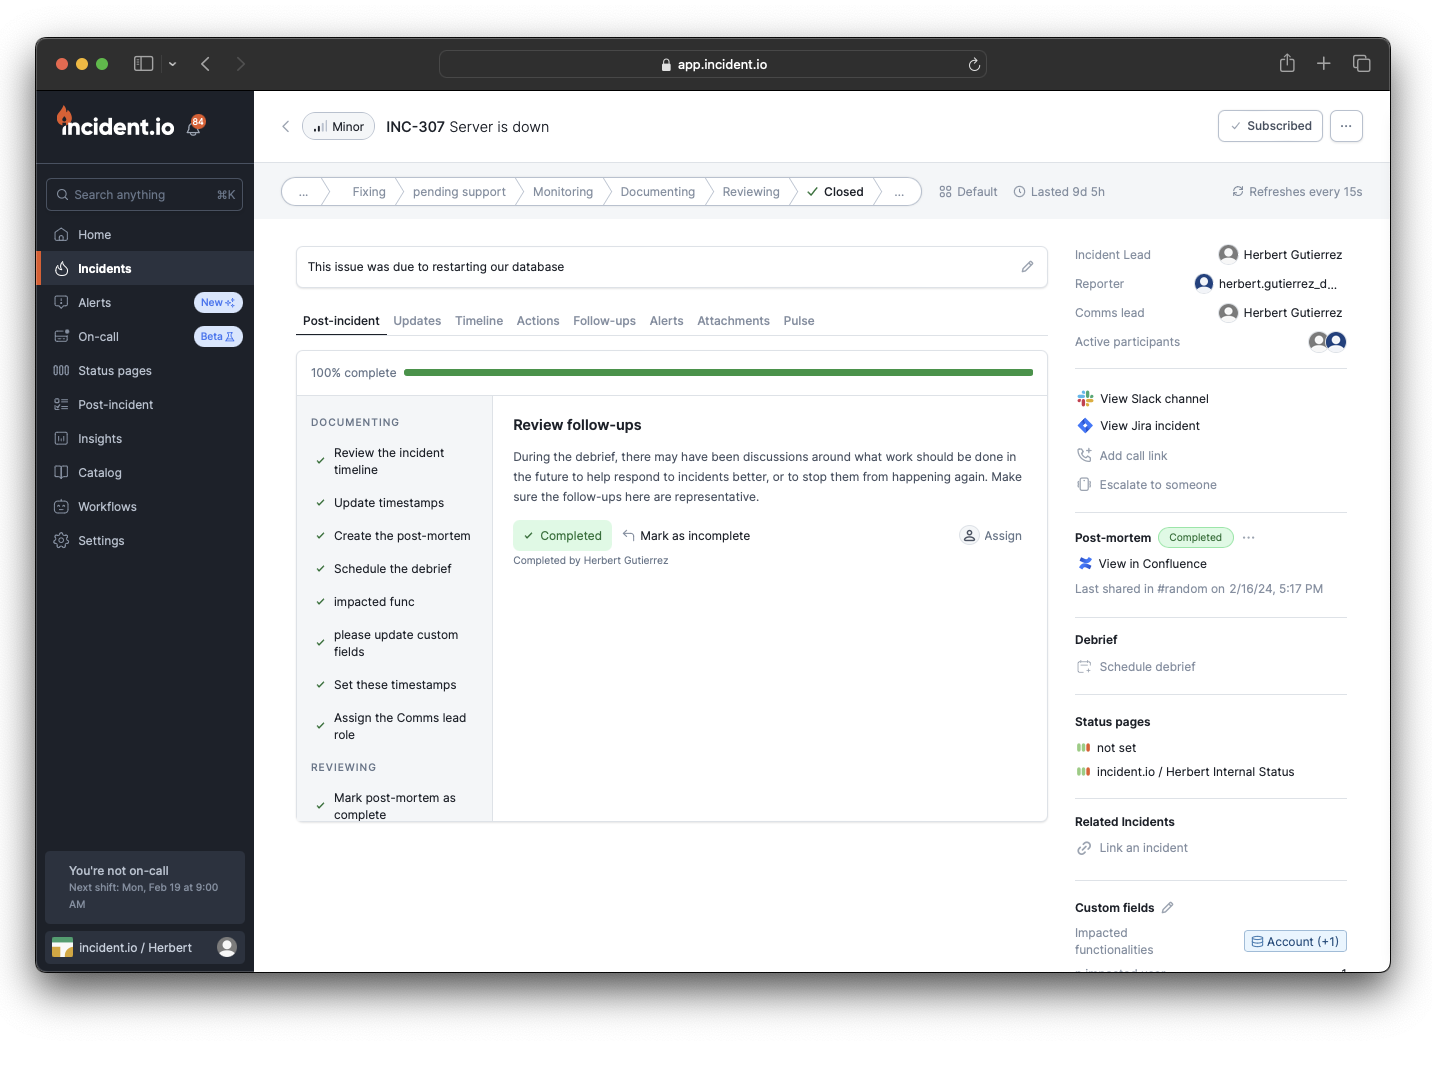
Statuses in the post-incident section are unlike other statuses. They have the following key differences: 1. Post-incident statuses have tasks associated with them. These are things like “Create a post-mortem”, or “Schedule a debrief”. 2. Users don’t manually move through post-incident statuses using
/inc update. Instead, incidents are automatically moved through the statuses as their tasks are complete, or marked as ‘Not doing’.Customers on our Enterprise plan can also: 1. Configure different post-incident flows, which can be used for different incident types. 2. Create fully-custom tasks, with their title and description.
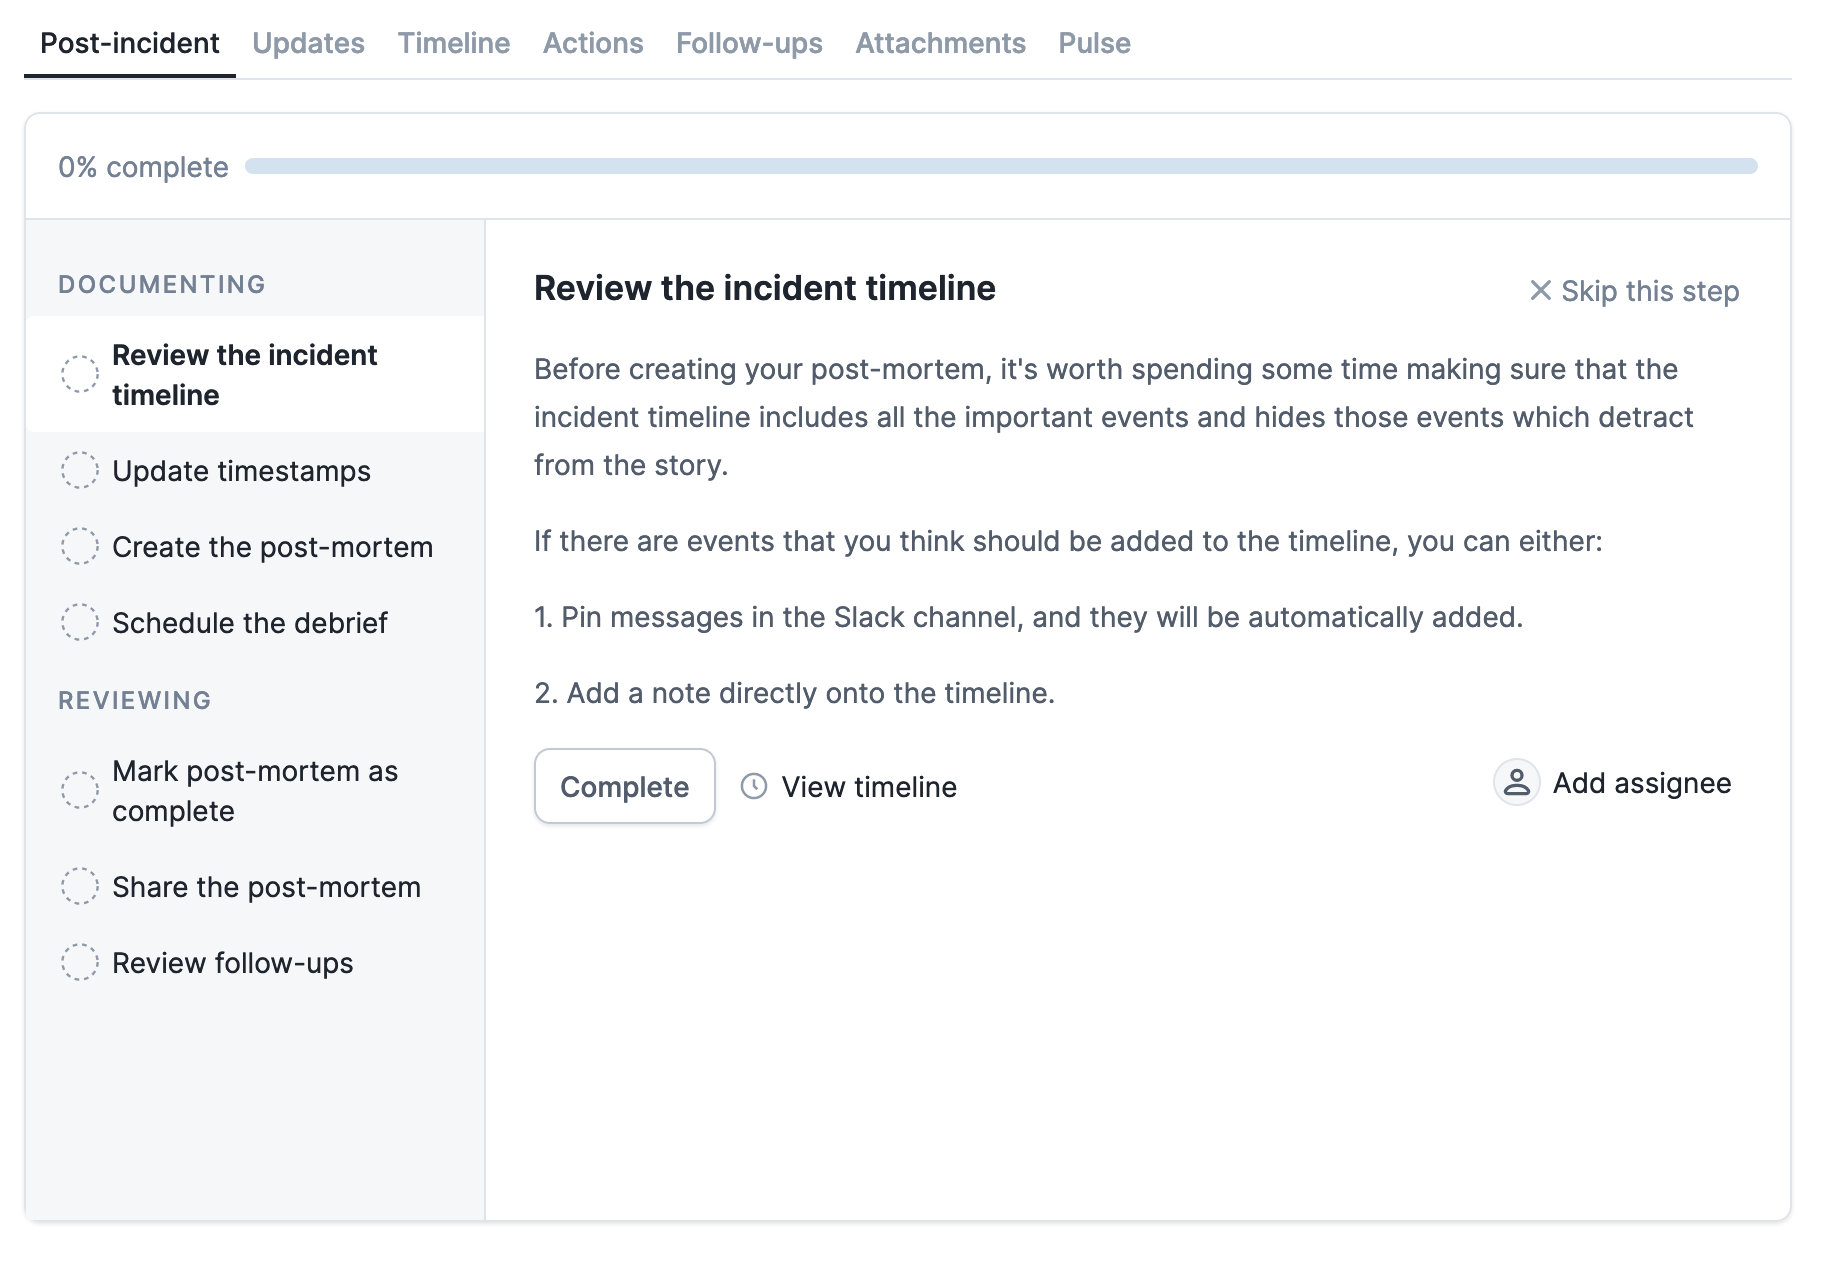
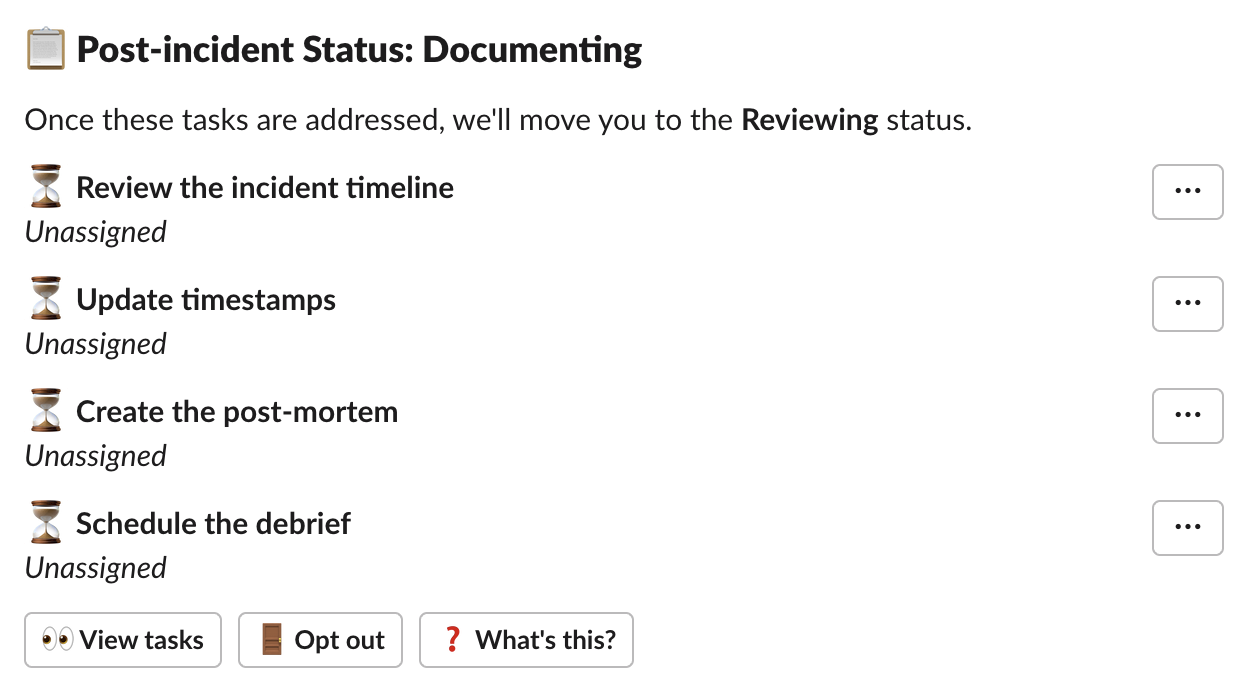
- Reviewing the incident timeline - which contains a link to jump to the incident timeline.
- Creating a post-mortem document - which will be automatically completed when a post-mortem document is attached to the incident.
- Schedule the debrief - which contains a button to create a Google calendar event with all the users involved in the incident.
- Mark the post-mortem document as complete - which will be automatically completed when the post-mortem document is marked as complete
- Share the debrief document - which is automatically completed when you share the post-mortem to a Slack channel
- Review follow-ups - which contains a link to open the incident’s follow-ups
- Assign the {insert role} role - which allows you to choose an incident role that must be assigned
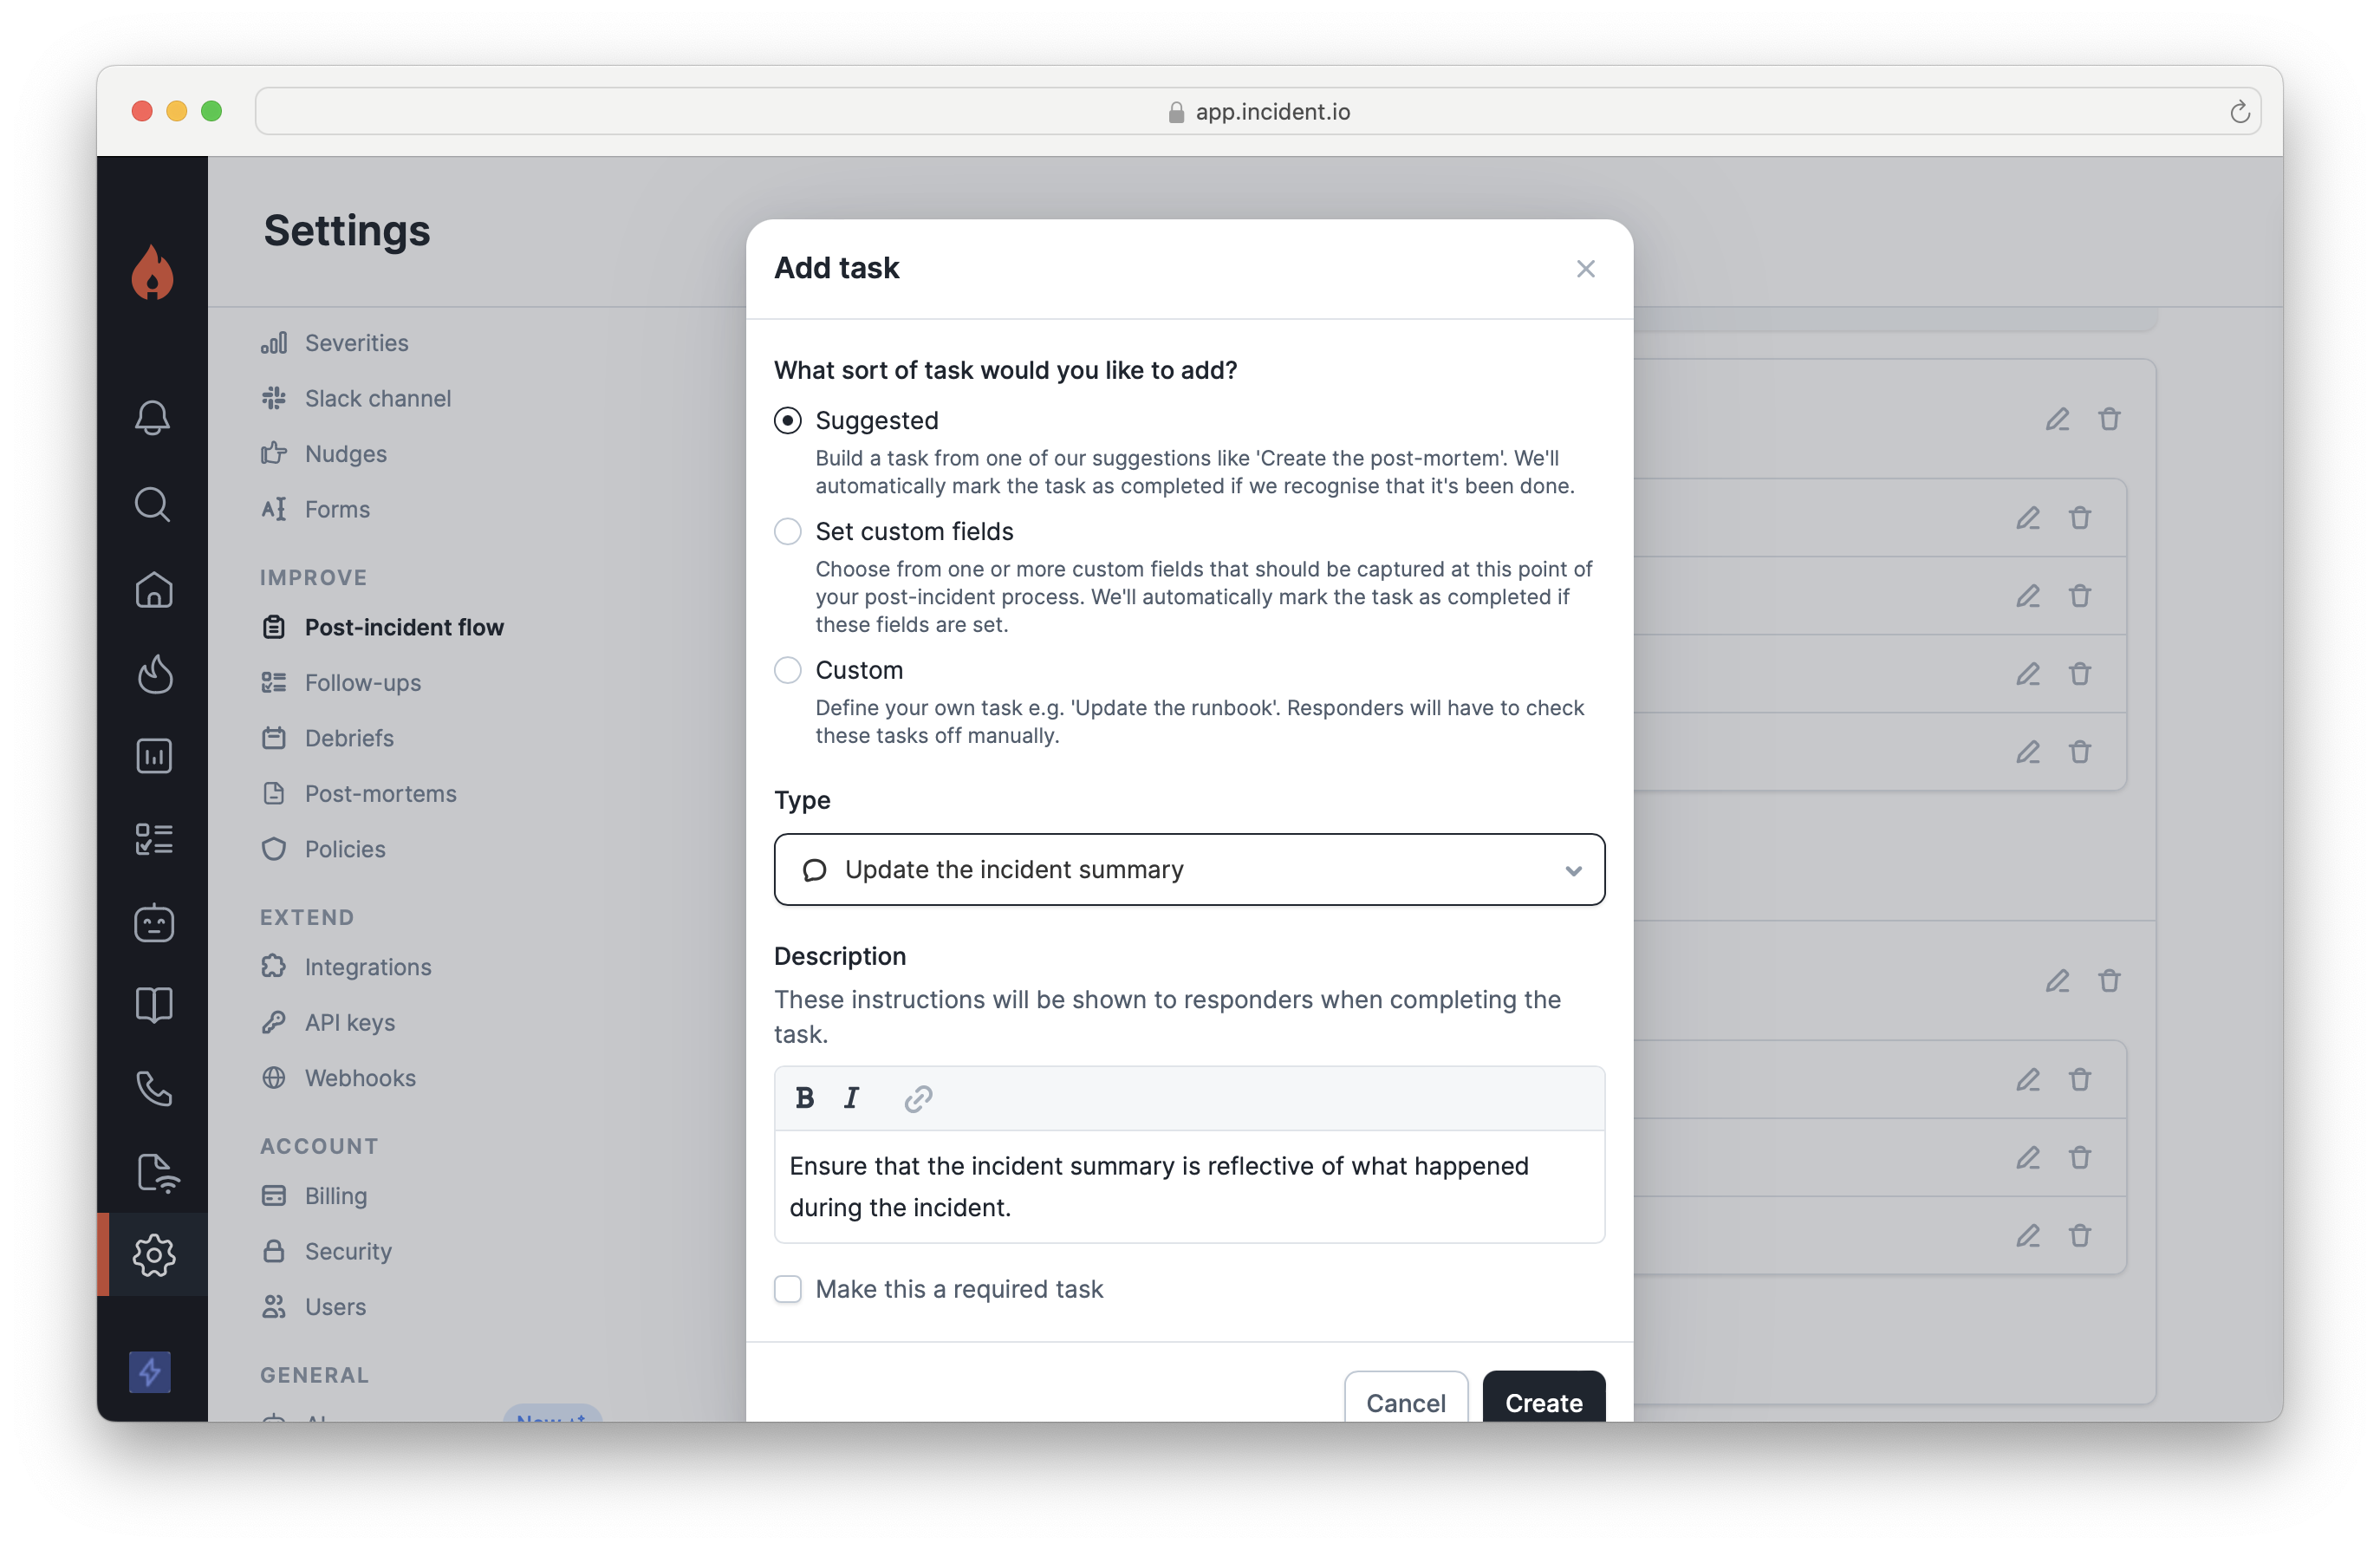
Please note that if you add new tasks, these will only apply to future incidents going into the post-incident flow. Existing incidents will only contain tasks that were defined when that incident entered the post-incident flow. If an incident’s post-incident tasks are deleted, it’ll no longer automatically move to the next status. In these cases, you can manually move the incident to the next status via the dashboard.
Requiring incidents to go through the post-incident flow
When closing an incident, users will get the option to opt-in to the post-incident flow. However, you can choose to automatically enter certain types of incidents into the post-incident flow. In Settings > Respond > Lifecycle, click ‘edit’ on the post-incident section. Enable the toggle to automatically put all incidents through the post-incident flow, then configure your conditions if you’d like this to only apply to certain kinds of incidents.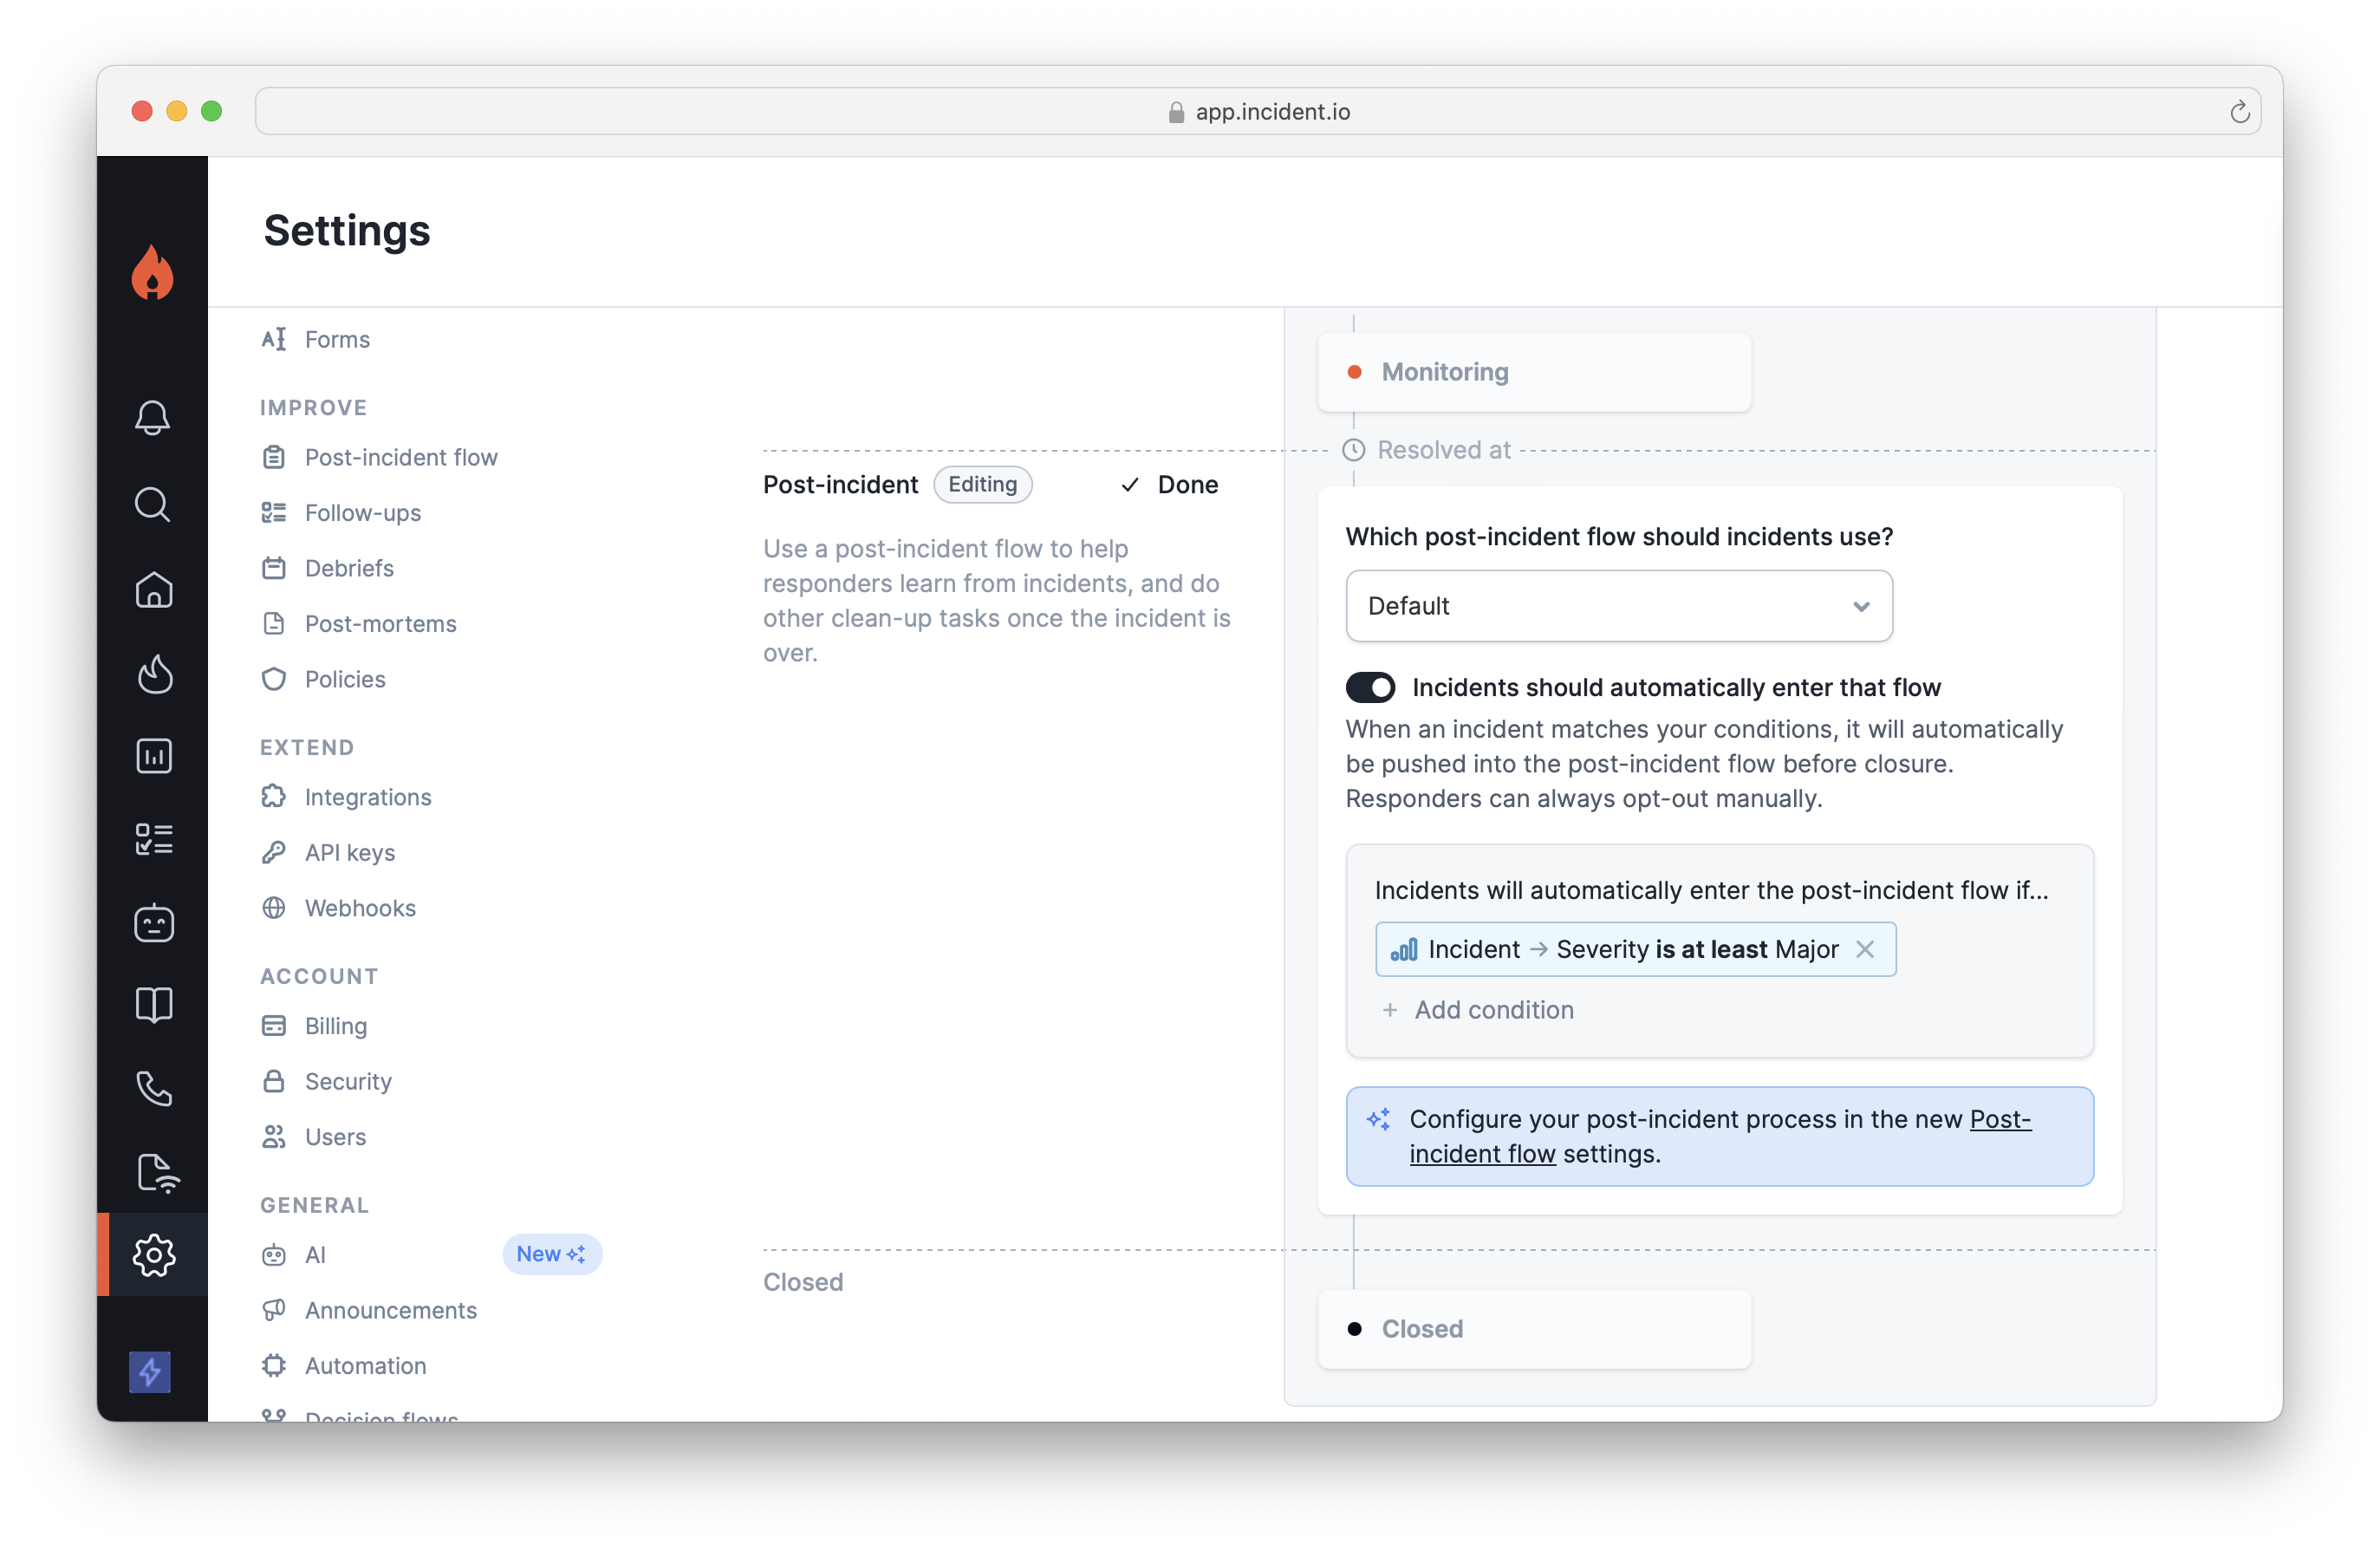
Using the post-incident flow
When closing an incident, responders will be prompted as to whether or not they’d like to go through the post-incident flow for this incident.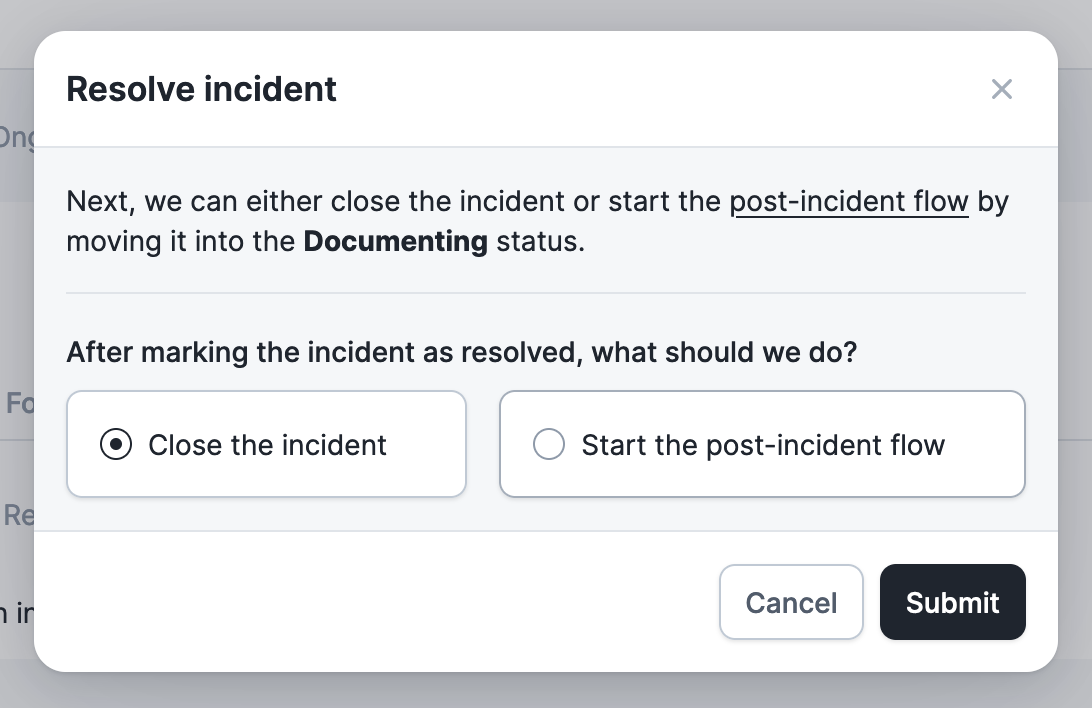
Opting an incident out of the post-incident flow
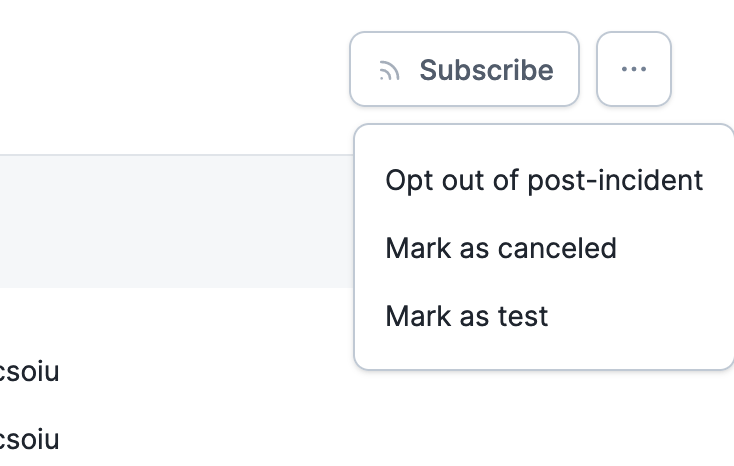
If an incident enters the post-incident flow, but you’ve decided that it’s not worthwhile for this incident, you can opt-out. You can do this by typing in/inc close into your incident channel, or by selecting Opt out of post-incident in the overflow menu at the top right of the incident in the dashboard.
When you opt-out, you have to provide a reason about why you’re opting out, which we’ll include in the message we send to its Slack channel about the incident now being closed.
Admins can remove the ability to opt out by adjusting permissions in Settings → Roles.