Can’t see the source you want? You can use our HTTP source to connect with most tools that provide webhooks.
Setting Up
1. Connect an alert source
- Create an alert source to receive alerts
- Navigate to Alerts > Create alert source
- Select the source that you want to import
- Connect your source to receive alerts
- Follow the steps provided for your chosen source to connect it and receive your first alert
- You’ll see live alerts come in once you start receiving them, you can try sending a test alert from your source to check your configuration

- Configure your alerts
Every alert source is rate limited We apply a rate limit of 120 events/minute for each alert source. This means that if you have two alert sources, we will process up to 240 events every minute. When the rate limit is exceeded, we will respond with an HTTP 429
Too Many Requests. Organization-level limits are also applied to ensure reasonable use.2. Create an alert route
Now that you have an alert source that’s receiving alerts, you need to connect it to an alert route to start creating incidents from your alerts.- Select alert sources
- Select any alert sources which should trigger incidents
- You can filter which specific alerts should create incidents later
- Filter and group
- Filter out alerts which should not auto-create incidents for (i.e. low priority alerts)
- Group alerts, so when an alert fires, we find active incidents with similar alerts and give responders the ability to attach the alert to an incident or create a new incident from that alert (ie. grouping alerts by the team or service that owns the alert). More on that later.
- Configure incidents
- Choose how you want the incidents created from your alerts to look
- You can select title and summary from the alert details you have available to you
- Add any custom fields which should be set based on details on your alert
How does it work?
Once auto-creation is switched on, incidents will be automatically created in a triage state. We’ll try our best to pull the right people into the incident channel. When joining a triage incident, you’ll be met with this: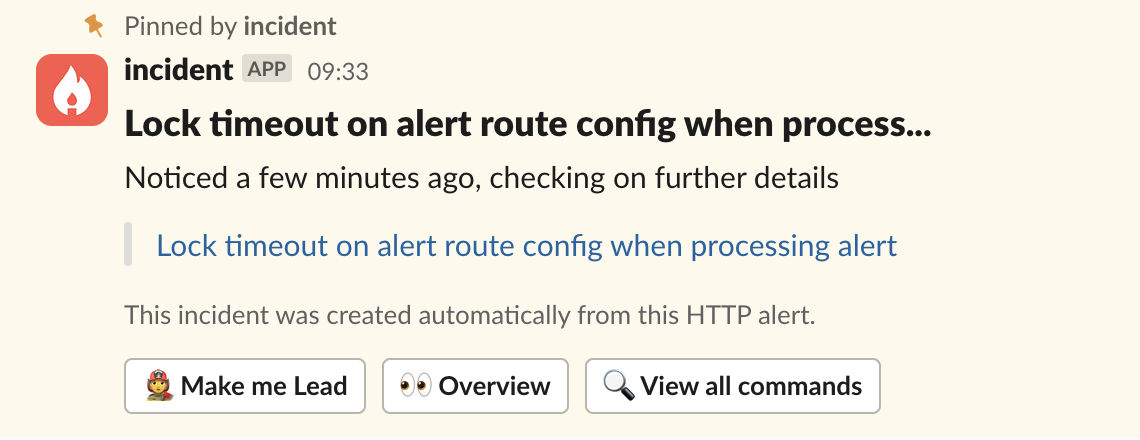

- You will be asked if you’d like to rename the incident, and you’ll be able to set any custom fields you have configured
- All your workflows will kick off once the incident is accepted, and you can get to work
- The incident which triggered this will become an attachment of your incident.
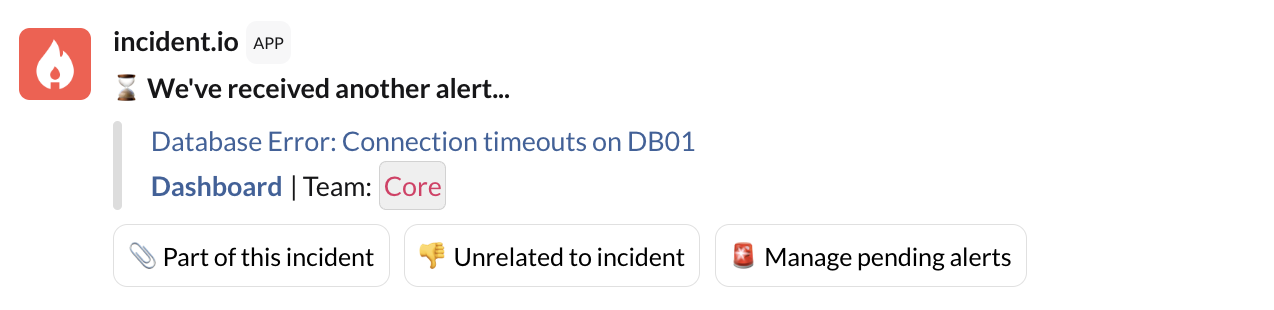
Grouping
Sometimes multiple incidents or alerts in a short space of time are caused by the same underlying problem. To avoid creating unnecessary noise, we recommend configuring a grouping window. This allows us to check in with you before we spin up new incidents automatically. We’ll continue to use HTTP source for our example, but the same applies to other alerts and the like:- An incident is auto-created from a HTTP incident
- A second HTTP incident is triggered within the grouping window, with a matching service
- The next step depends on the grouping behavior you’ve configured. For this example, we’ll use suggested as this is our recommended setting. See below for more details on automatic grouping.
- Instead of creating a new incident, we will post the below message in all open incidents with matching HTTP services created within the grouping window.
- Any other grouping suggestion messages will be deleted from other channels, it’s unlikely it’s linked to multiple incidents
Automatic grouping
Automatic grouping automatically attaches related grouped alerts into the same active incident without asking for manual confirmation via the incident channel or dashboard. The alert can be unlinked from the incident via the dashboard.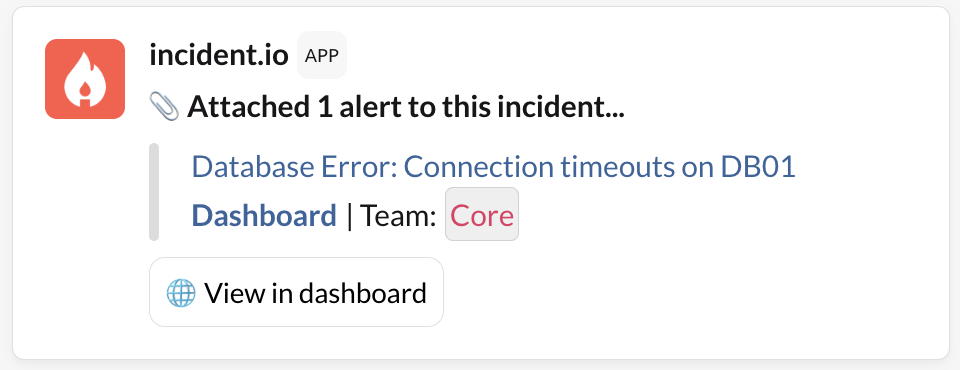
FAQs
What does my deduplication key in my alert payload do in incident.io?
What does my deduplication key in my alert payload do in incident.io?
Deduplication keys are one way to indicate that some events are the same alert: If your alert events have the same deduplication key, we won’t create new alerts in incident.io for them - if it’s different we create a new alert.
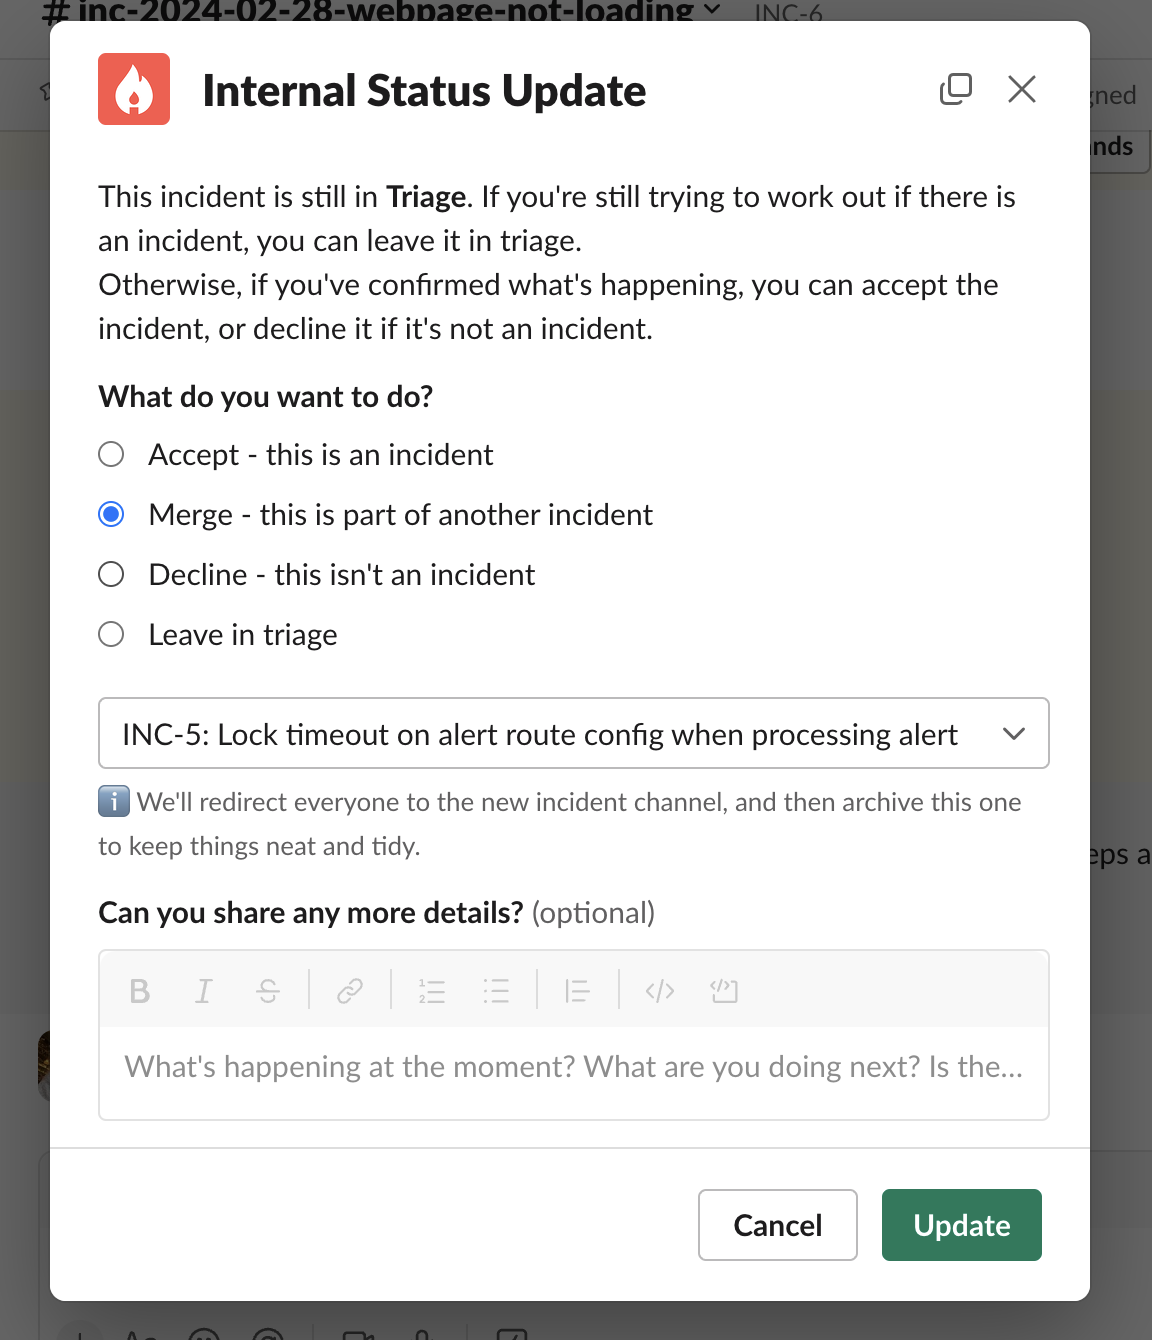
An incident just got created today, but the associated alert and escalation came in yesterday - what could have happened?
An incident just got created today, but the associated alert and escalation came in yesterday - what could have happened?
If an alert is marked as unrelated to an incident, it will trigger a new incident based on the alert route. The creation time for the new incident is set to the time the alert is marked as unrelated.Grouping logic can be defined for an alert route for alerts to be grouped into an incident. If one then marks it as unrelated, we assume it might need its own incident. This triggers it to be raised in Triage, following the Alert Route rules (check the Triage mode setting at the bottom to determine if incidents should be created or not).In some cases to prevent this, one might want to enable the option underneath the Triage condition in the Alert Route to be enabled: