After you have connected your alert source, it’s time to create alert routes. Alert routes process incoming alerts, and determine:Documentation Index
Fetch the complete documentation index at: https://docs.incident.io/llms.txt
Use this file to discover all available pages before exploring further.
- How to route alerts to the correct escalation path
- Which (if any) alerts should create incidents, as well as alert grouping behavior
Creating a new Alert route
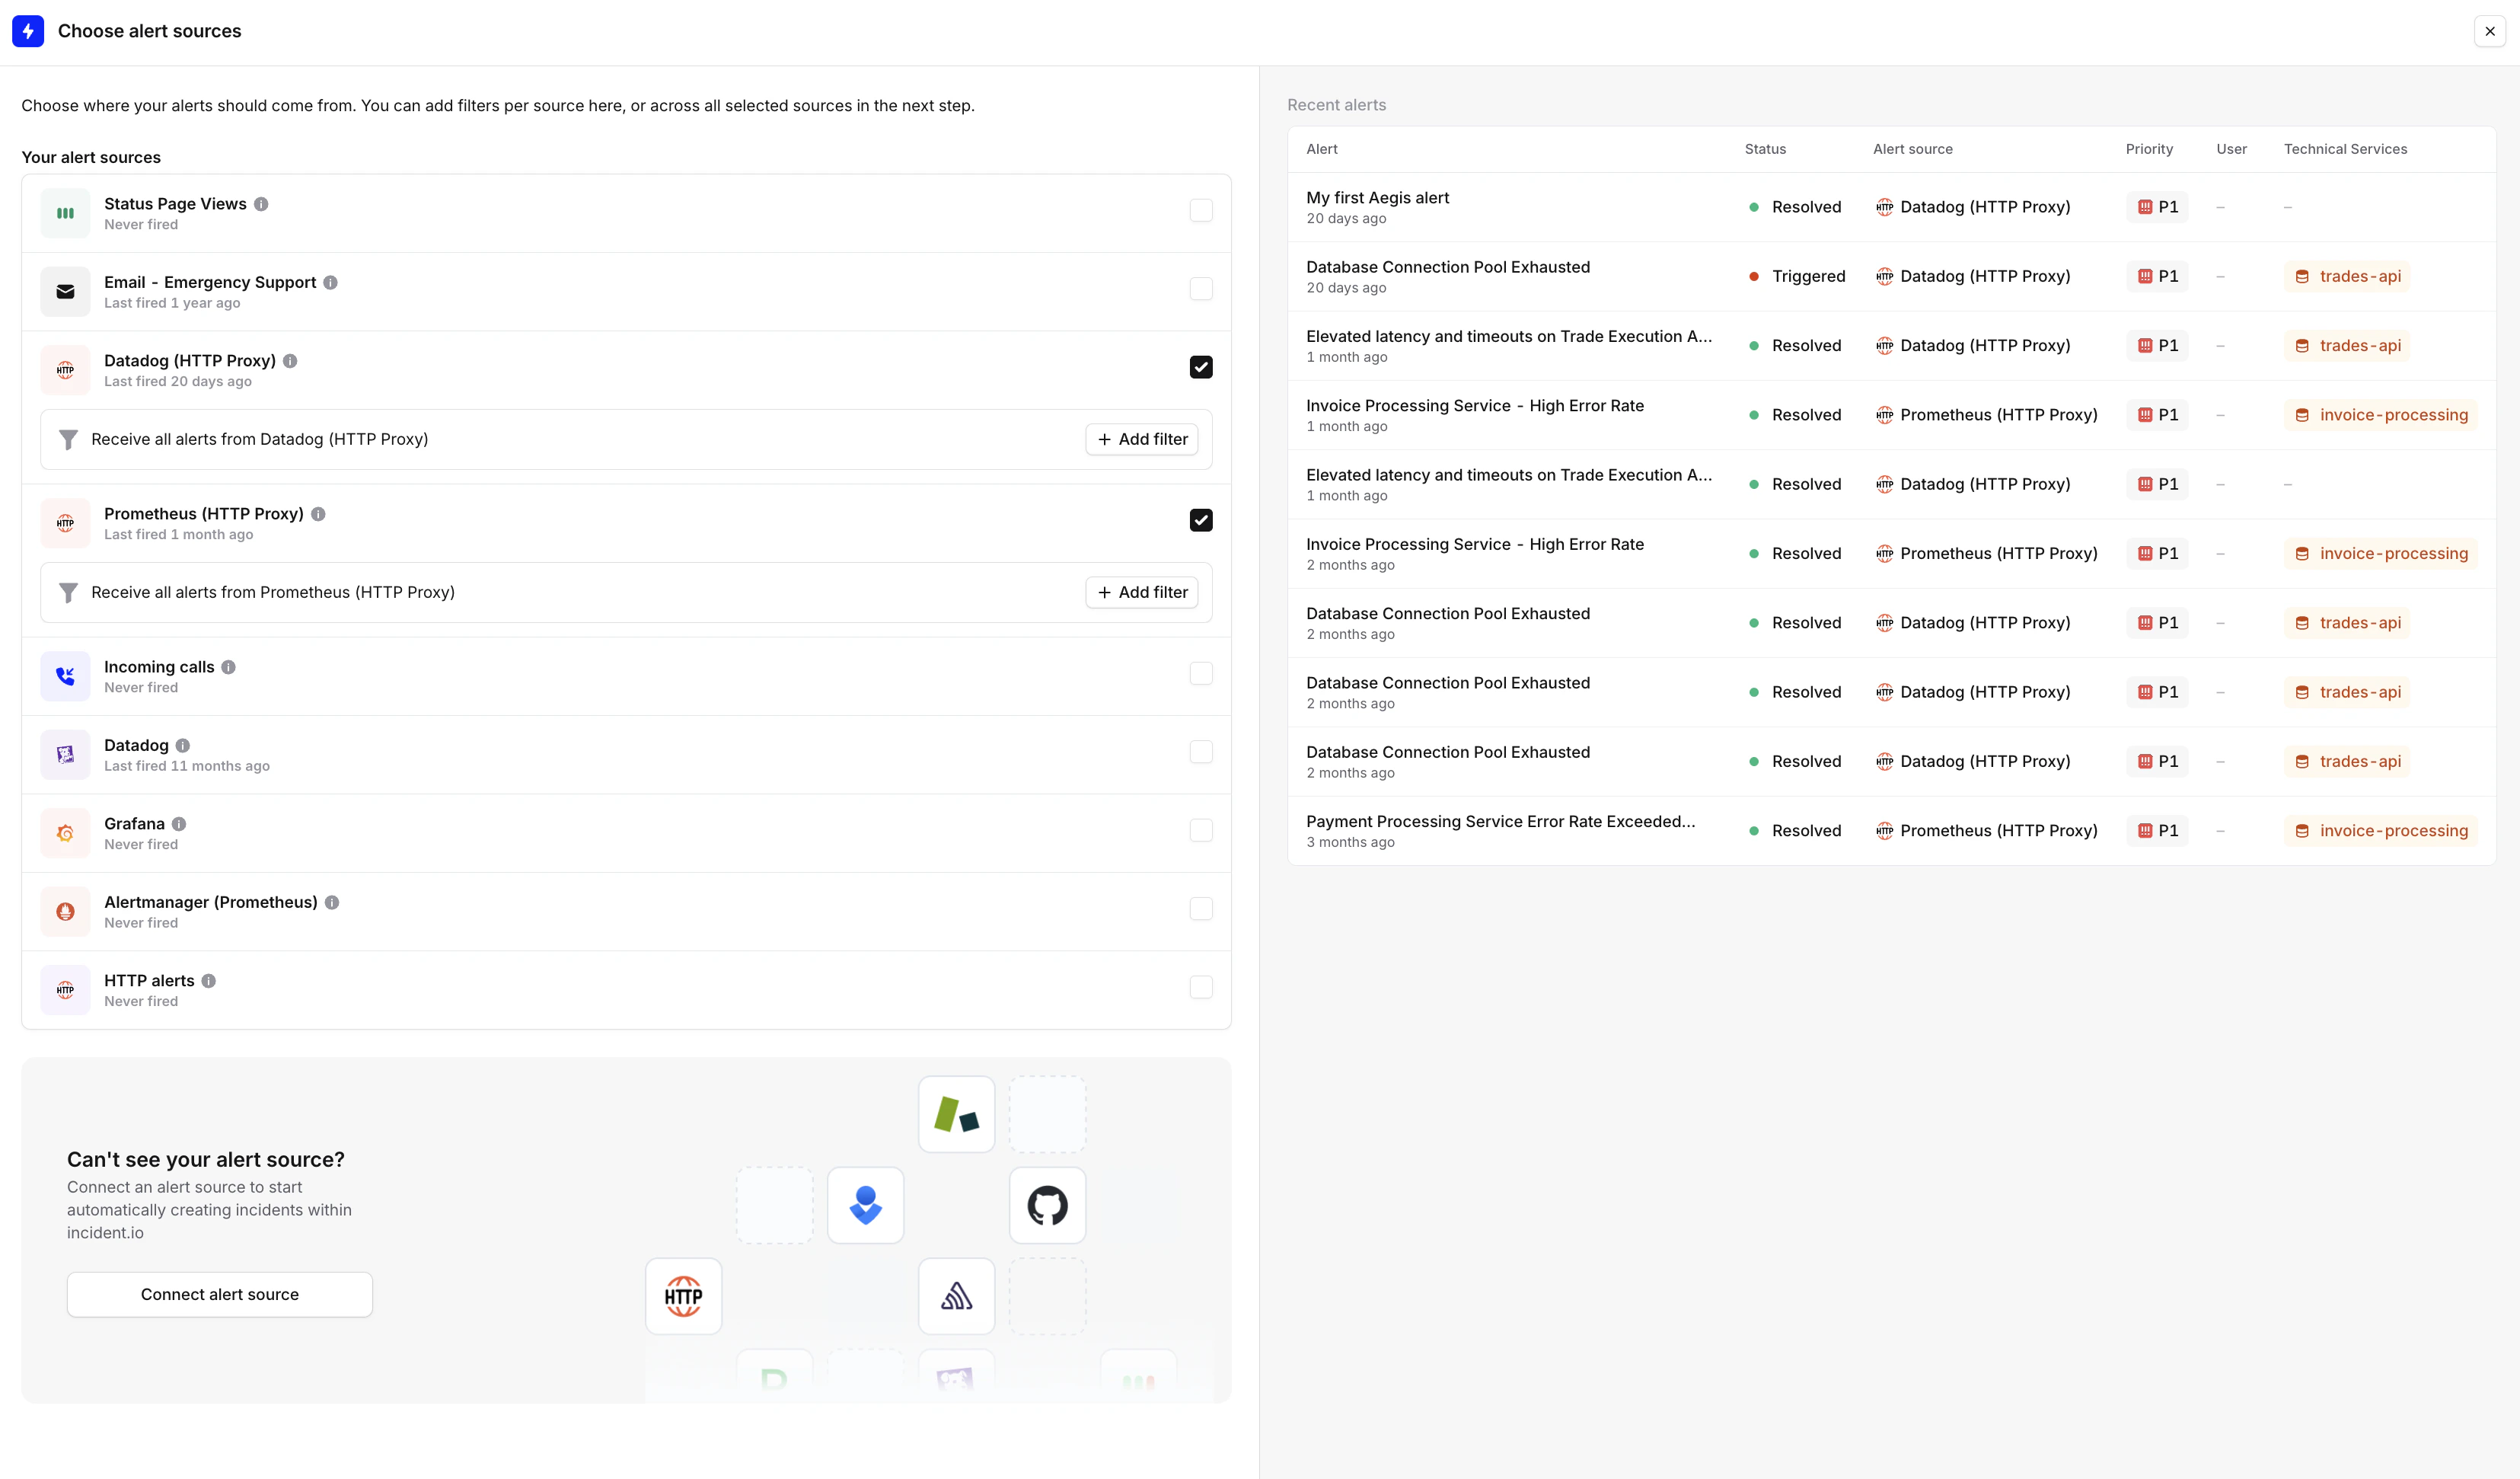
After you have connected your alert source, it’s time to create one or more alert routes from it. Remember, you can bring data from multiple data sources to one route!- Head to Settings > Alerts
- Create a new Alert Route, and give it a name
- Choose the alert sources you want to bring to this route
- Continue
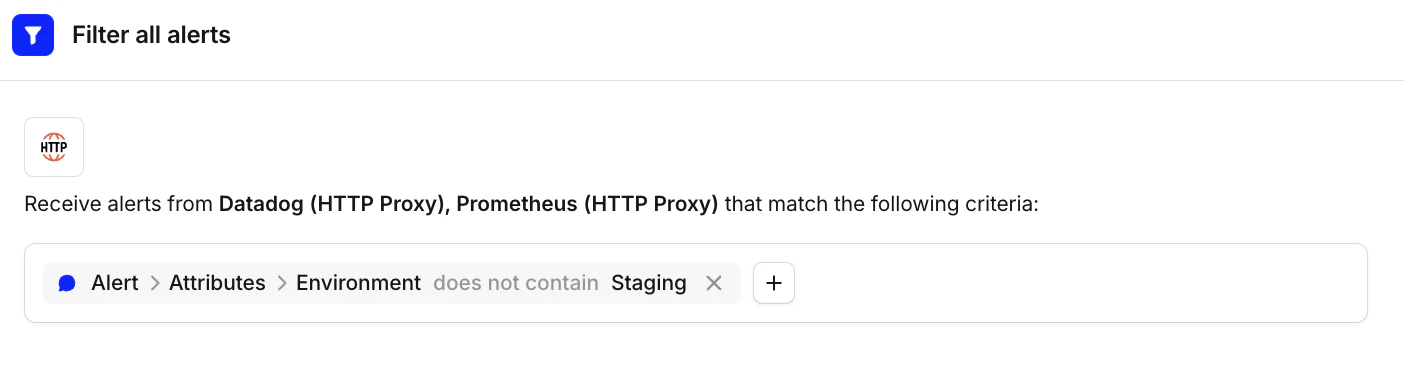
Filtering alerts
You can filter alerts out if they are irrelevant to your alert route. Any data from the alert’s payload can be used to filter out alerts (leveraging attributes ), as well as first-order filters like Source or Priority. Example: Have an attribute on your alert to captureStaging versus Production environment, so you can filter out Staging alerts.
Grouping alerts
Grouping alerts is where we can decrease the amount of noise coming from similar alerts, and reduce alert fatigue. You can group alerts by time window and/or context (via attributes), like services or teams too.Creating escalations from an alert route
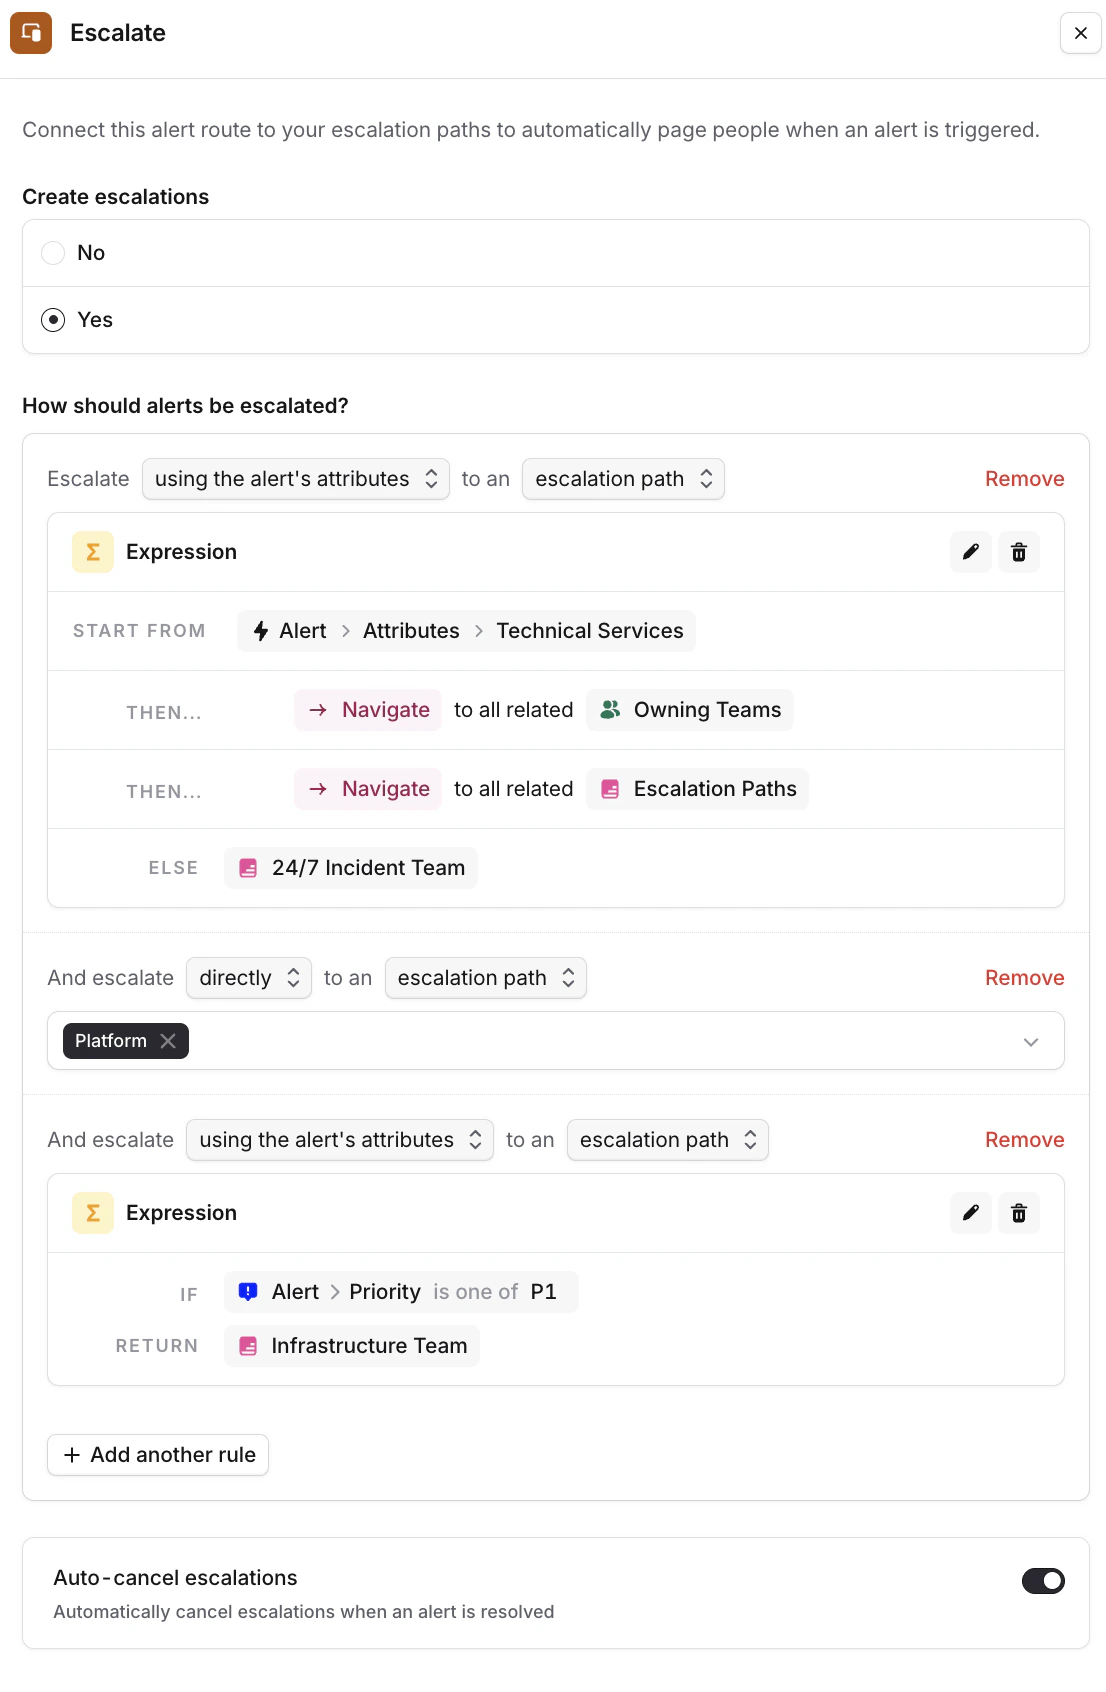
You can choose whether you want to page people for your incoming alerts. Alerts can be escalated to Escalation paths, users, or a combination thereof. You can either point directly to a specific Escalation Path or user; or (which we recommend!), leverage Expressions to dynamically pick the right Escalation Path depending on the alert’s context.- Go to the Alert Route > Set Escalate alert to “Yes”
- Choose the escalation path(s) you’d like to page (we recommend leveraging a query-based expression to pick the right Path based on e.g. the impacted Service or Team on the alert)
- Optionally, you can stack multiple escalation rules (for example, “Escalate to the Team labeled against the alert, AND escalate to the Infrastructure team if alert priority = P1”)
- Toggle on auto-cancel escalations if you wish to cancel pages when an alert is resolved (this is useful for flappy alert sources)
Alert Grouping
Grouping in incident.io happens on the incident object. In your Alert Route, start by setting “Create incidents, and group alerts by” to “Yes”. Toggle “Group alerts” on.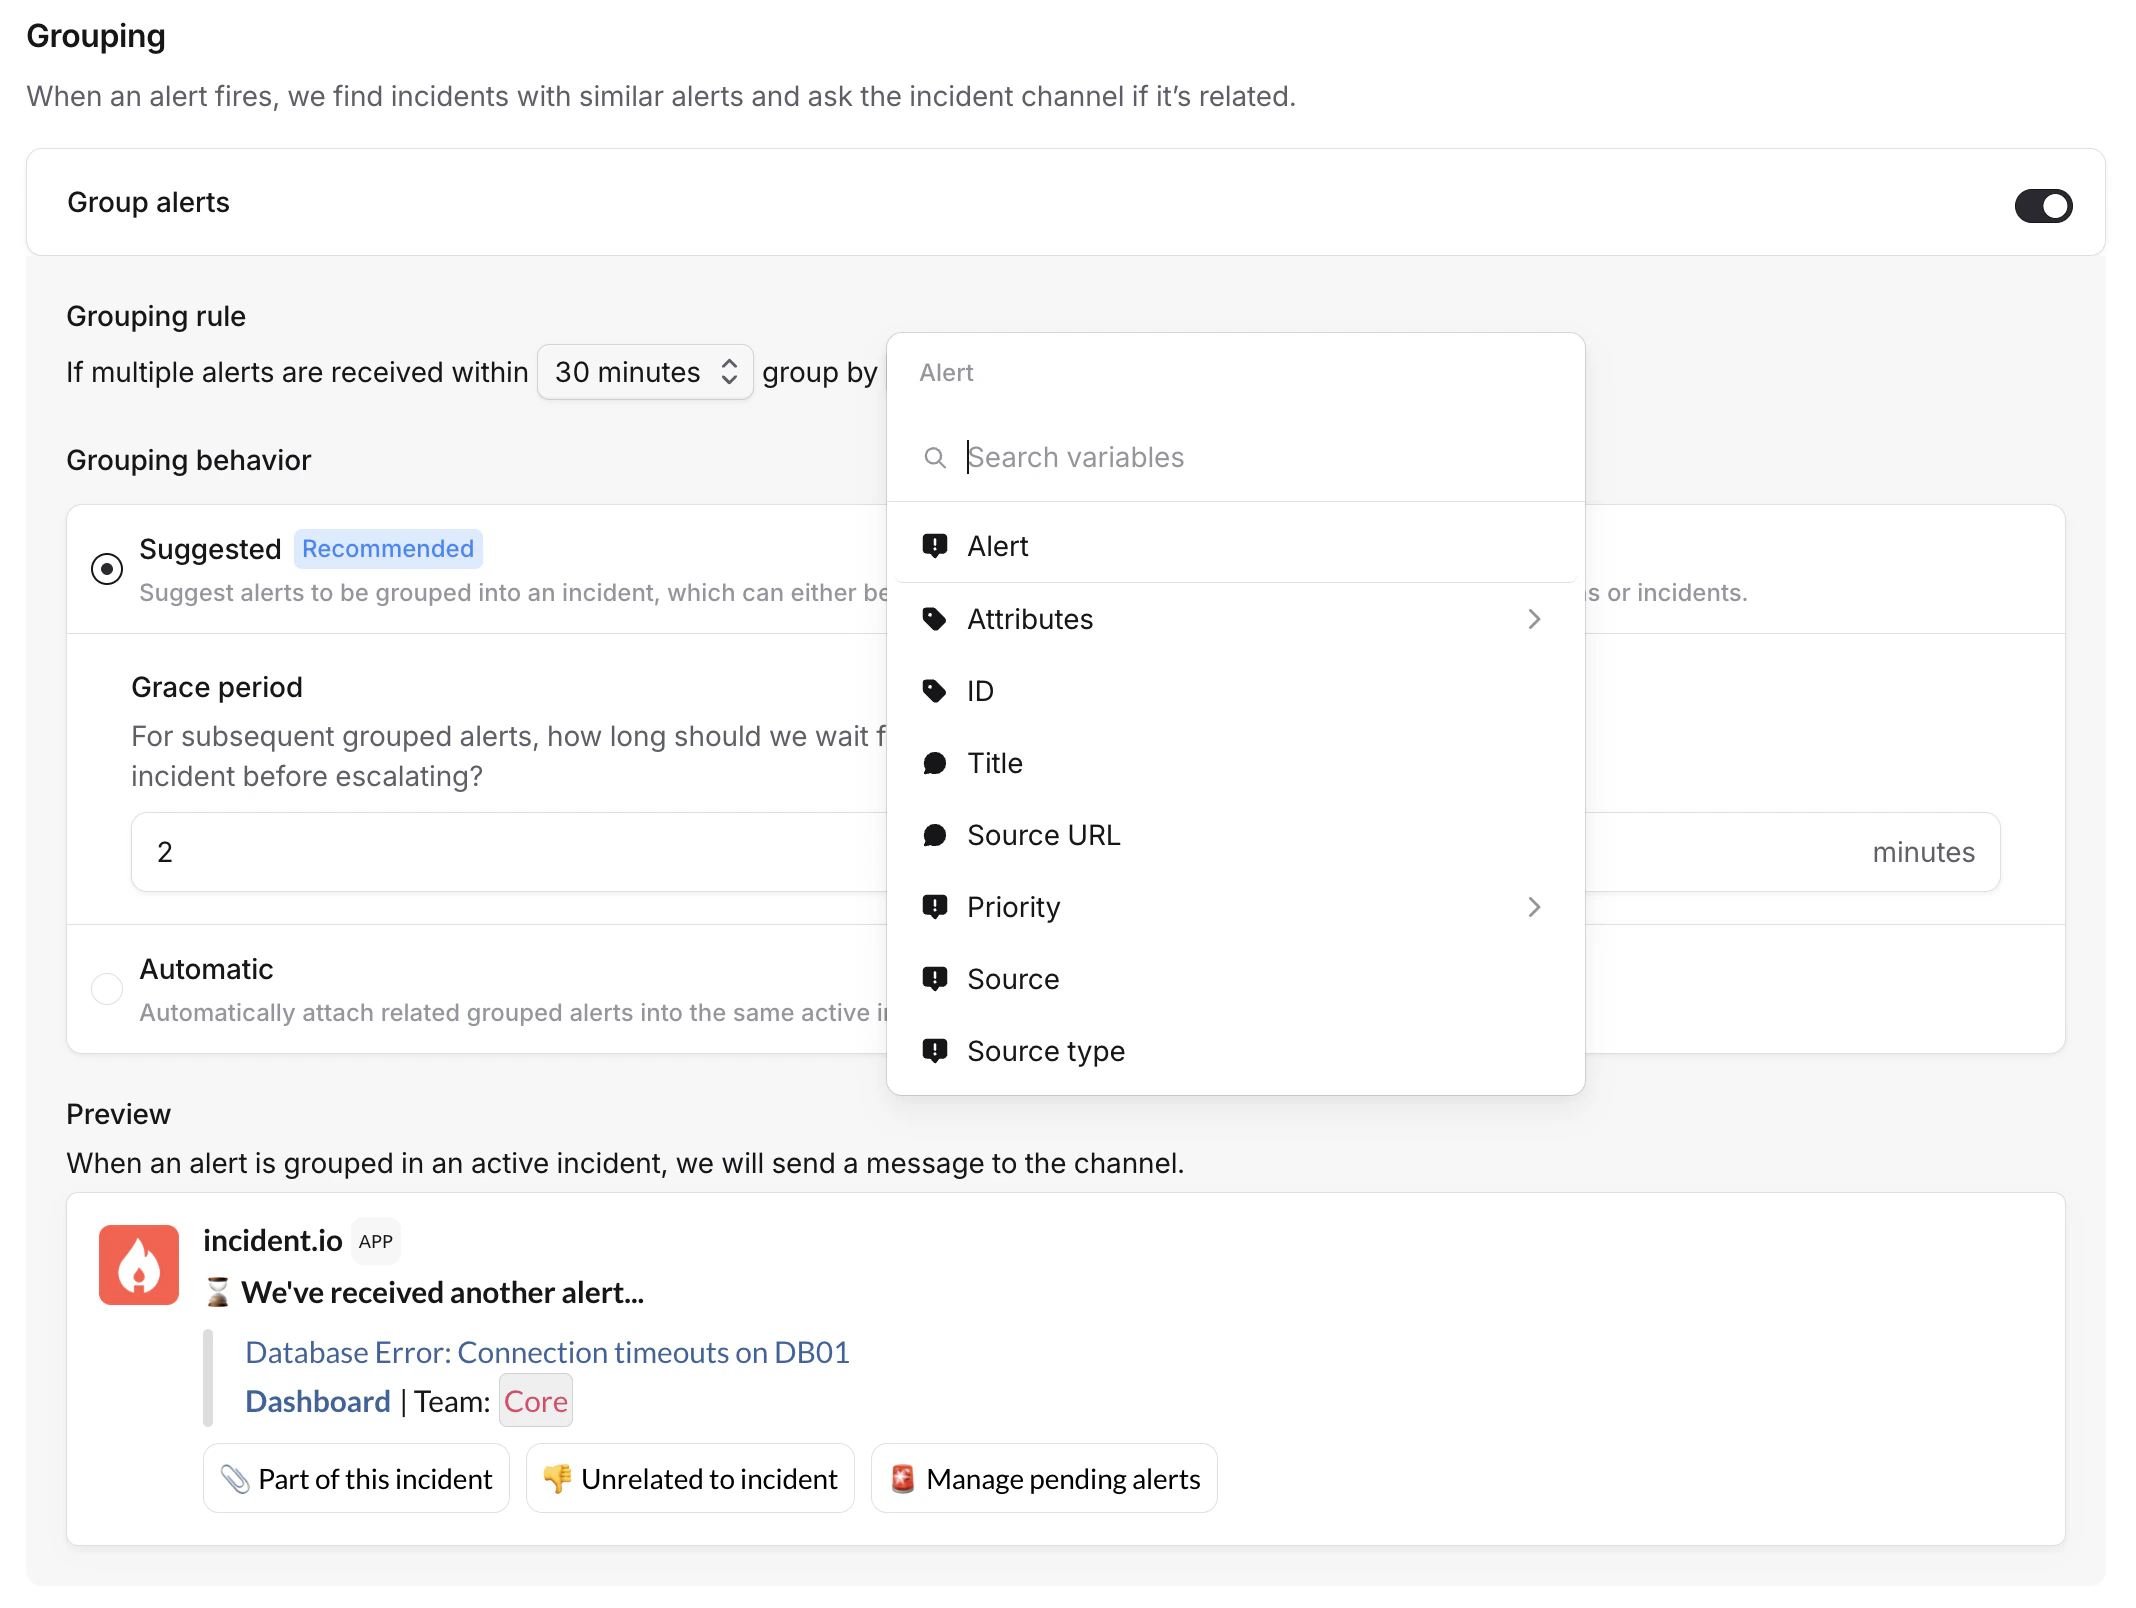
Suggested (Recommended)
With suggested grouping, you keep a human-in-the-loop to check groupings. Alerts will come in, and proposed to be grouped into an incident. Responders can then either confirm the grouping, or mark alerts as unrelated (via the incident channel or incident homepage). You also define a grace period, which determines how long to wait for manual confirmation before escalating again.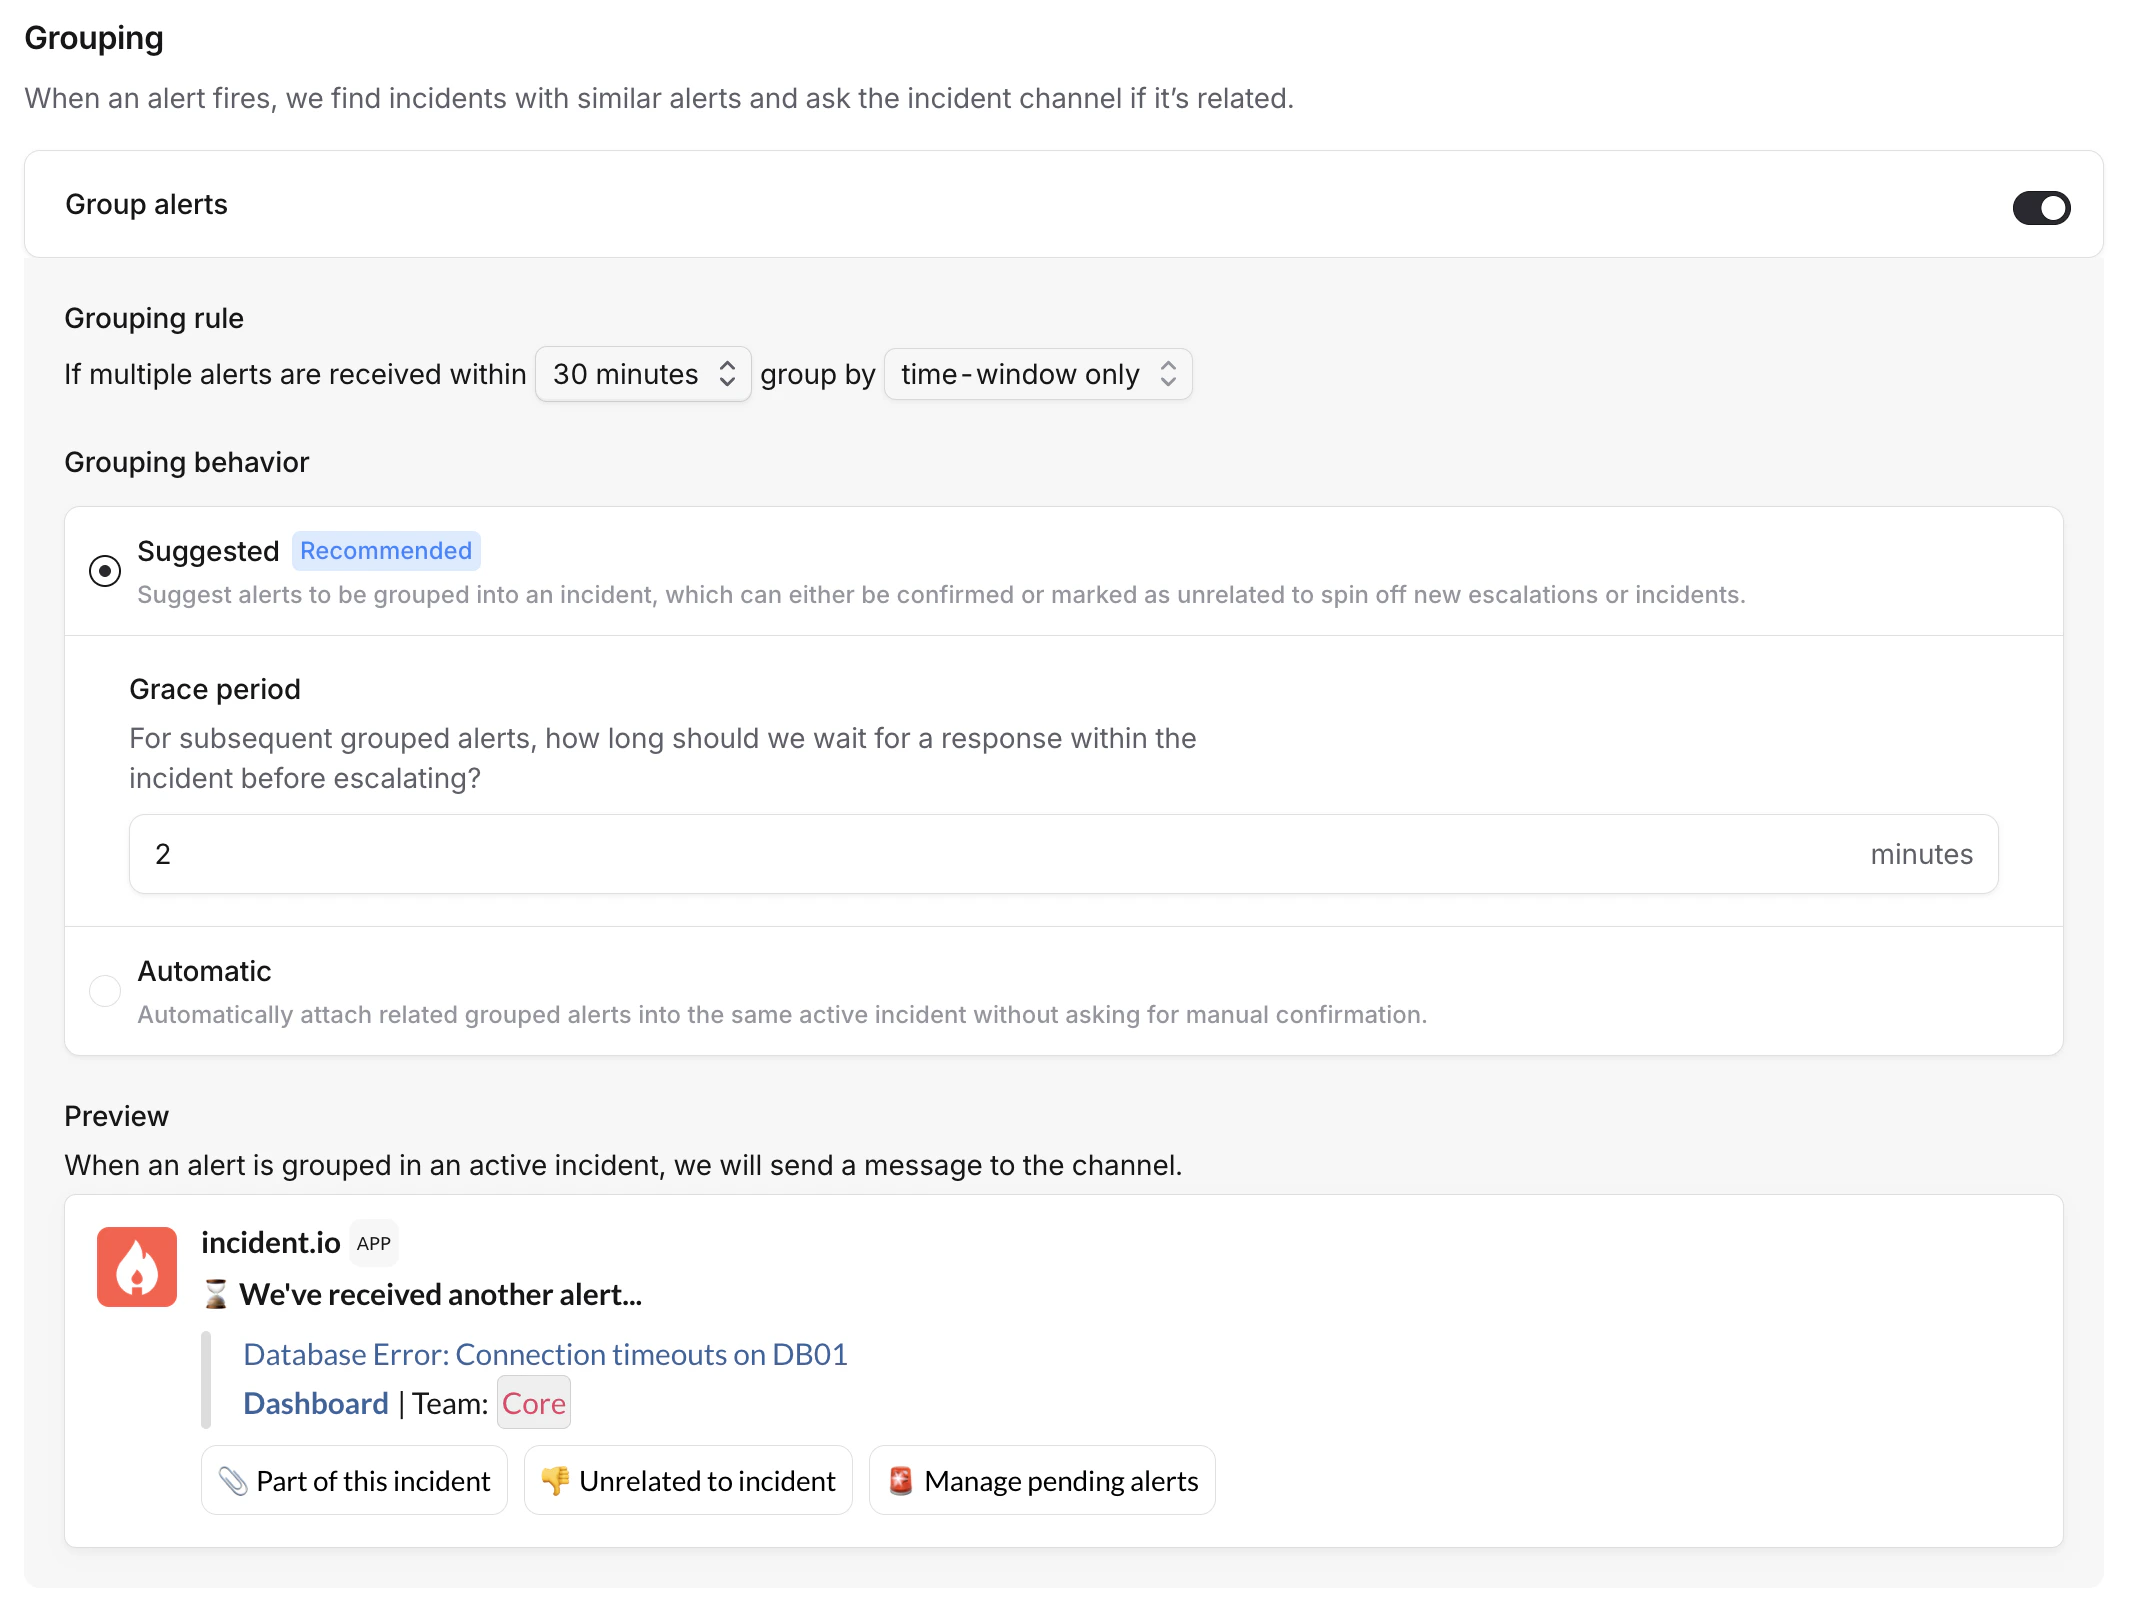
Automatic
Automatic grouping immediately attaches related alerts into the incident, without requiring manual confirmation. If needed, responders can unlink alerts via the incident’s homepage.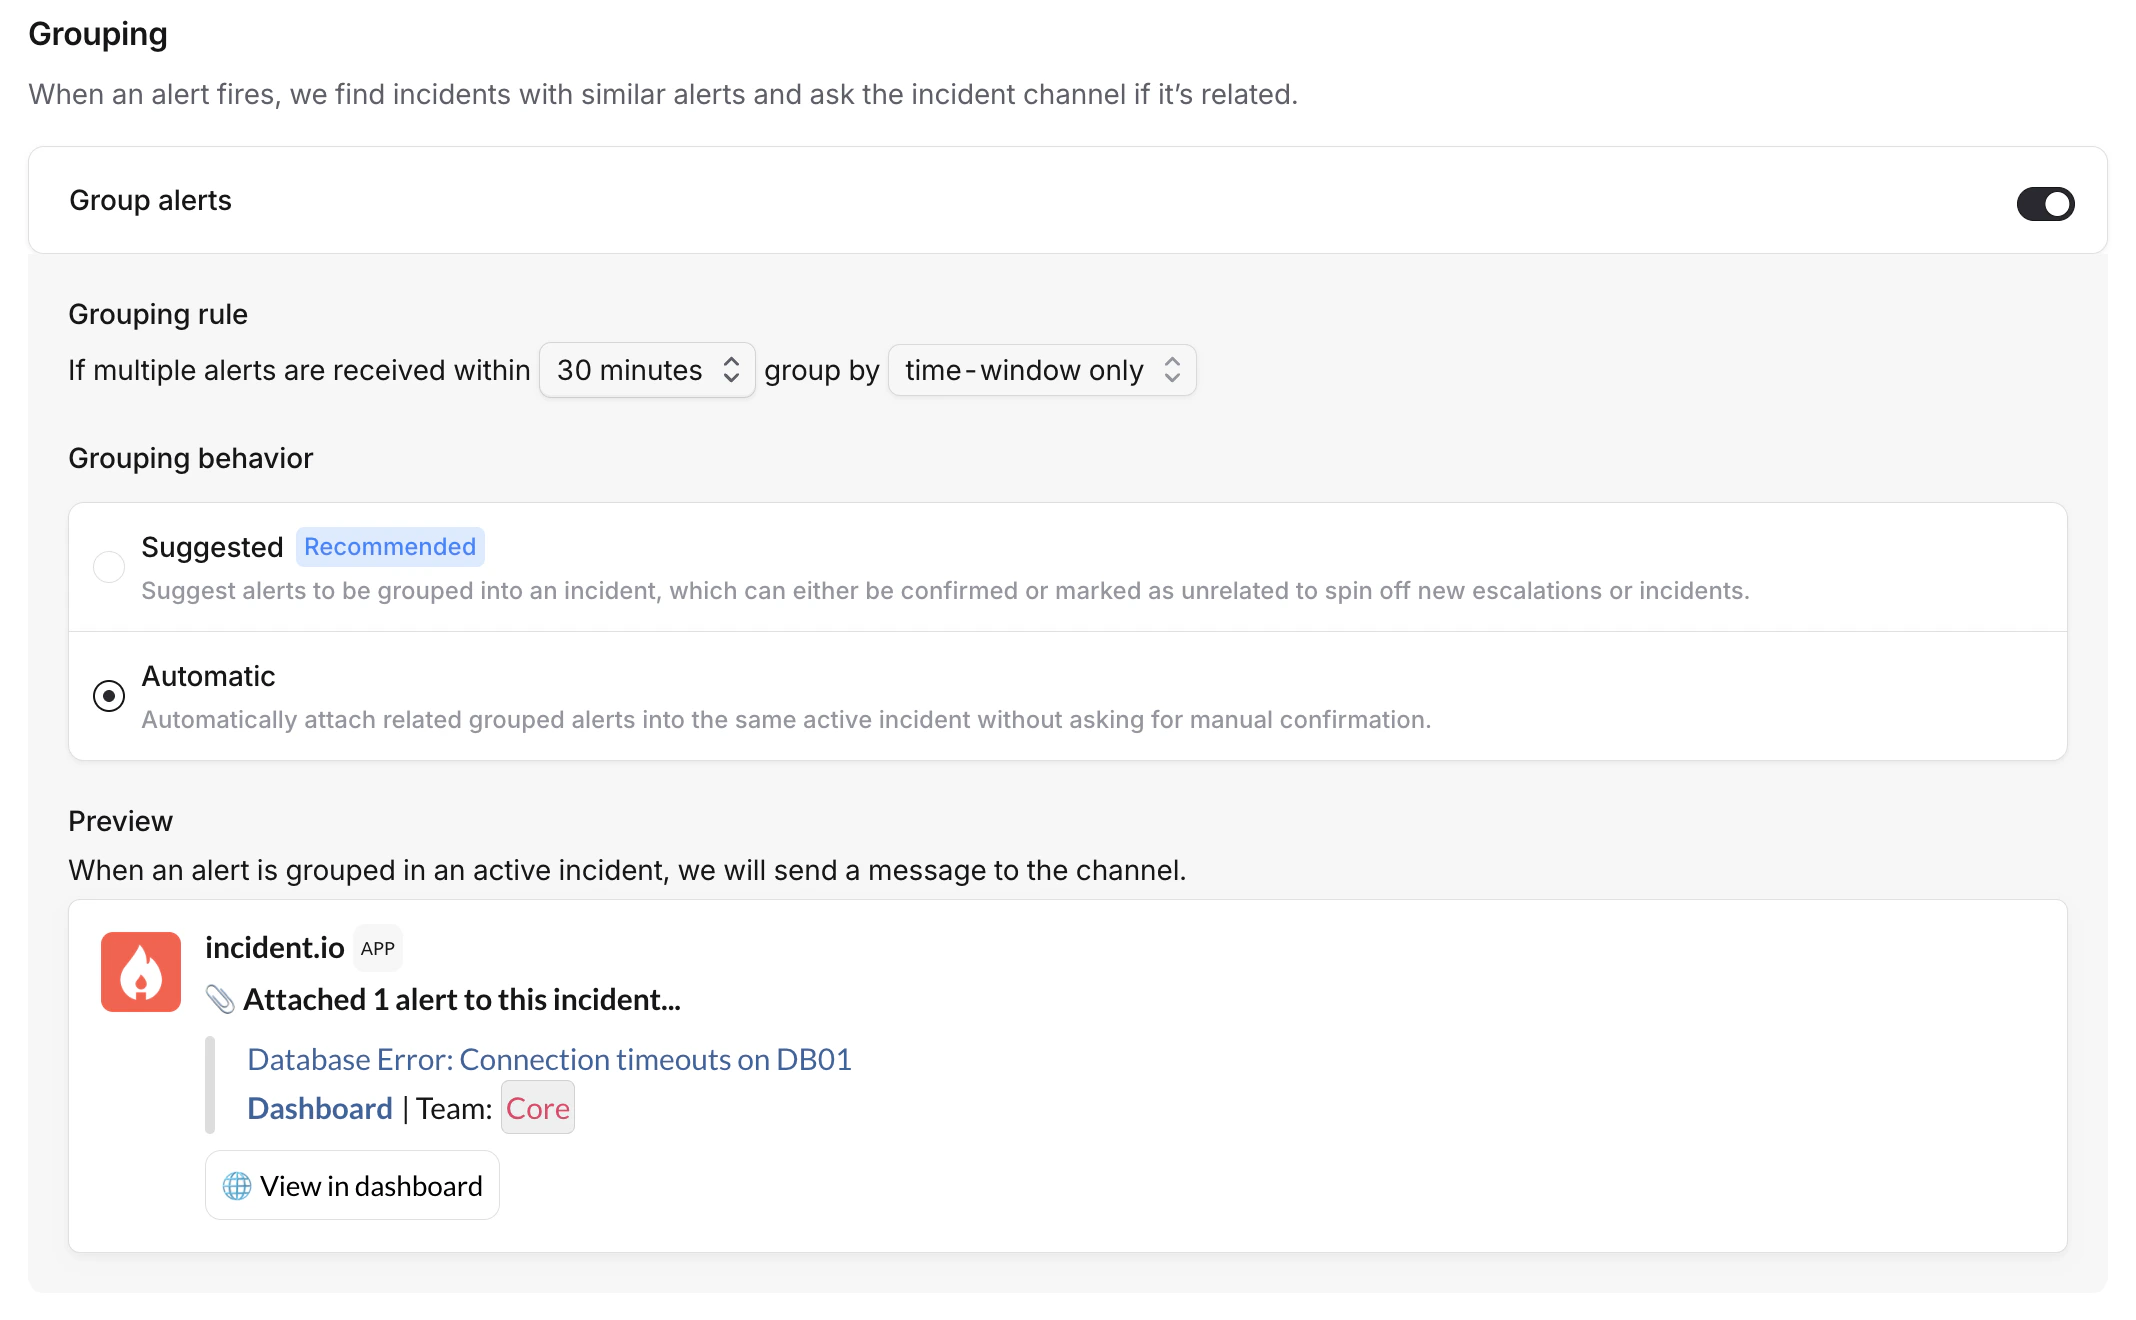
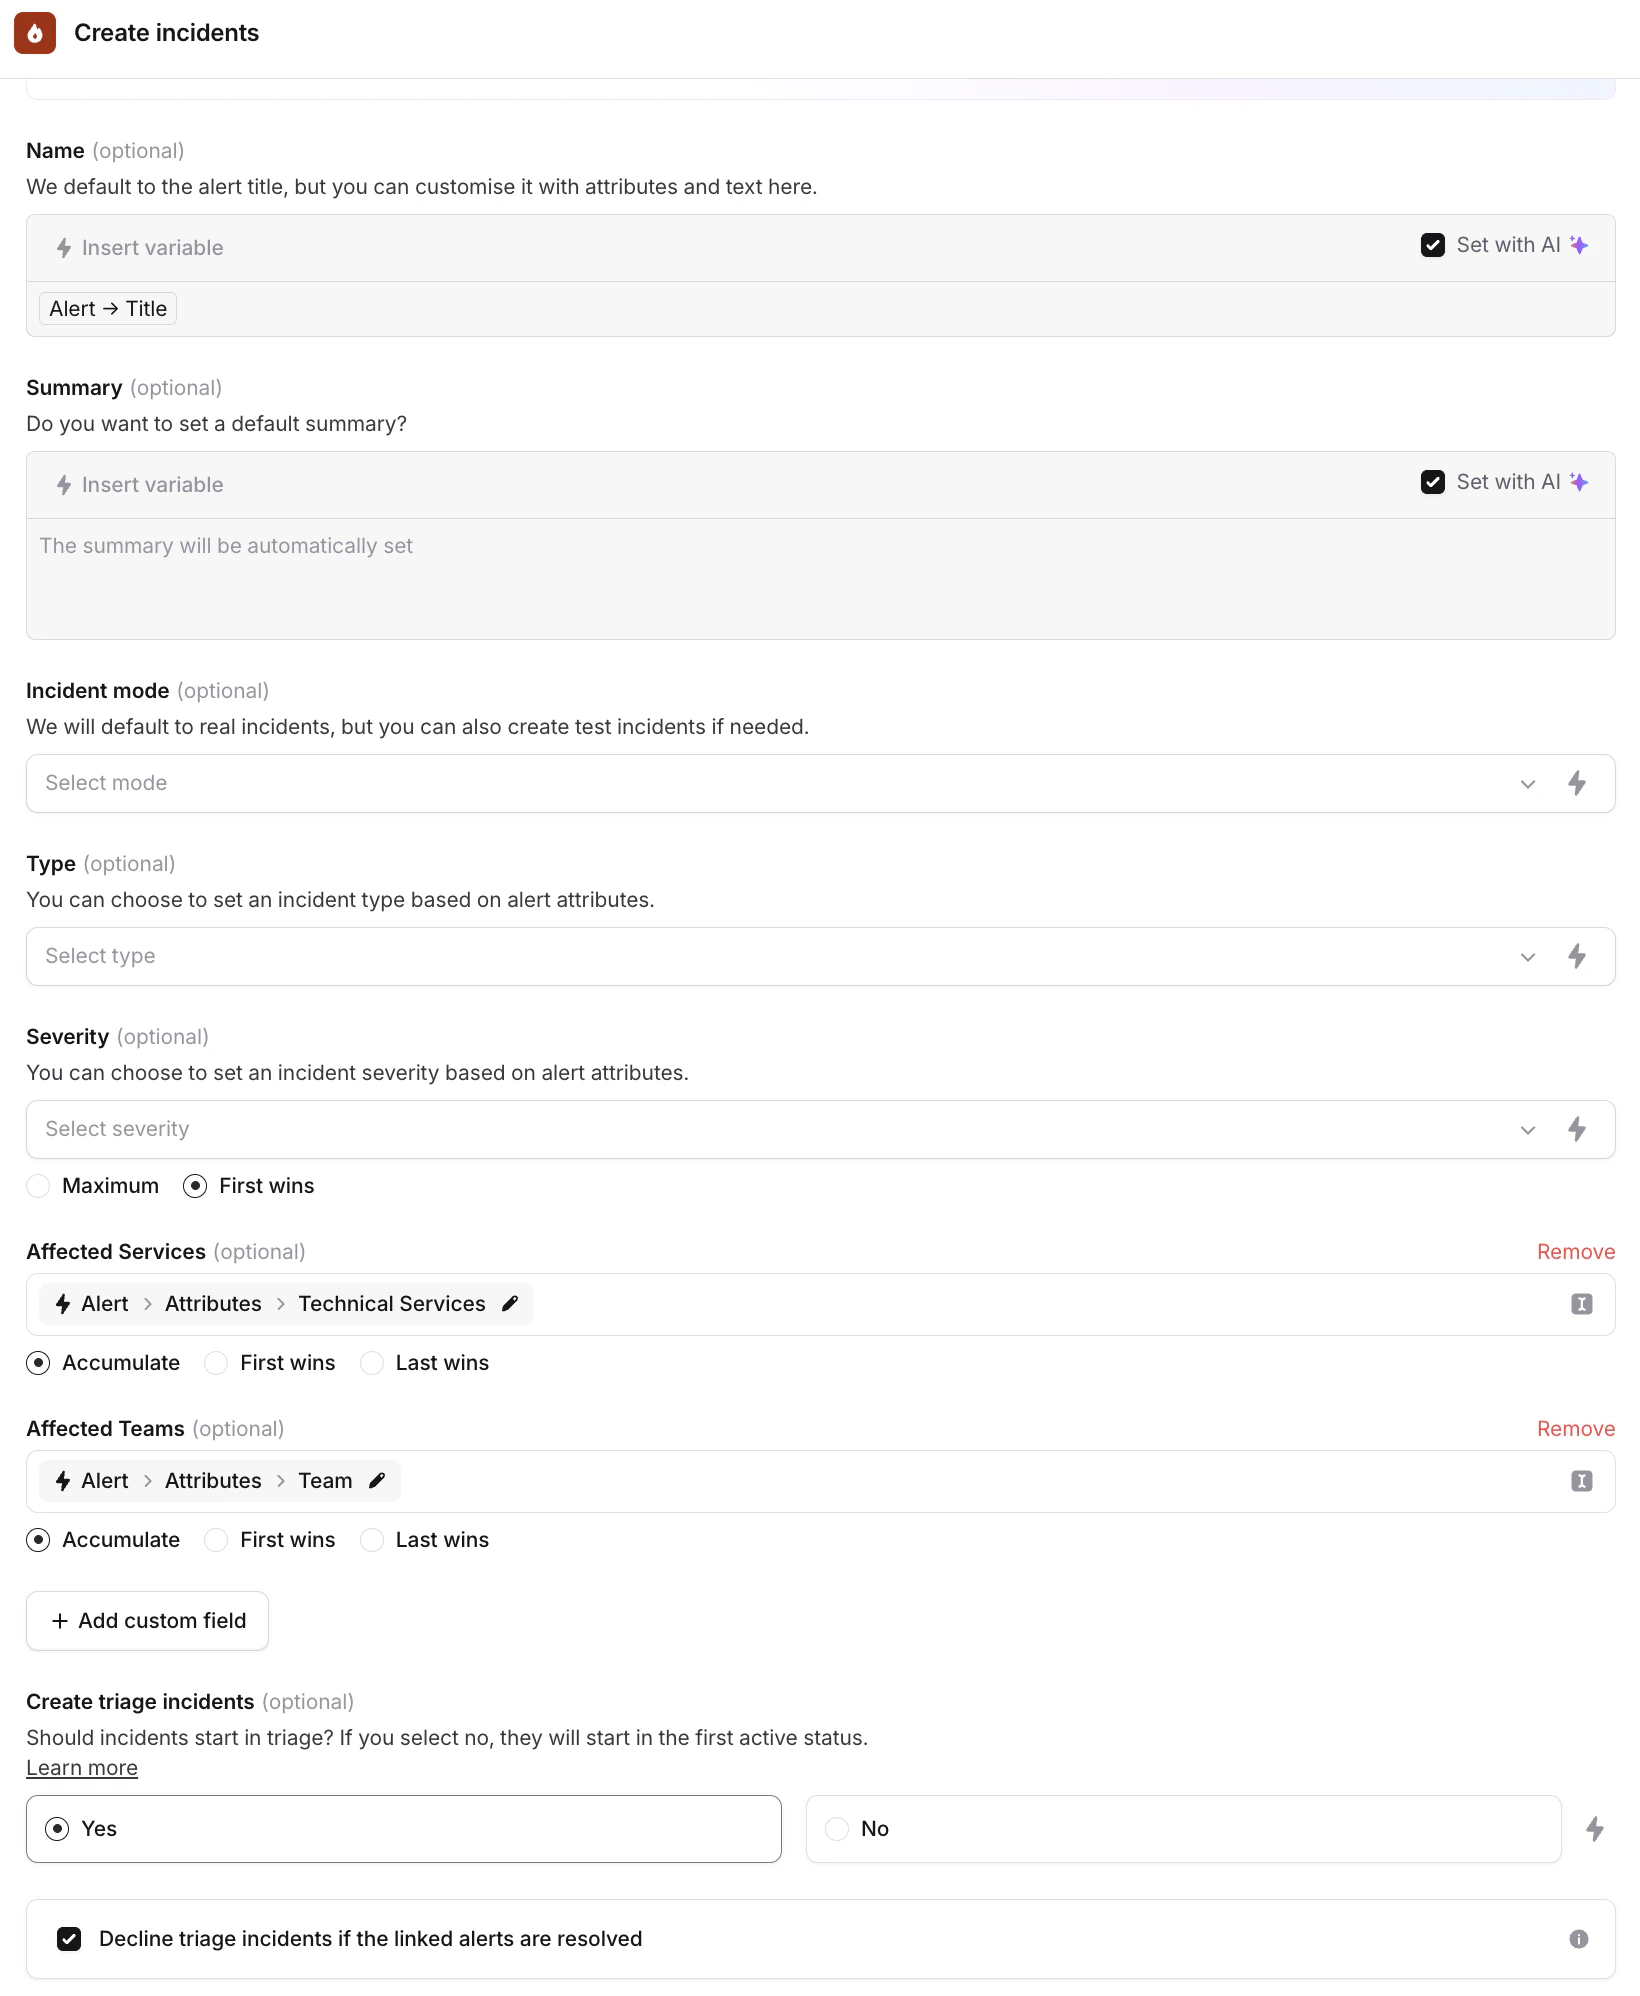
Creating incidents
You can choose exactly when and how you want to create incidents, and what type of incident, when alerts are received.- Go to the Incident Details
- Choose what information you want to get shown about an incident in the Slack channel when it is posted. You can see a preview on the right side of the screen.
- Dynamically set the incident’s severity, and pass any data from your alert to your incident using the “Add Custom Field” option (this will let you e.g. pass the tagged Service on your alert as the Affected Service on your incident), keeping data consistent and auto-populated
- Tick the “Decline triage incidents’ box if you’d like to automatically reject triage incidents when the alert resolves itself