Configuring Priorities
Creating priorities
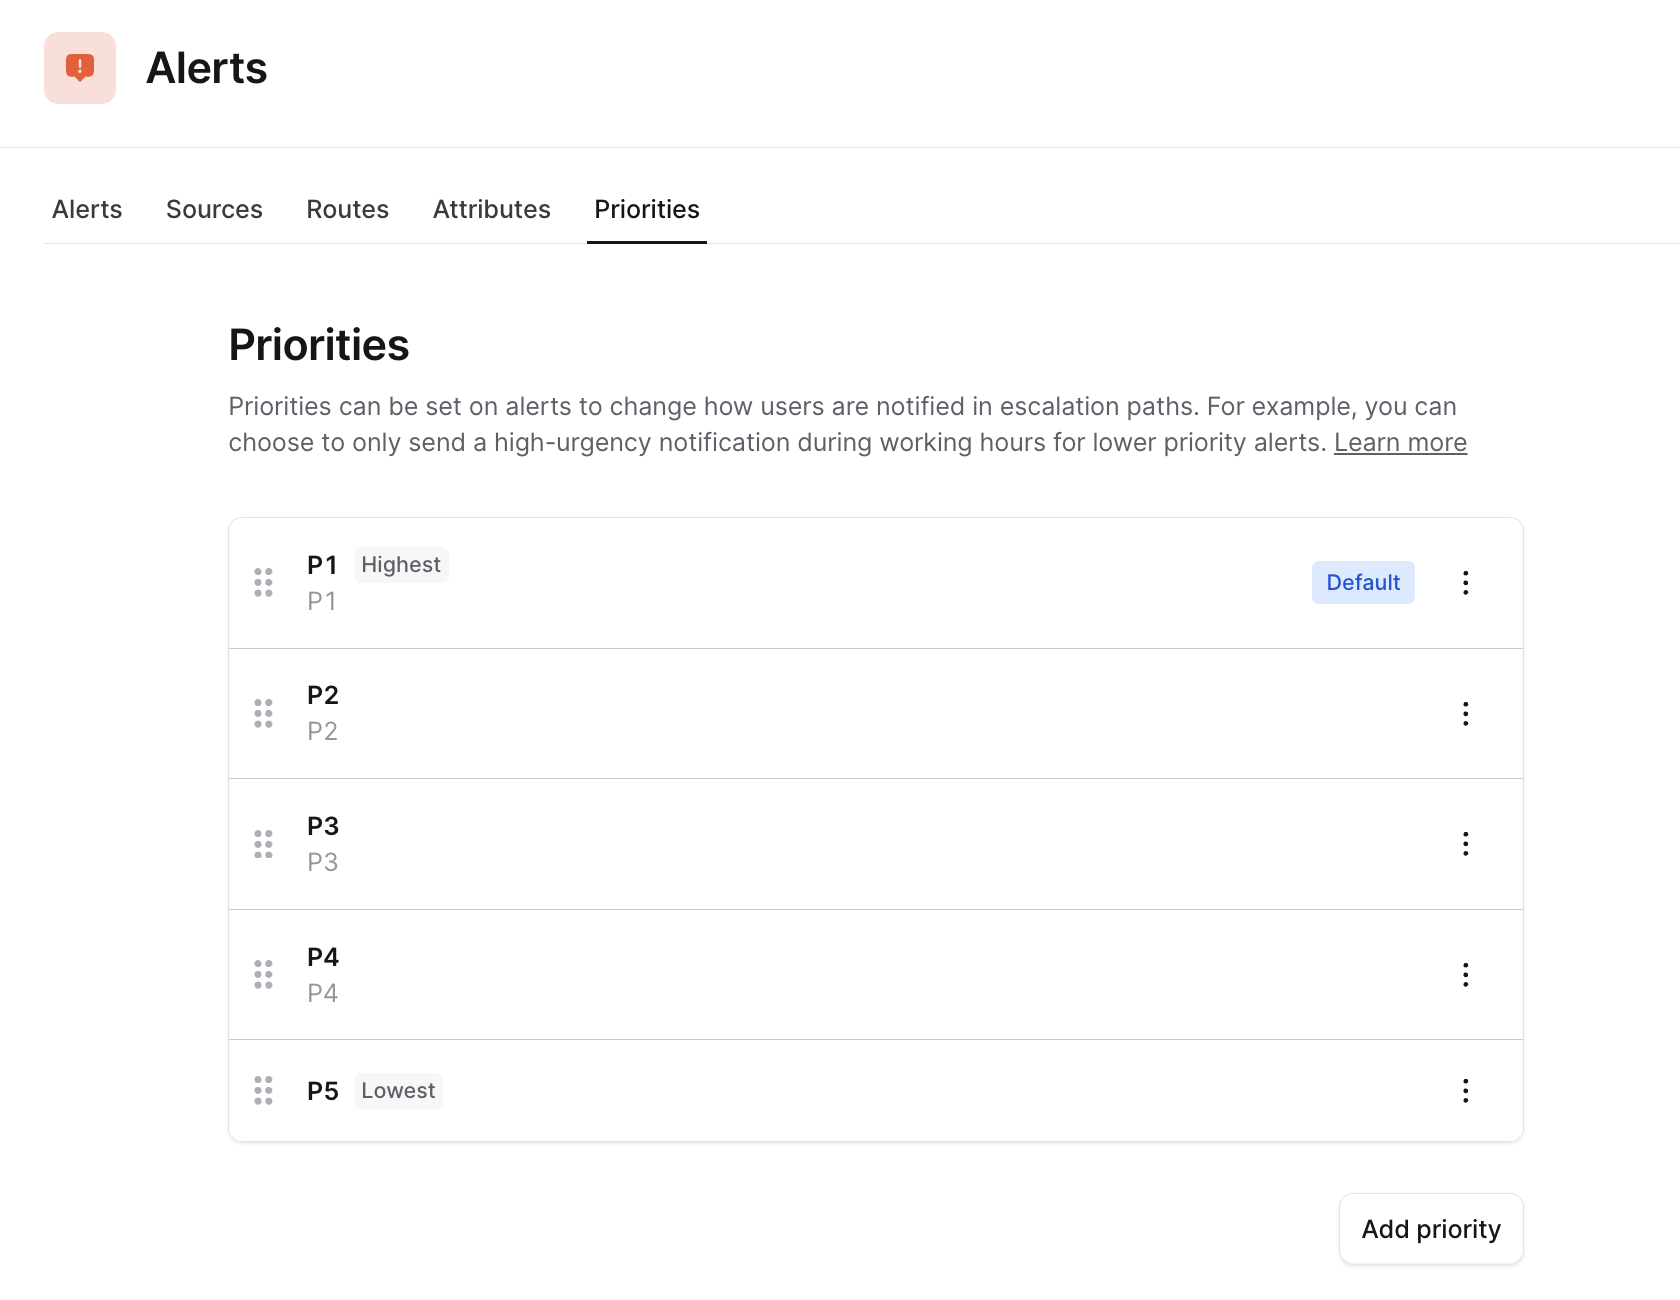
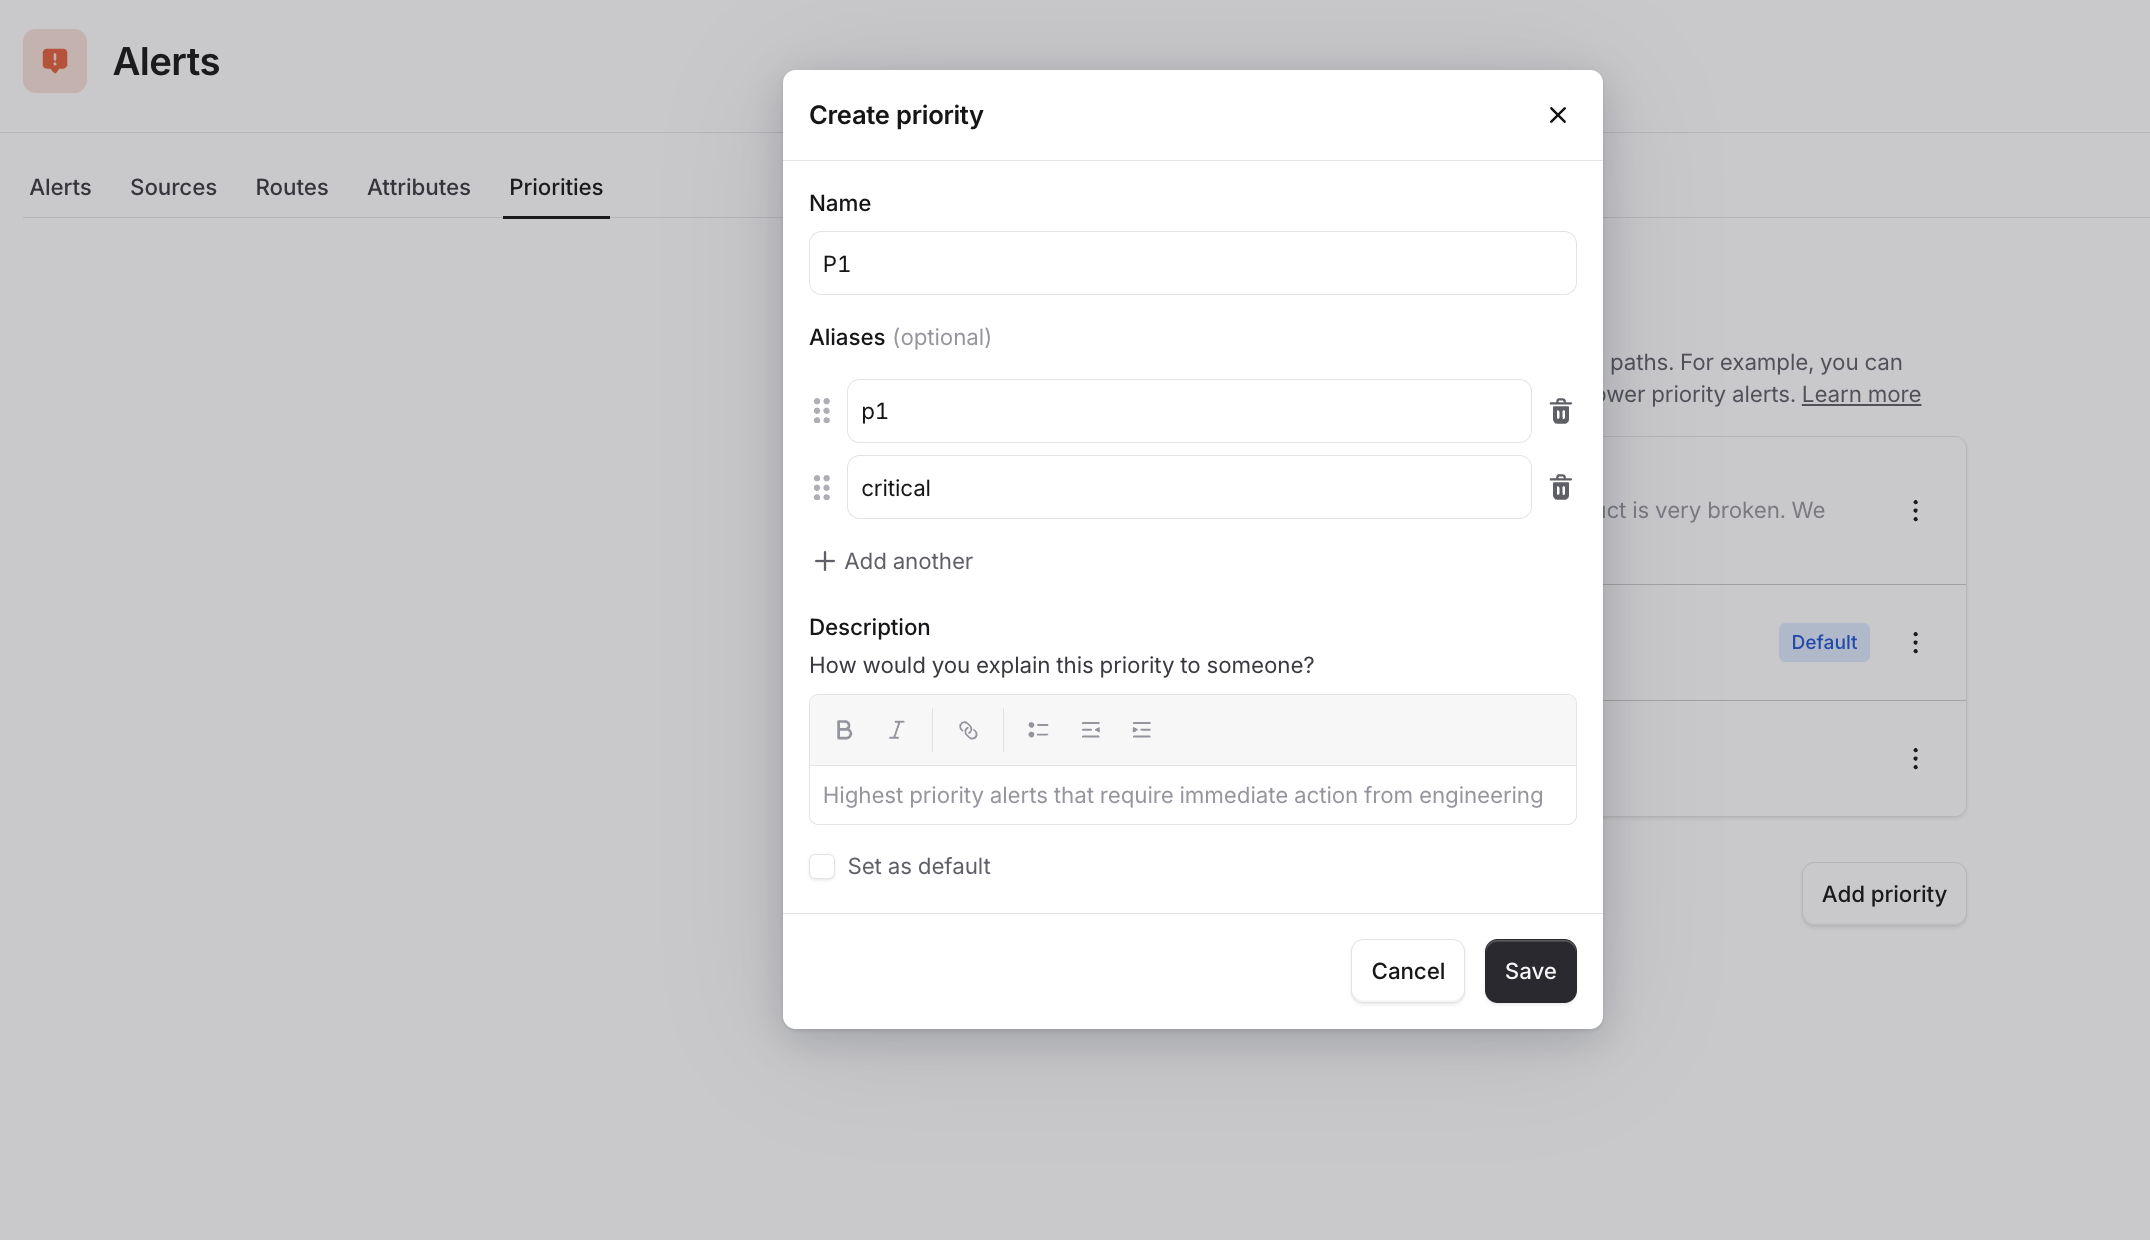
We have introduced Priorities as a first-class citizen to incident.io, meaning that you can configure it in the Priorities tab without creating them as a separate custom field.- Head to Priorities
- Add the priorities you use in your organization
- Choose a default priority, meaning that this is what we’ll suggest in your sources
Viewing priorities in Catalog
Catalog is the engine that powers automation and expressions in incident.io. It allows you to sync or create your organization structure like teams and services and then connecting them into other incident.io native types like escalation paths, schedules and priorities. Just head to Catalog > Alert Priority and you’ll be able to see all Priorities that you have created earlier in the Priorities -tab .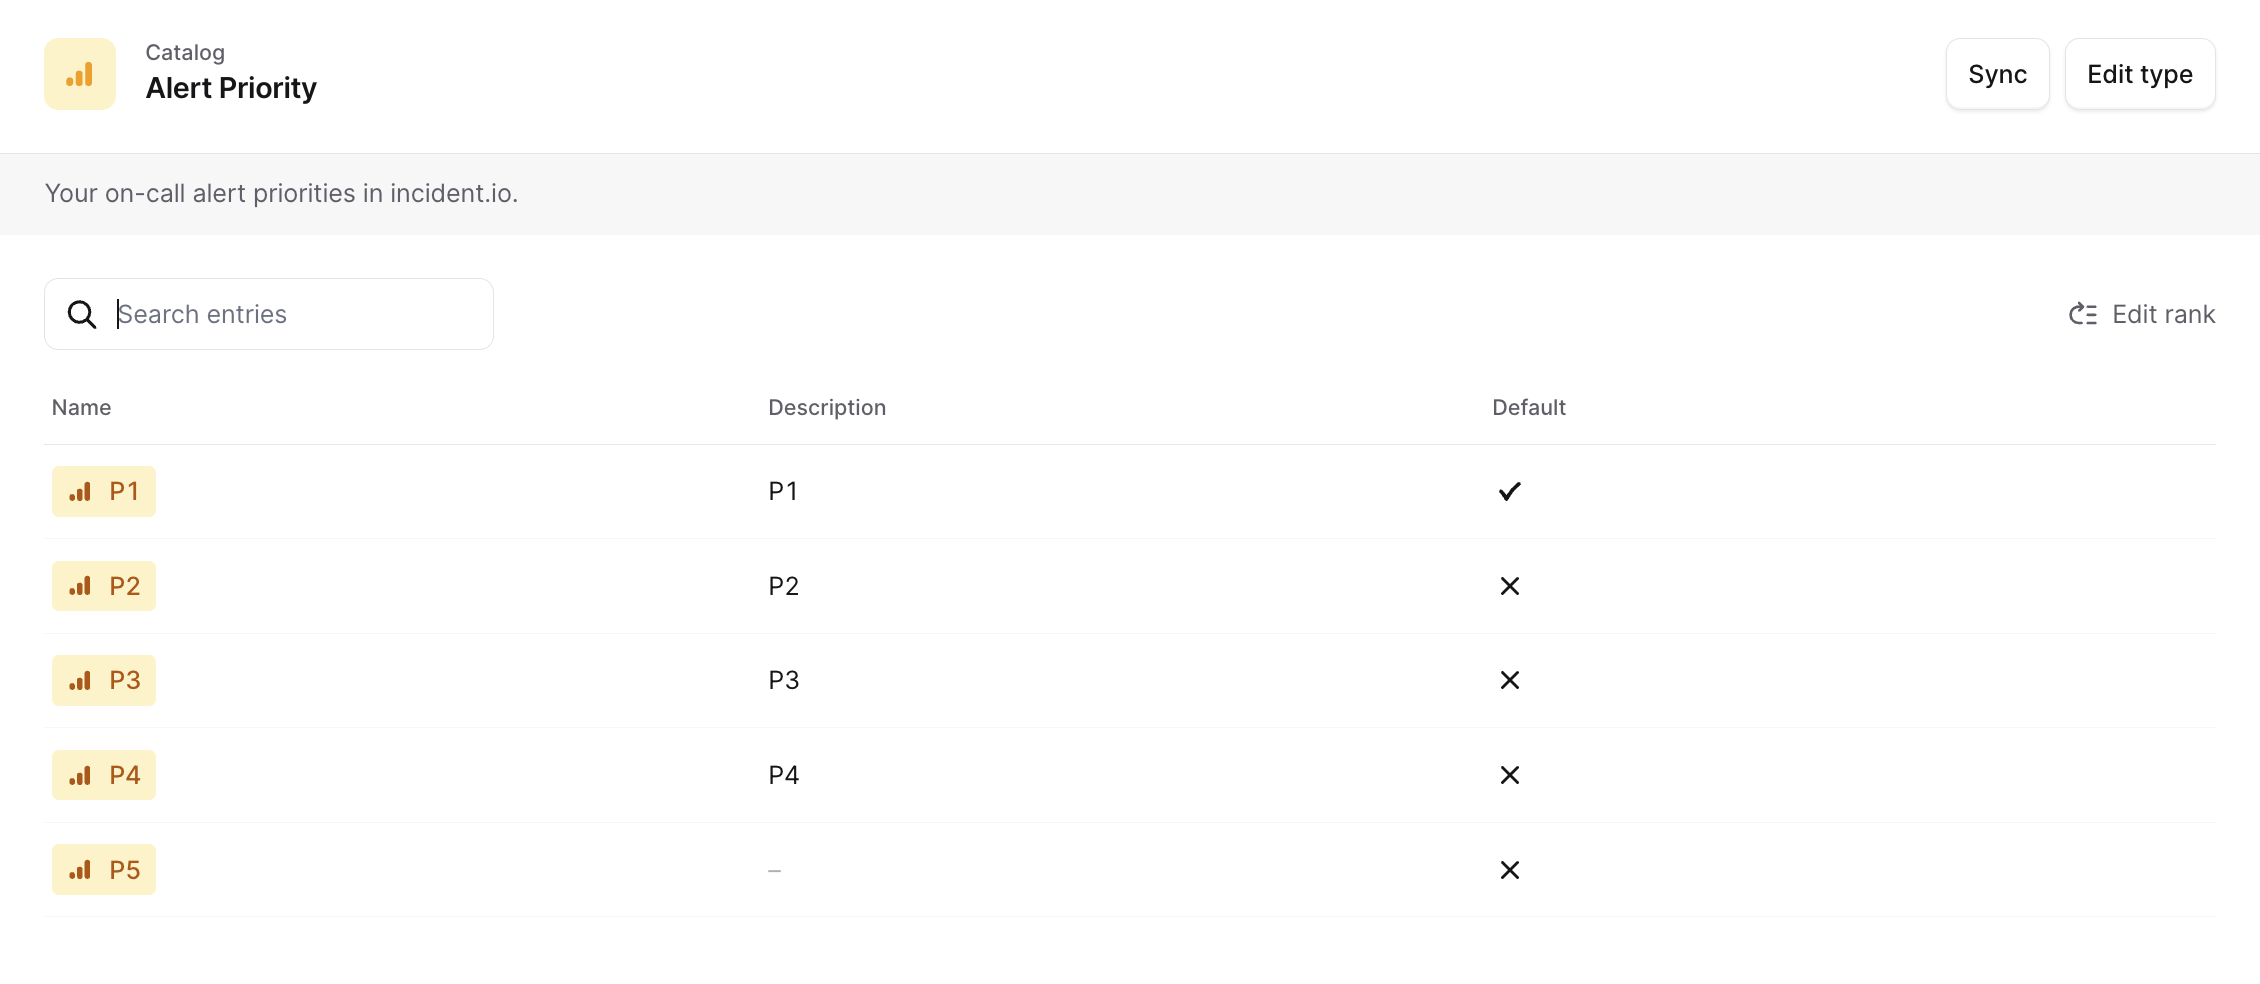
Setting priorities from your Alert source
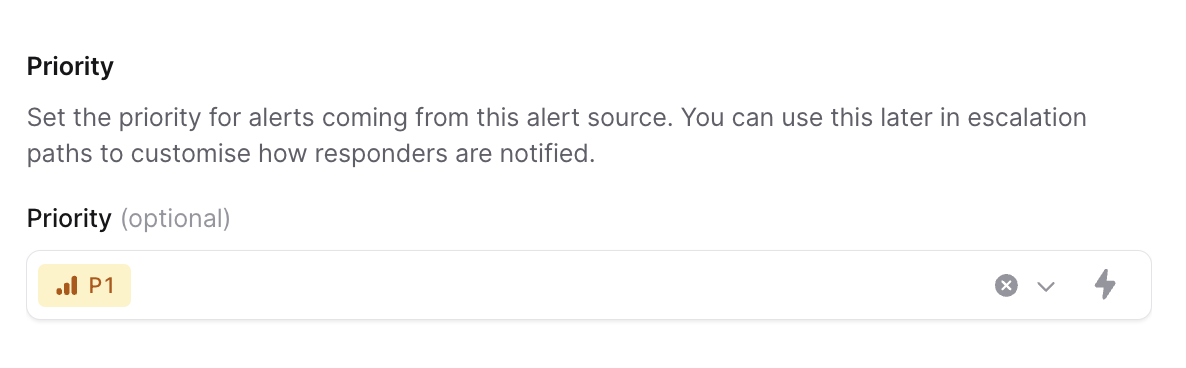
For any given alert, you’ll want to look at trying to set the alert priority based on the content within the alert itself e.g. if my alert indicates a higher level of priority in the payload, I probably want the same level of priority to be reflected in the Alert Priority set against that alert. To do so:- Head to the Alert source
- Scroll down to Priority towards the end of the alert attributes section
- Click ‘Use a variable’
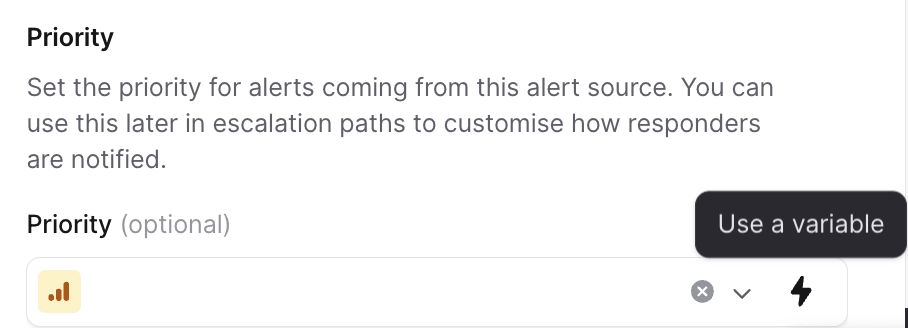
- Add new expression
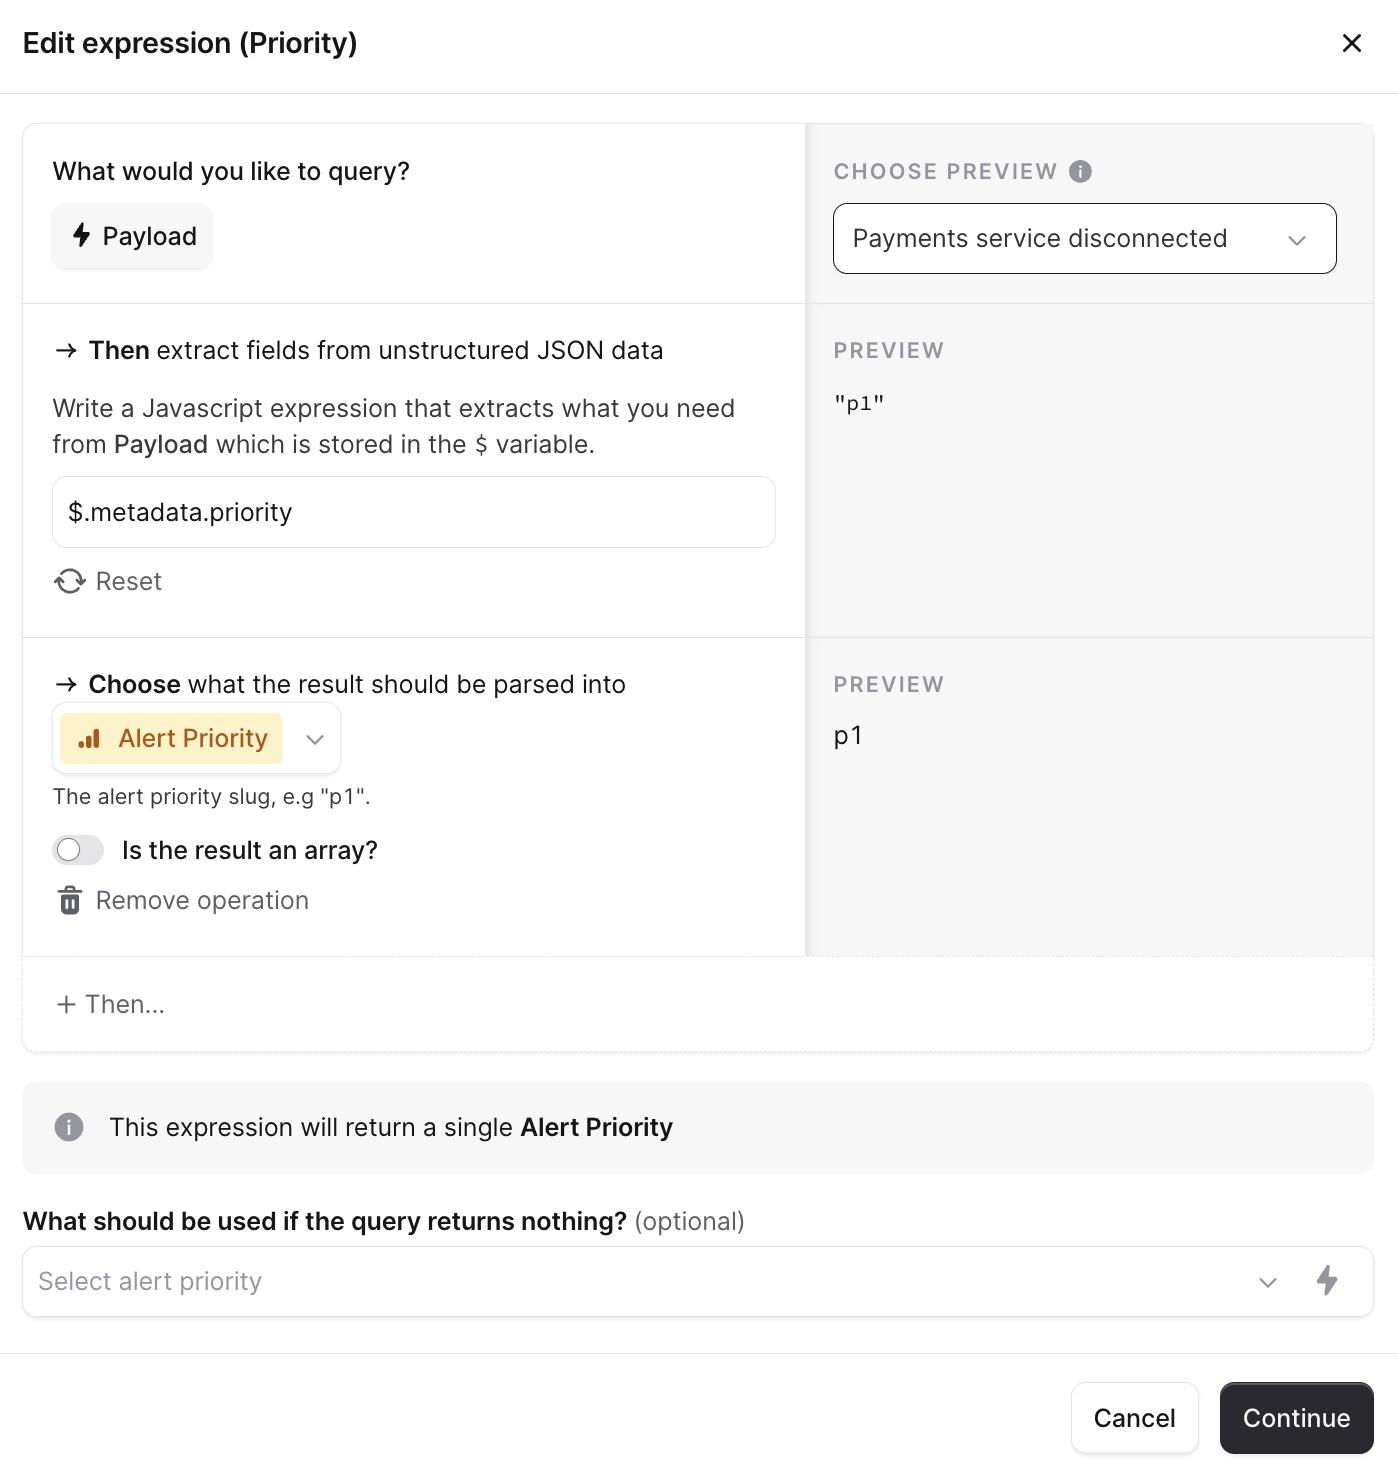
- Query and choose Payload
- Then write Javascript expression to extract what you need. In this simple case that is $.metadata.priority. Now you should see the example of the preview
- Choose ‘Alert priority’ as what the result should be parsed into
- And choose the empty value if needed
- Continue and Save
critical will return the P1 alert priority.
If you have Priorities set up as a Custom field
You might have created Priorities before we brought in our native ‘Alert priorities’. This is why you might not be able to use Priorities in Escalation paths. If this is the case, we would recommend you copying your custom field values to the Alert Priorities configuration and then deleting your custom field.Using Priorities in Escalation paths
You can now set up rules around priority in Escalation paths to ensure you page the right people at the right time without causing additional noise.- Head to Escalation paths
- Create a new escalation path or choose a current one
- Click ’+ Add branch’ and ‘Add condition’
- Choose Priority and which ones you want to add as a rule, in example Priority is P1 or P2
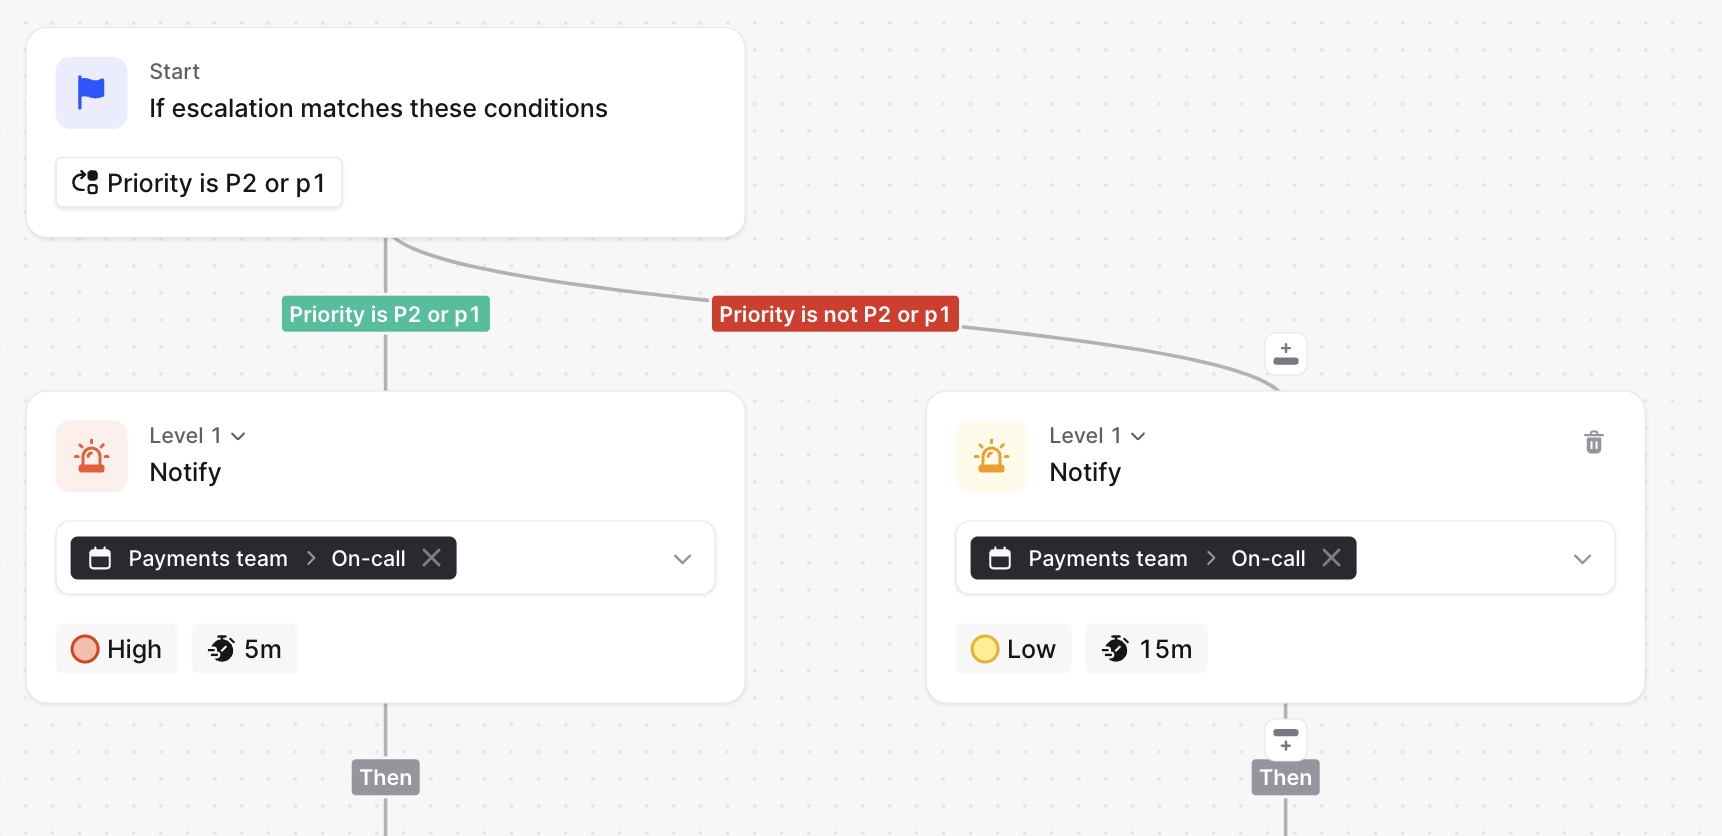
- Add more levels if needed
- Create or Save changes