Escalation path branches
You might have people who are on-call just during business hours, or where you only want to wake people up when the priority is the highest for an alert. You can now set up rules around priority and/or working hours to ensure you page the right people at the right time without causing additional noise.How does it work?
You can start creating a new escalation path from scratch or edit your current paths. With this feature, you can- Set up working hours for all levels in the escalation path
- Configure priorities in incident.io and connect them to your alert source
- Configure notifications for your devices for high and low-urgency
- Create branches based on priority and/or working hours
- Choose which levels should send high or low-urgency notifications
- Choose to escalate either within a time window or based on your working hours
1. Set up working hours for all levels in the escalation path
You can define one or more named sets of working hours for your escalation path — for example, separate configs for your UK and US teams, each with their own days, times, and timezone. These are then referenced in branches (to route escalations differently based on the time of day) and in ack deadlines (to wait until a team’s working hours begin or end before escalating further).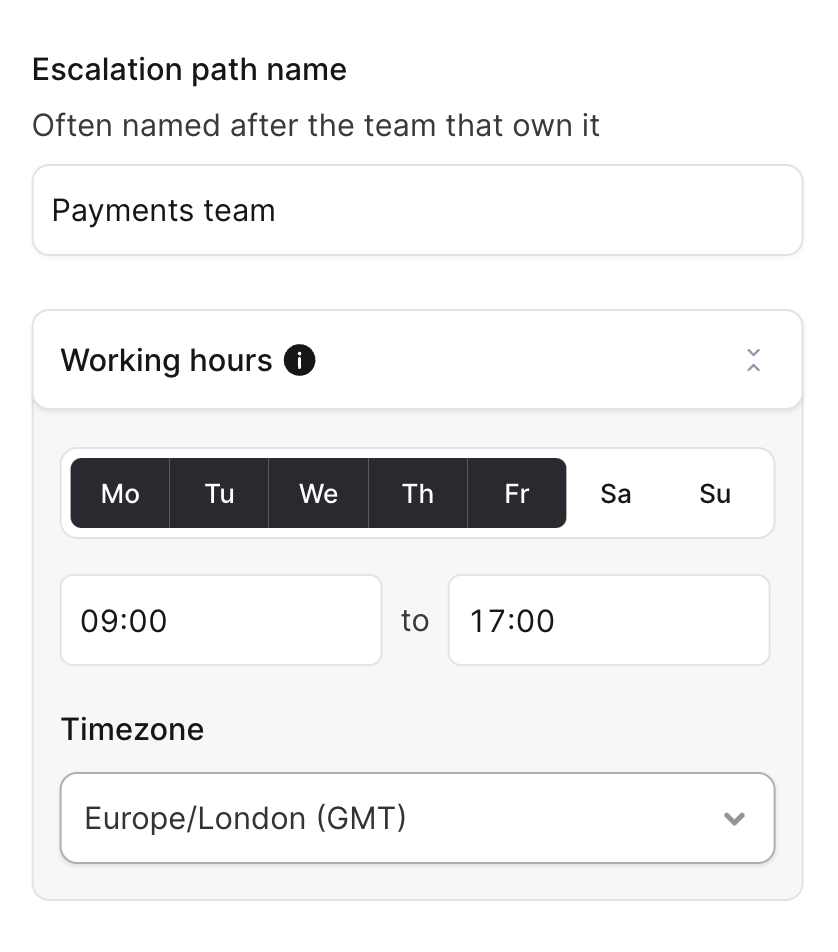
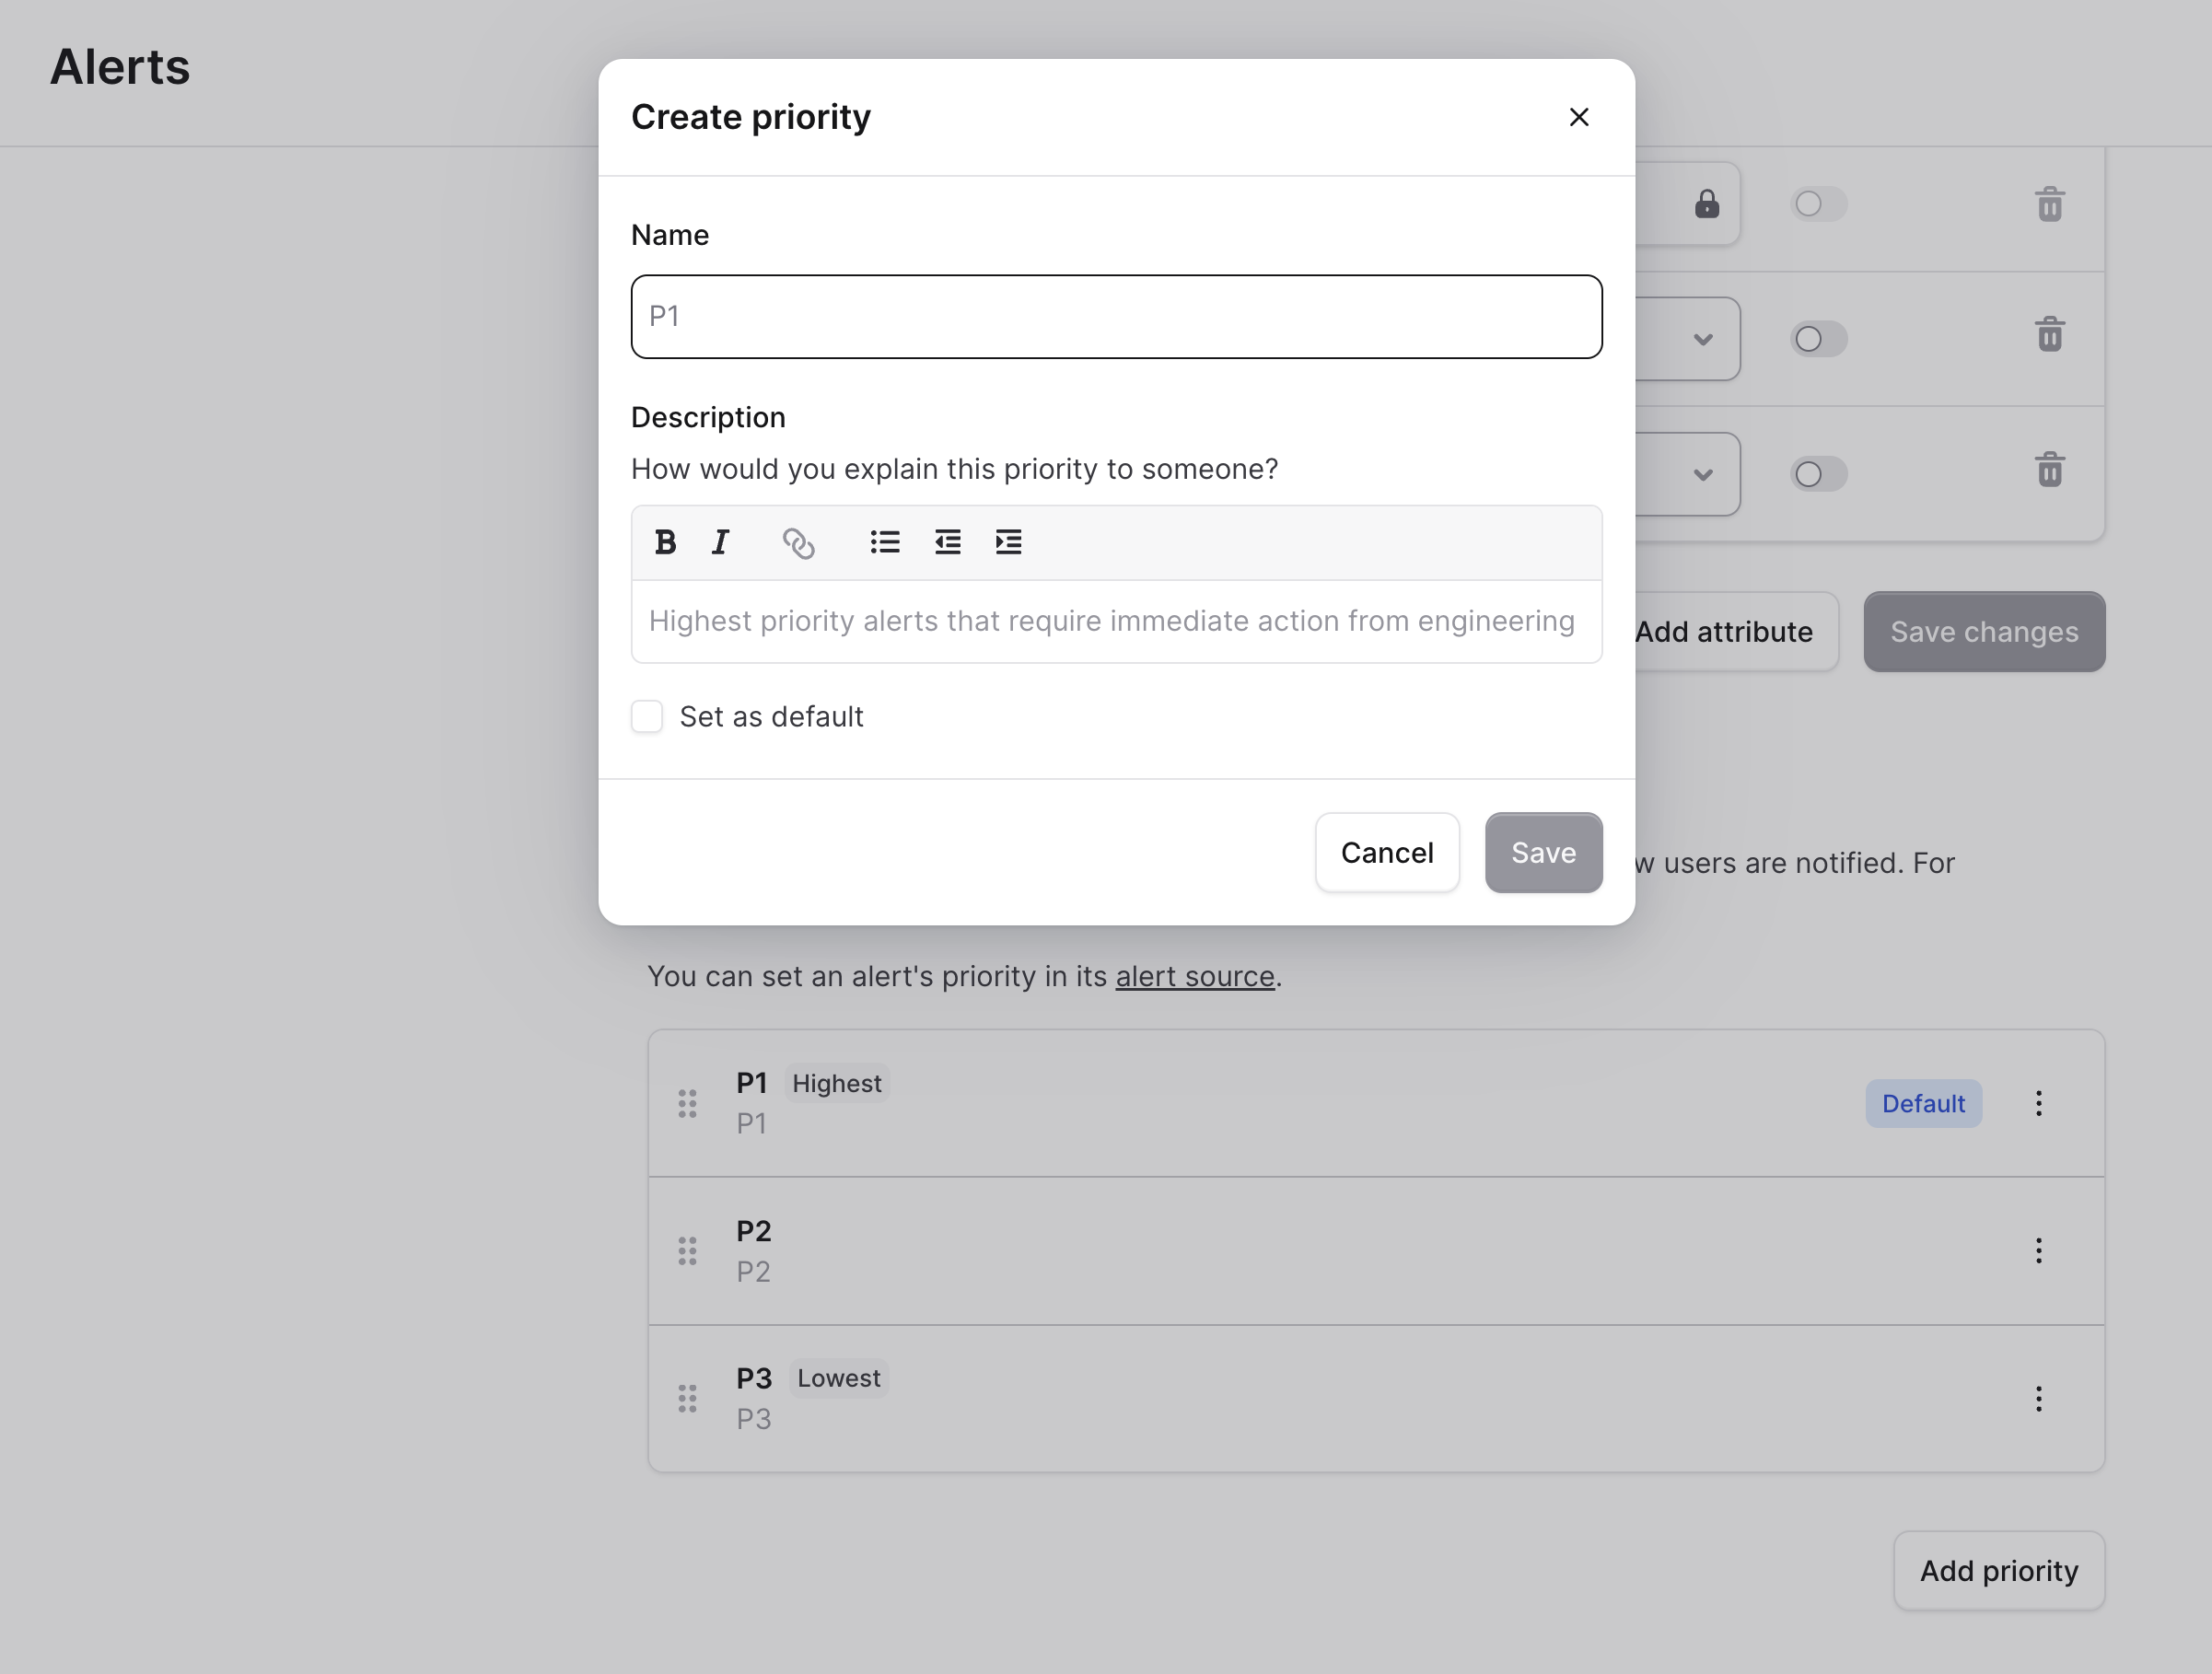
2. Configure priorities and connect them to your alert source
To use priorities in the escalation path branches, you can create them in Alert Attribute settings. Priorities are now a first-class citizen in incident.io, which means that you wouldn’t need to create those as a custom field in the catalog just to connect with your alert source.Create your priorities in incident.io
- Head to Alert Attribute settings
- Create Priorities, organize them with drag and drop and choose a default value
- After creating the priorities, head to your Alert sources to set up the default priority per source.
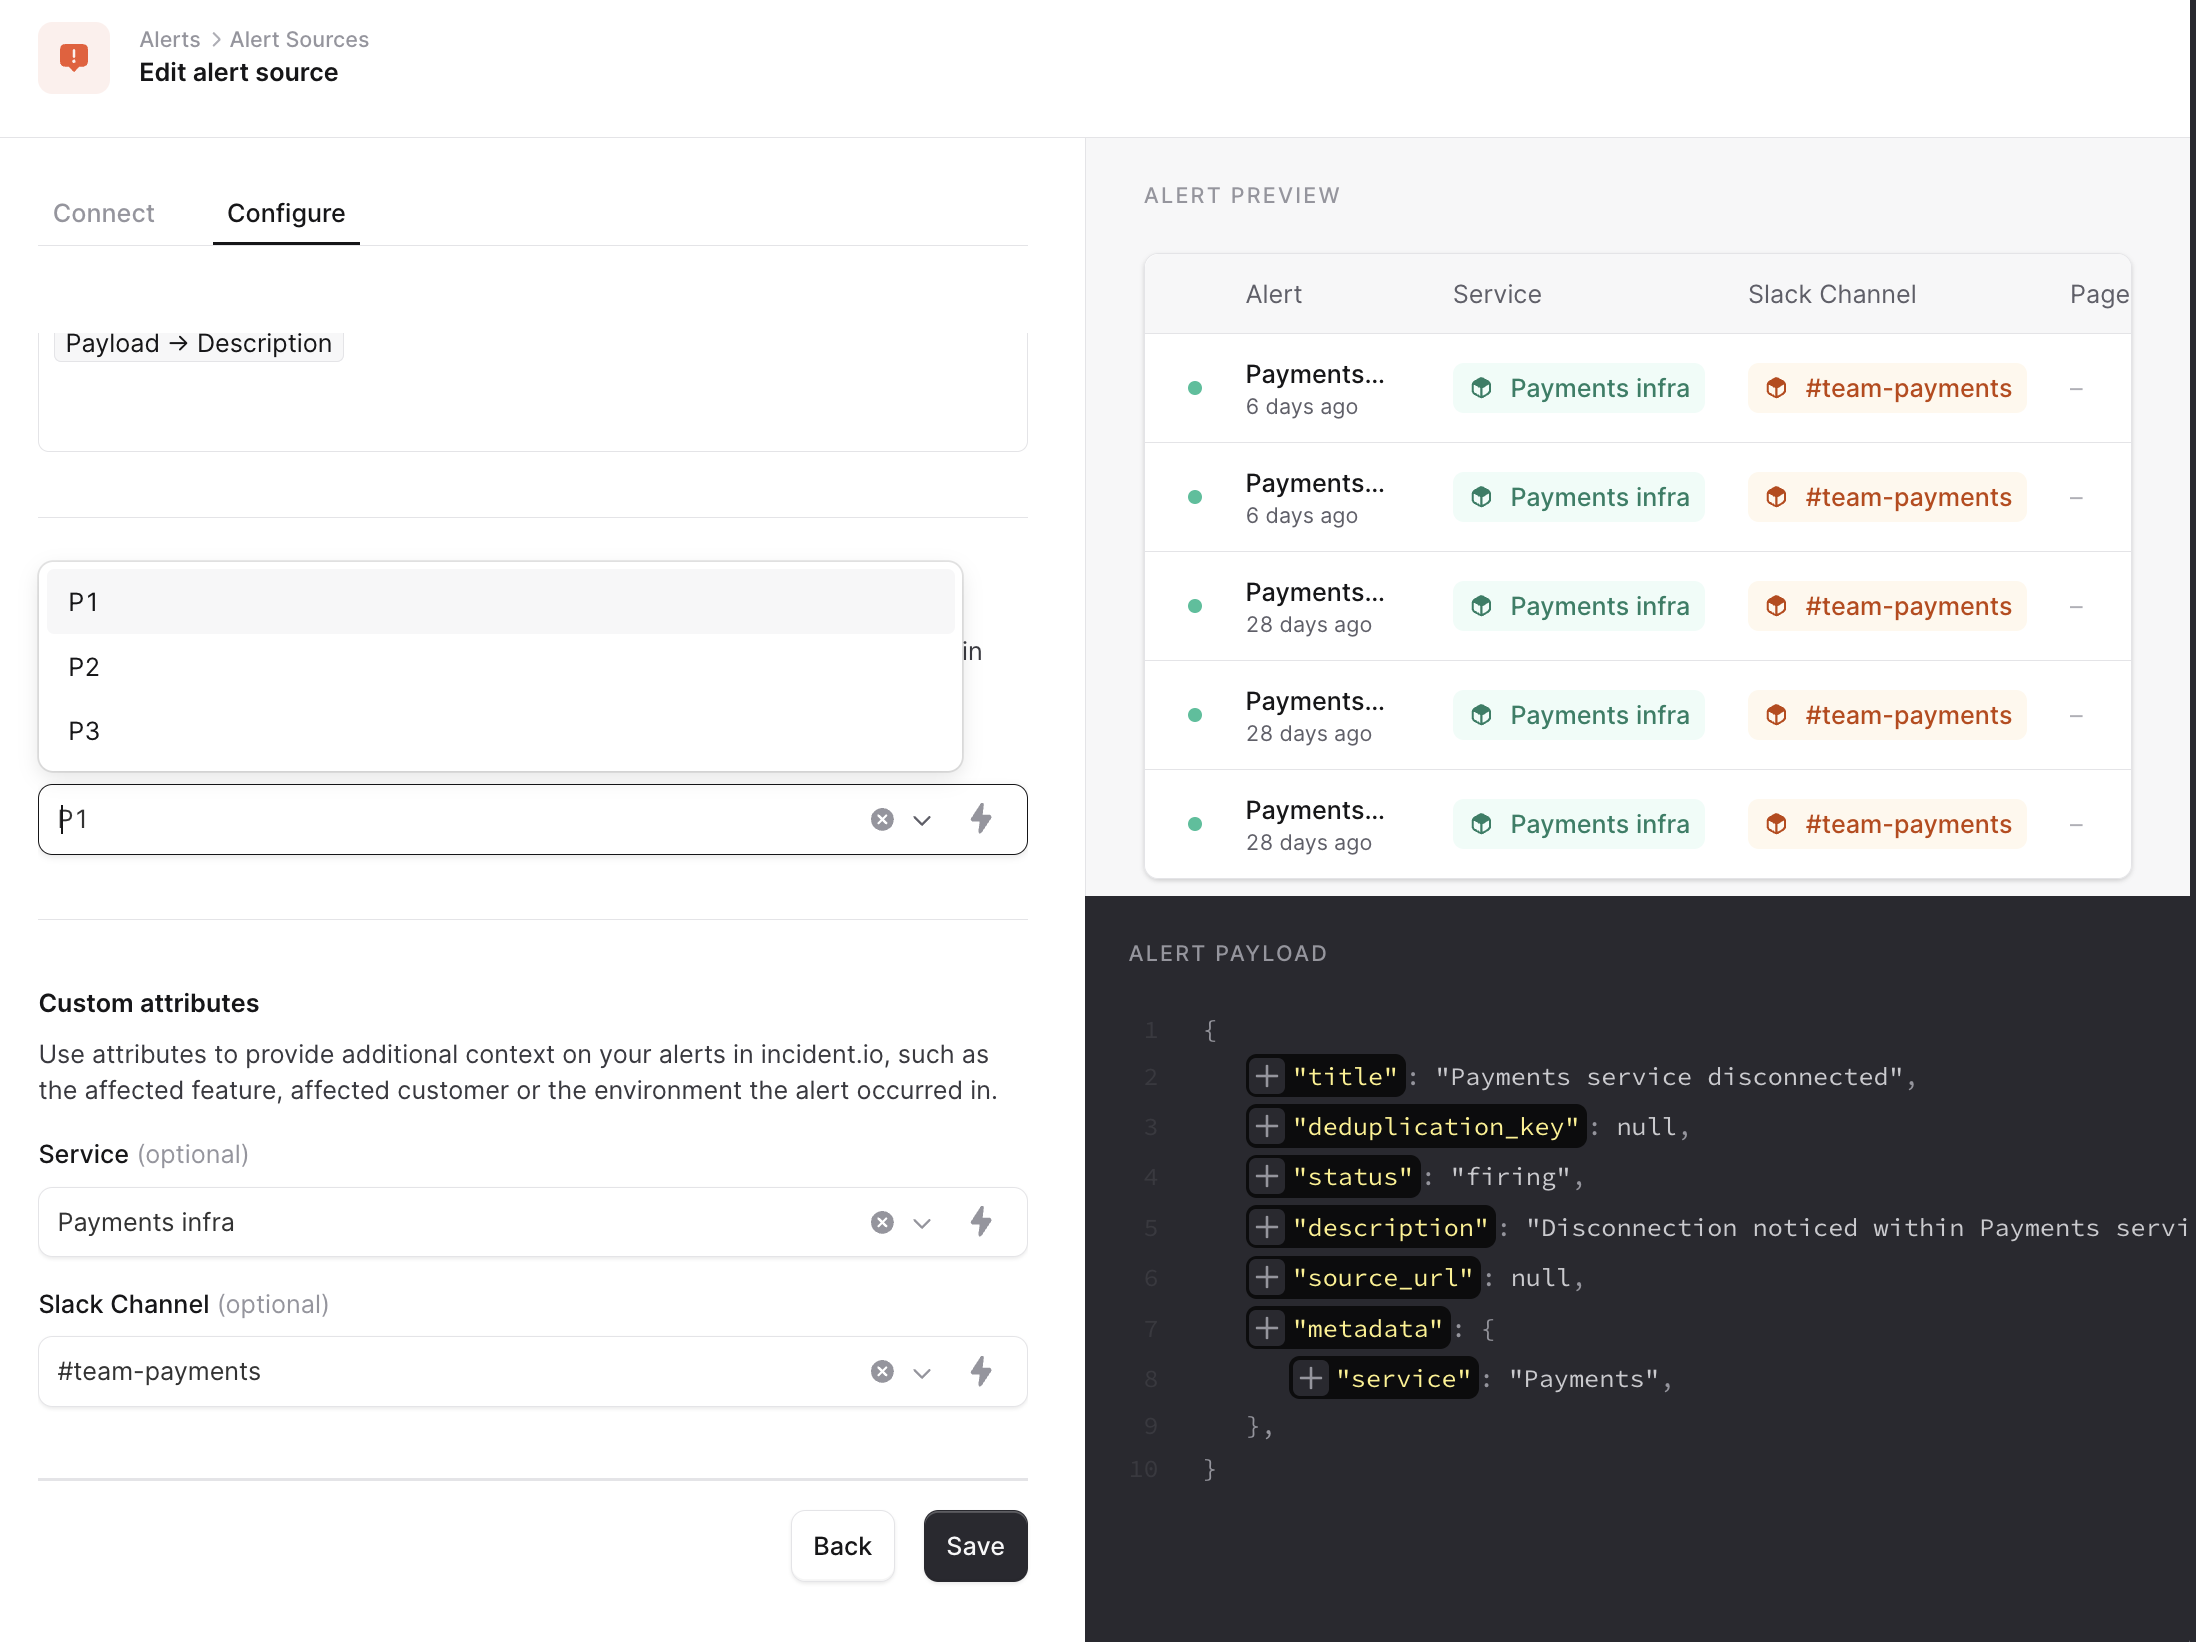
Bring your priorities from your alert source i.e. Datadog
- Go to your Alert sources and choose an alert source
- Go to Configure tab and scroll down to Priorities
- Choose to use a variable and Add new Expression
- Choose query
- Choose the payload and Parse
- Write to field
$.metadata.priority(Example, can be a different payload variable name) - Choose Alert priority from the drop-down
- Choose the default if the query doesn’t return the Alert priority
- Save the setting by clicking ‘Add’
- Save the alert source
3. Configure notifications for your devices for high and low-urgency
If you want to enable your workflows to use different notifications depending on priority or working hour branches, you can head to your Preferences and choose the notifications you’d like to receive in both cases.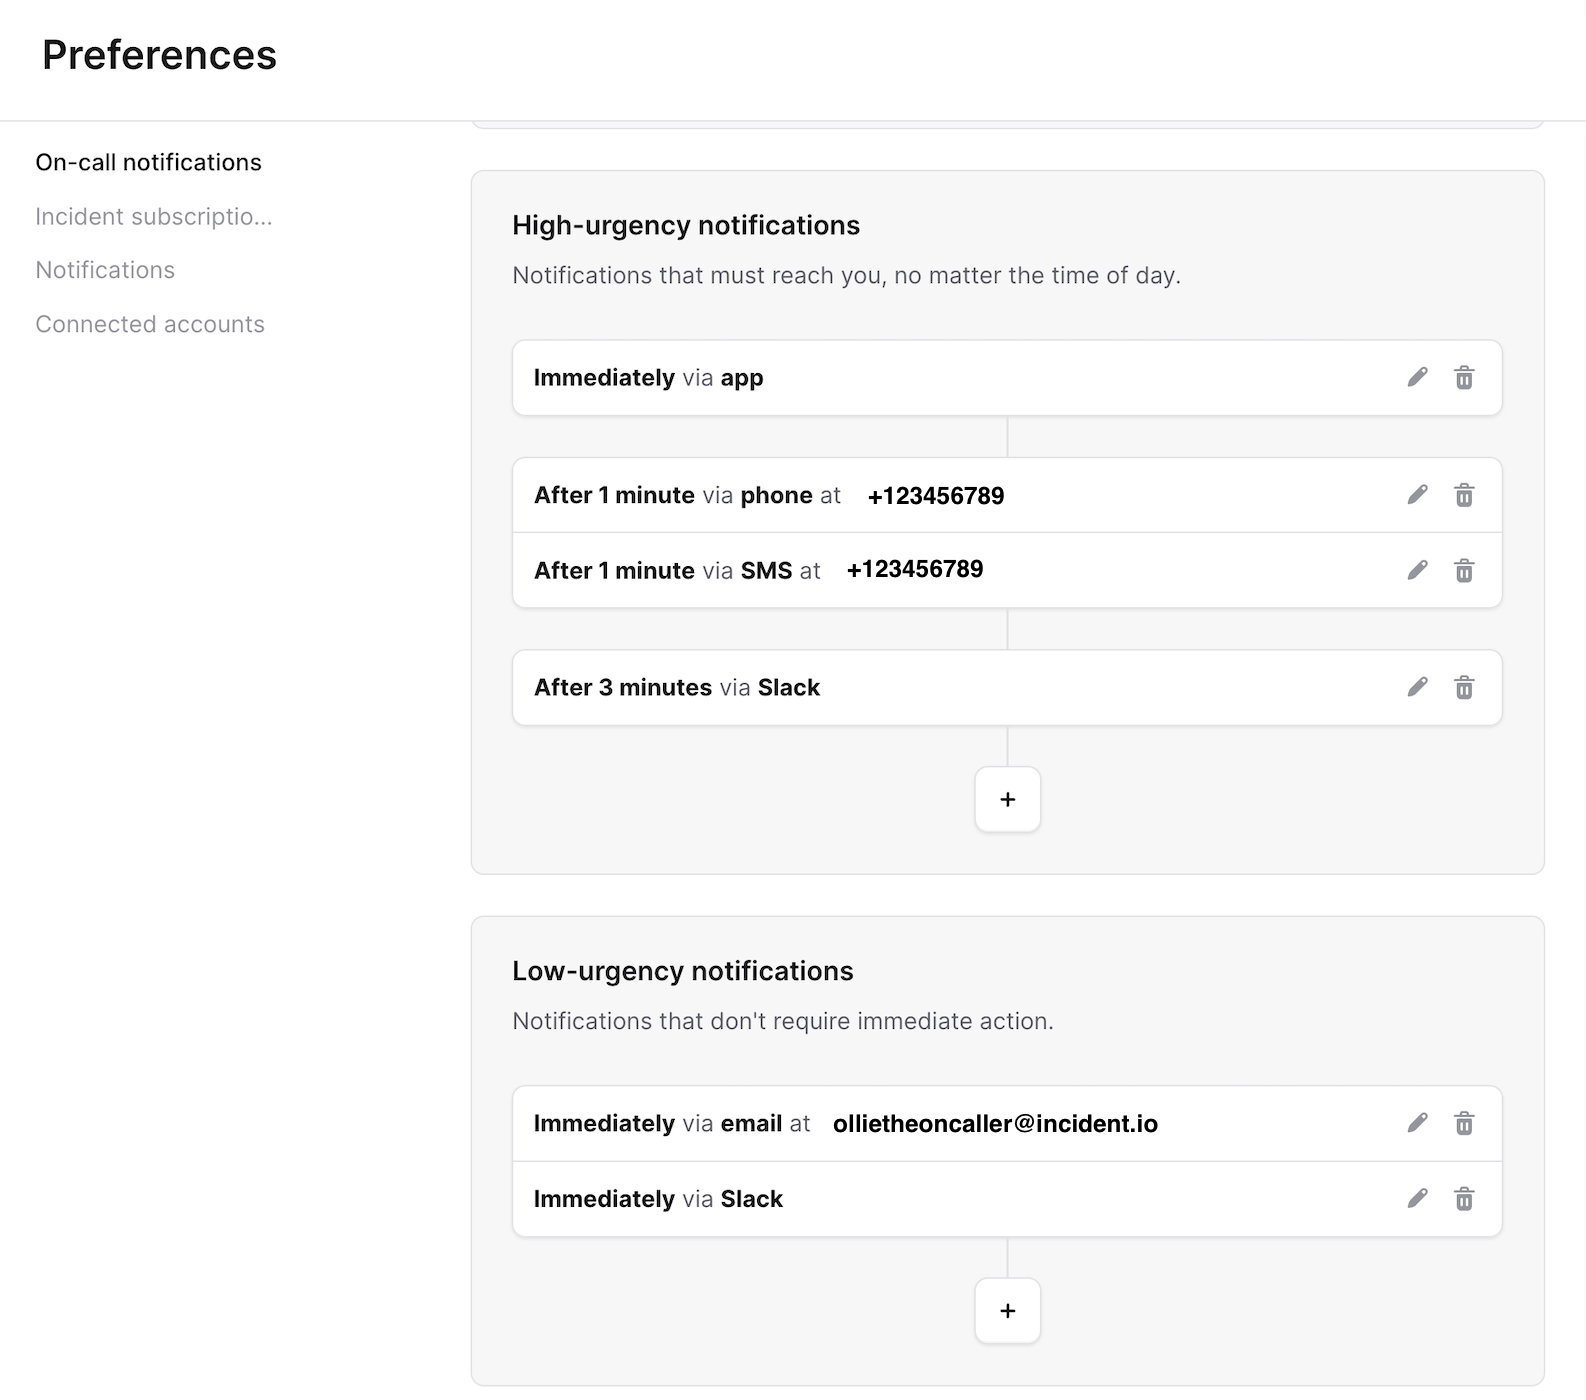
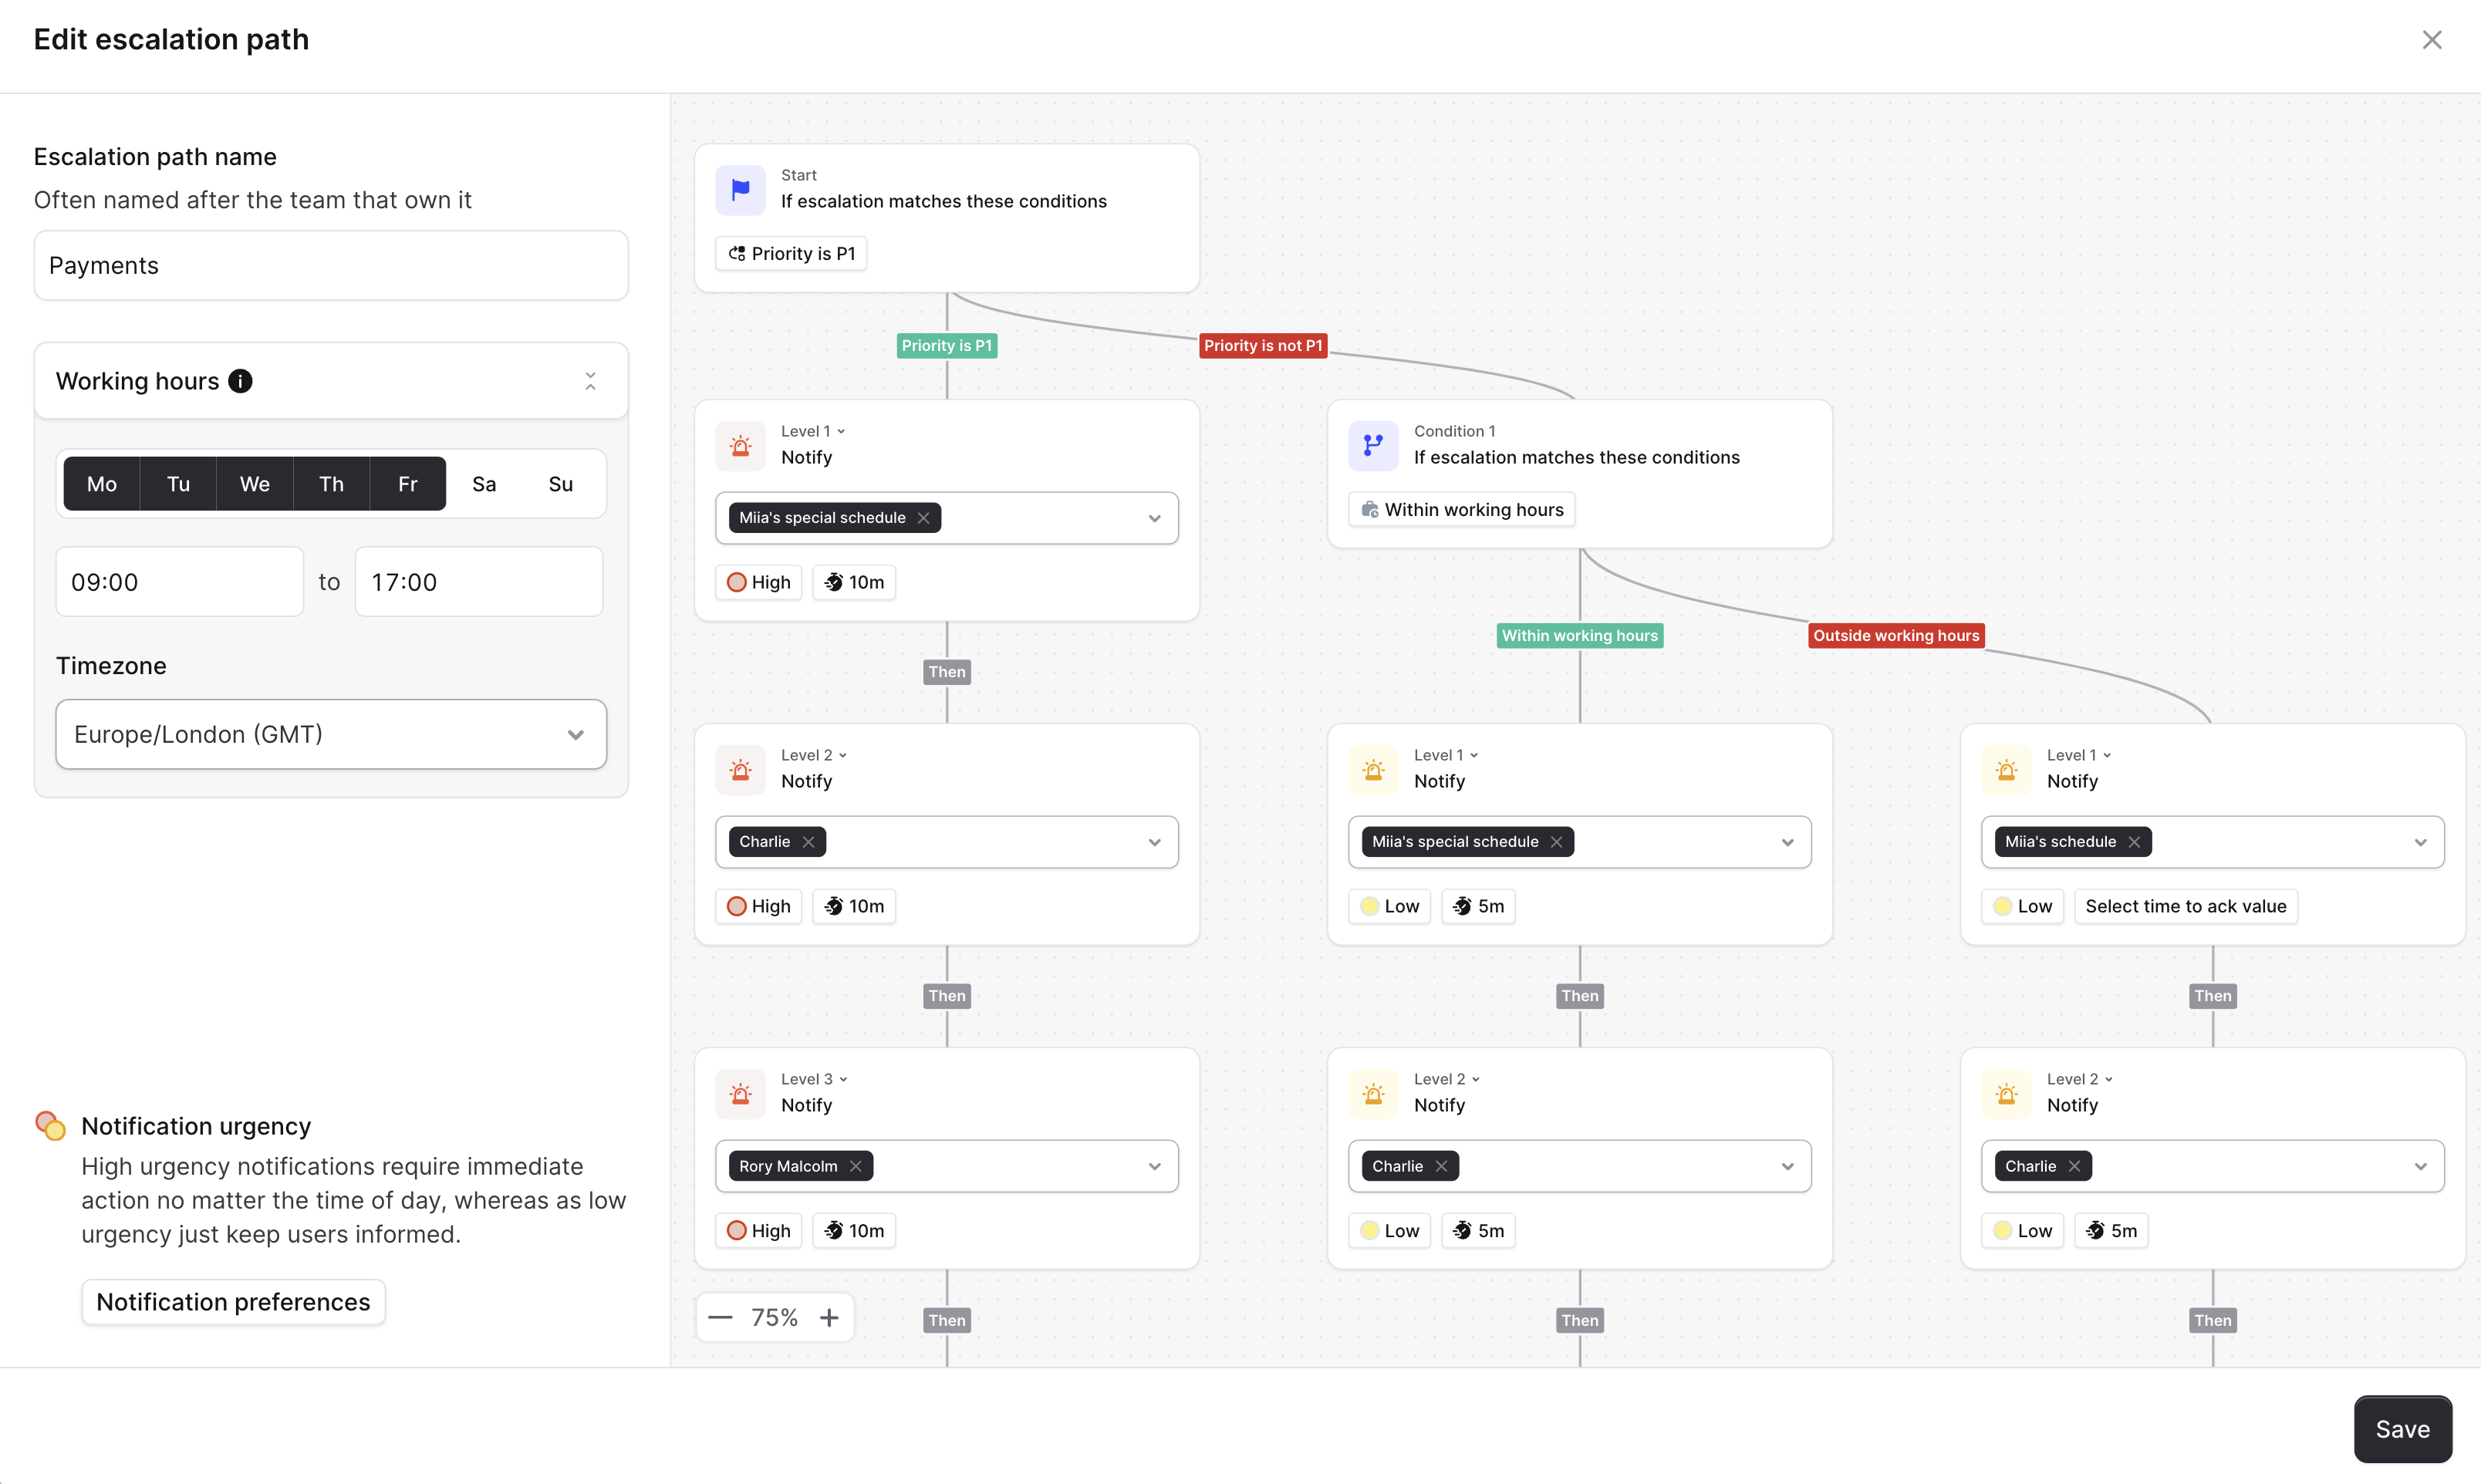
4. Create branches based on priority and/or working hours
Now that you have all configurations created, you can start your path with or without conditions. Conditions we offer at the moment are working hours and priority. You can choose to start from either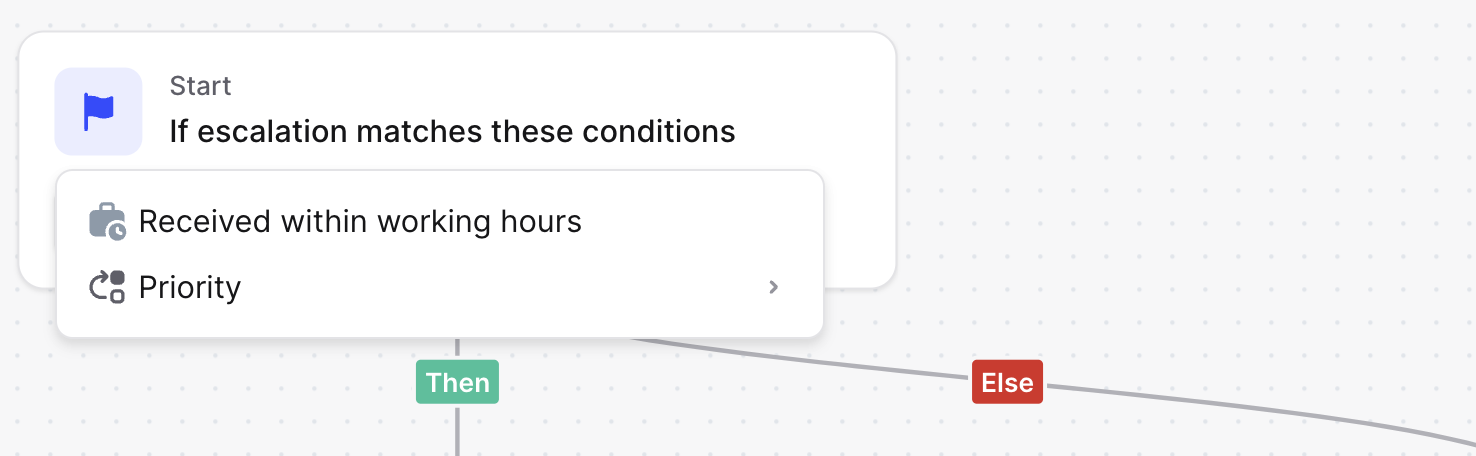
- 1st branch will send Alerts within working hours with high urgency notifications to the person on call from the Payments team and wait 10 minutes until escalating to the next level
- Second branch
- If P1, will send Alerts outside of working hours with high urgency notifications to the person on call from the Payments team and wait 5 minutes before escalating to the next level
- If other than P1, will send Alerts outside working hours with low urgency notifications to the person on call from the Payments team and wait until working hours begin for that person to acknowledge, before escalating to the next level

5. Choose which levels should send high or low-urgency notifications
Earlier in this article, we showed how every person can set up their preferences on high and low-urgency alerts. To set them up in the Escalation path, just choose either High or Low in every level to choose how you’d want to notify the users.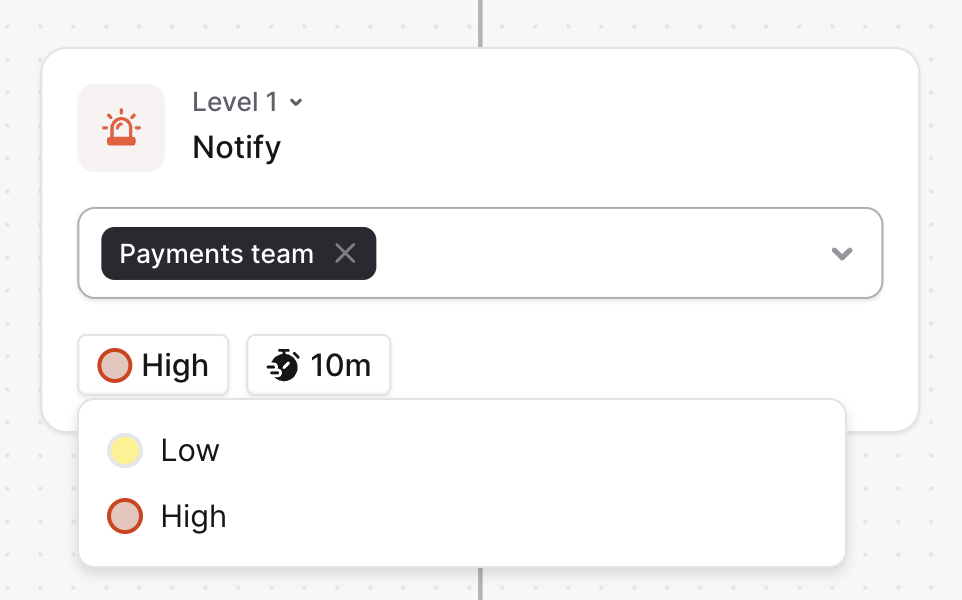
6. Choose to escalate either within a time window or based on your working hours
If you have used Working hours as a condition in your branch, you’ll receive a few new options in escalation delays: Working hours begin and working hours end. This means that people who are on call will receive the notifications at that moment, but we’ll wait until that time before we escalate to the next level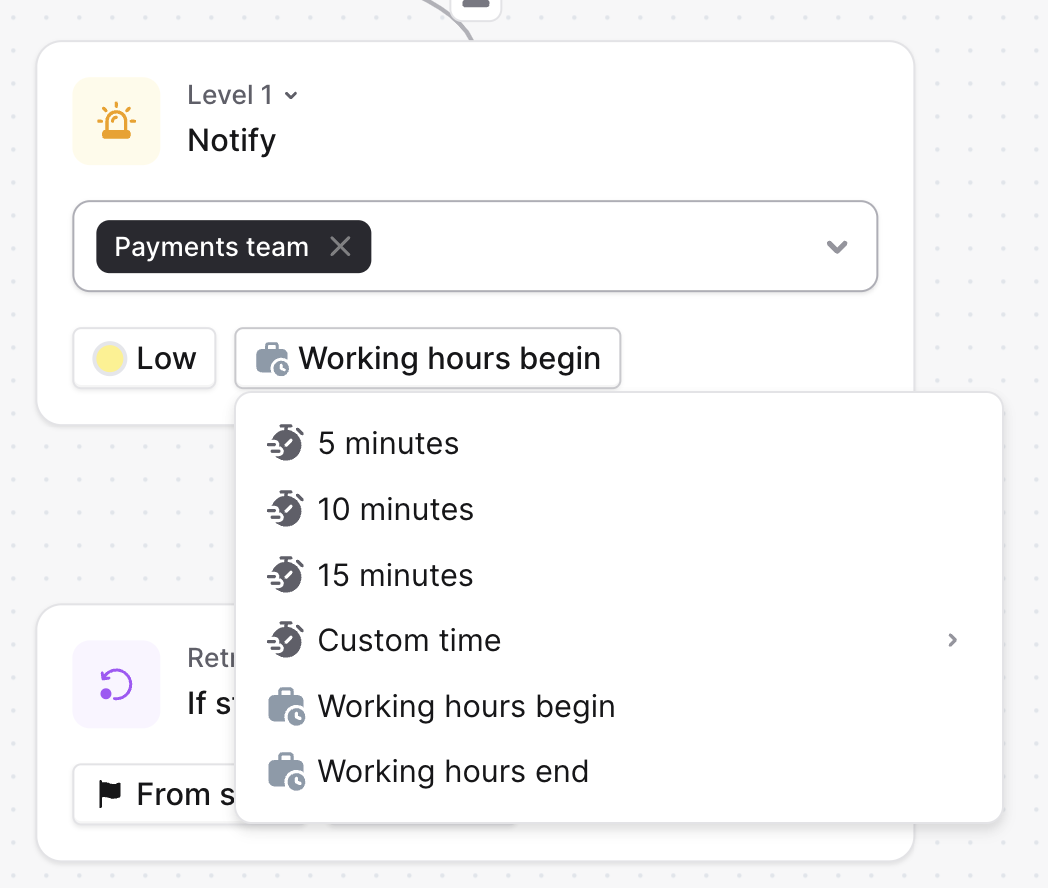
Escalate to a channel
Choose when an alert should be escalated to a Slack or Microsoft Teams channel of your choice where anyone can acknowledge and start resolving the alert.- Head to Escalation paths
- Click ‘Level’ to choose a channel
- Search for the channel — both public and private channels are supported
- Save your escalation path
Example use cases
- You can send all escalations to a shared Slack channel to let a group of people know that something is wrong, but still escalate to an actual responder at the same time by selecting “Don’t wait” as a time to acknowledge option.
- You can set up a branch to deviate low urgency escalations to a Slack channel.
Good to know
- If you have an escalation path that first pages a slack channel, then the person being on call in the next level will be shown as ‘Level 1’ in your On-call status
- If you have an escalation path that first pages someone else, then a slack channel, then you, you’ll be shown as ‘Level 2’ in your On-call status
Page a schedule
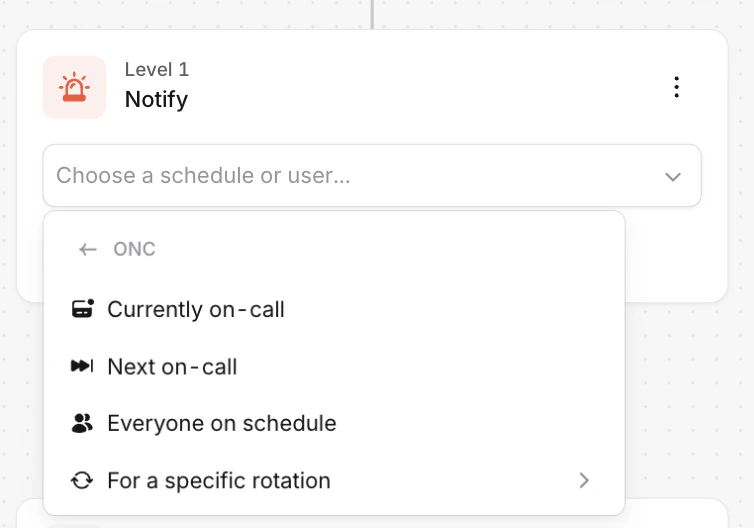
When you page a schedule from an escalation level, you can choose who to notify. After first selecting a schedule, the dropdown gives you three schedule-wide options, plus a sub-menu for narrowing the level to a specific rotation:- Currently on-call: page the person on call across the schedule right now
- Next on-call: page the next person scheduled to come on call
- Everyone on schedule: page everyone on call at the same time
- For a specific rotation: narrow any of the above to a single rotation within the schedule
Currently on-call
The default when you select a schedule. Pages whoever is on call right now, combining all rotations in the schedule.Next on-call
Pages whoever is scheduled to come on call next. This is most useful as a fallback level. Pair it with Currently on-call on an earlier level so that if the current on-call doesn’t acknowledge, the escalation reaches a different person. Next on-call always finds a real person to page:- If someone is currently on call, it pages whoever is due to take over from them, skipping the current on-call user, even if their next shift is back-to-back.
- If nobody is currently on call (for example, outside working hours), it pages the next person coming on, even if that isn’t until later in the week.
Everyone on schedule
Page everyone at the same time in a schedule. When choosing this, everyone in the same level will be paged at the same time. By choosing ‘Everyone’ it means that we will page everyone in that level. If a person from this level acks, we will not escalate to the next level. By default, we will continue to notify all people in the level until their notification preferences end, though you can configure the path to cancel notifications for others once someone acknowledges. Read more about notification preferences here.For a specific rotation
Choosing this opens a sub-menu listing each rotation in the schedule. Pick a rotation, then choose Currently on-call, Next on-call, or Everyone to apply that routing option to just that rotation.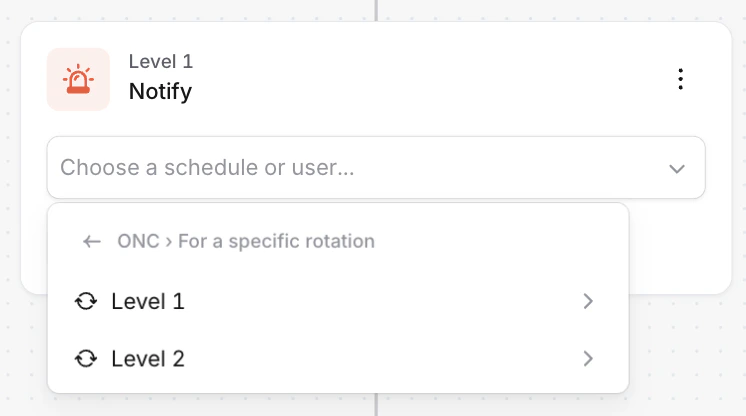
How to set it up
- Head to Escalation paths
- Open a level and choose a schedule
- Pick a routing option from the dropdown: Currently on-call, Next on-call, Everyone on schedule, or For a specific rotation
- If you picked For a specific rotation, choose the rotation, then choose the routing option for that rotation
- Save the path
Good to know
- ‘All at once’ setting will only page those people in a schedule who are on call
- For cycling through responders within a level, see Round Robin in Escalation paths
Delay escalation
Add a delay node to pause an escalation before it proceeds to the next level. This is useful for alerts that may resolve on their own, or for holding off on paging someone until working hours. Add a delay node in the escalation path editor just like any other step. Choose your delay mode and save the path. When an alert triggers the escalation, it pauses at the delay node for the configured period. If the alert resolves while waiting, the escalation stops entirely. Delay nodes have two modes:- Delay for a fixed duration: Pause for a set number of minutes (e.g., 5, 10, or 15 minutes) before continuing. If the alert resolves during the delay, nobody gets paged.
- Delay until working hours: Hold the escalation until the configured working hours begin, so responders aren’t woken up overnight for non-critical alerts.