

Every plan already includes single sign-on through Sign in with Slack or Sign in with Microsoft. Connecting your own identity provider adds sign-in managed independently of Slack or Teams, and is available on the Pro and Enterprise plans.
Connecting your identity provider
You’ll need the Manage security settings permission in incident.io and admin access to your IdP.1
Connect and verify your domain
Go to Settings → Security and, under Single sign-on (SAML), click Connect.
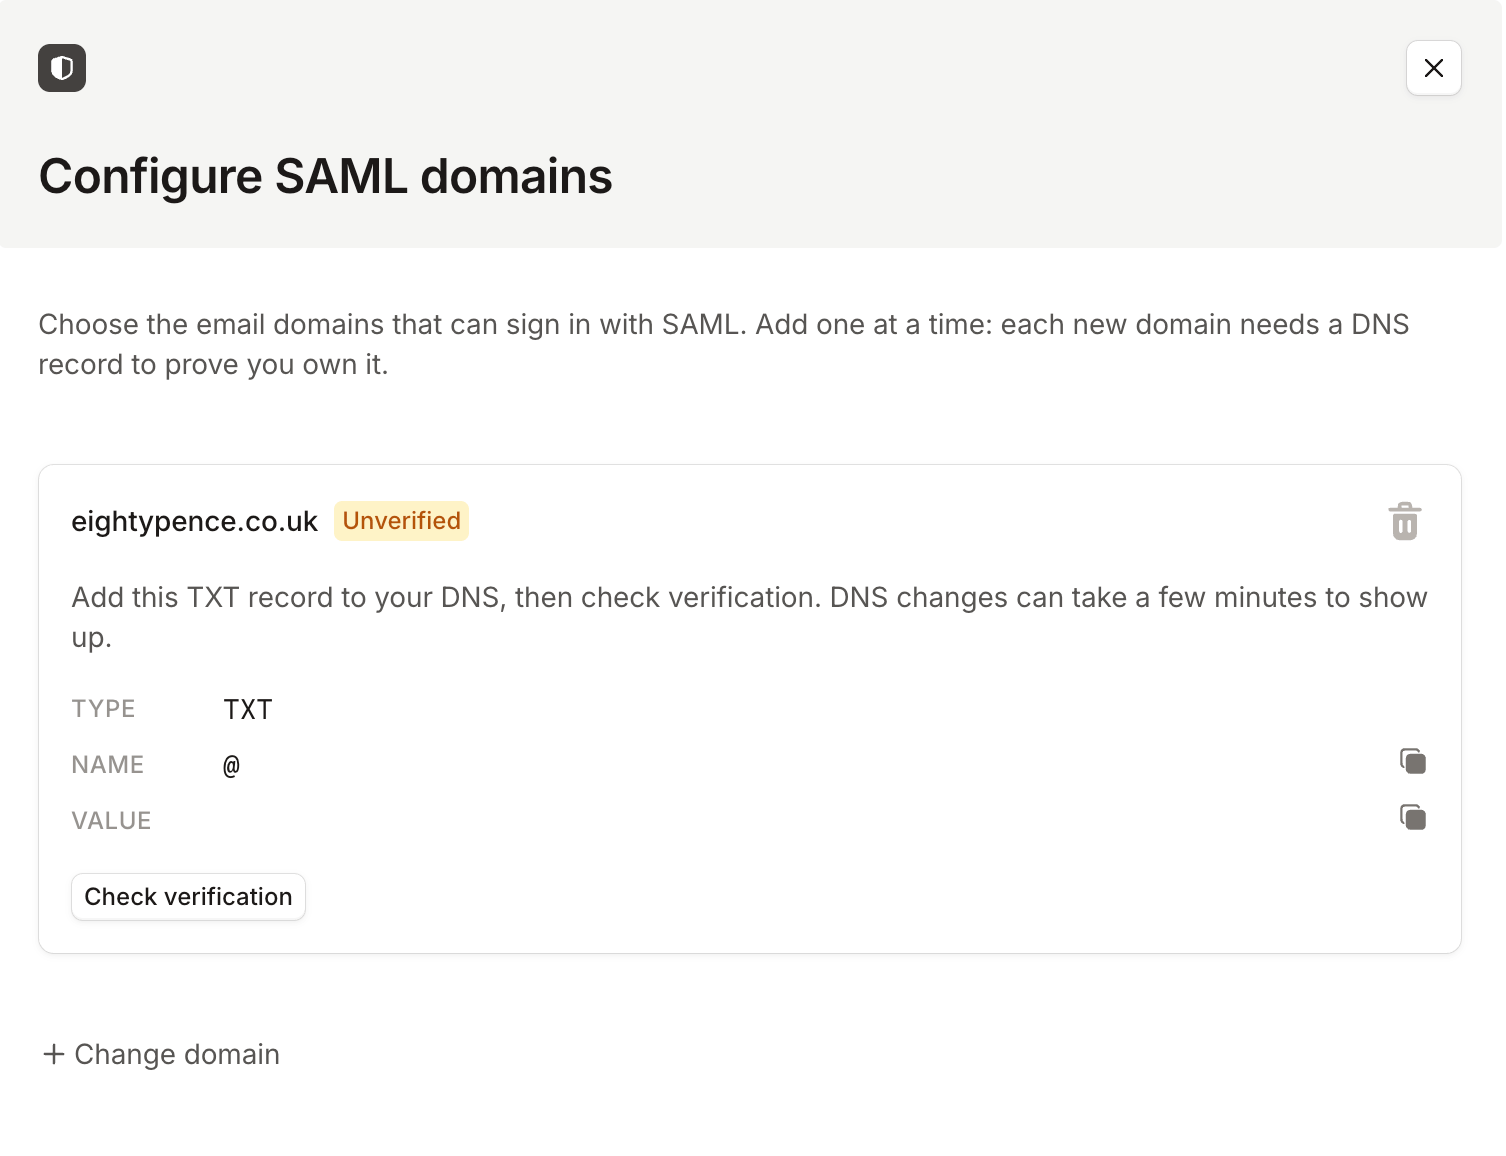
2
Choose your provider
Once your domain is verified, click Continue to SSO setup. Choose your provider and follow the provider-specific steps to exchange metadata and certificates.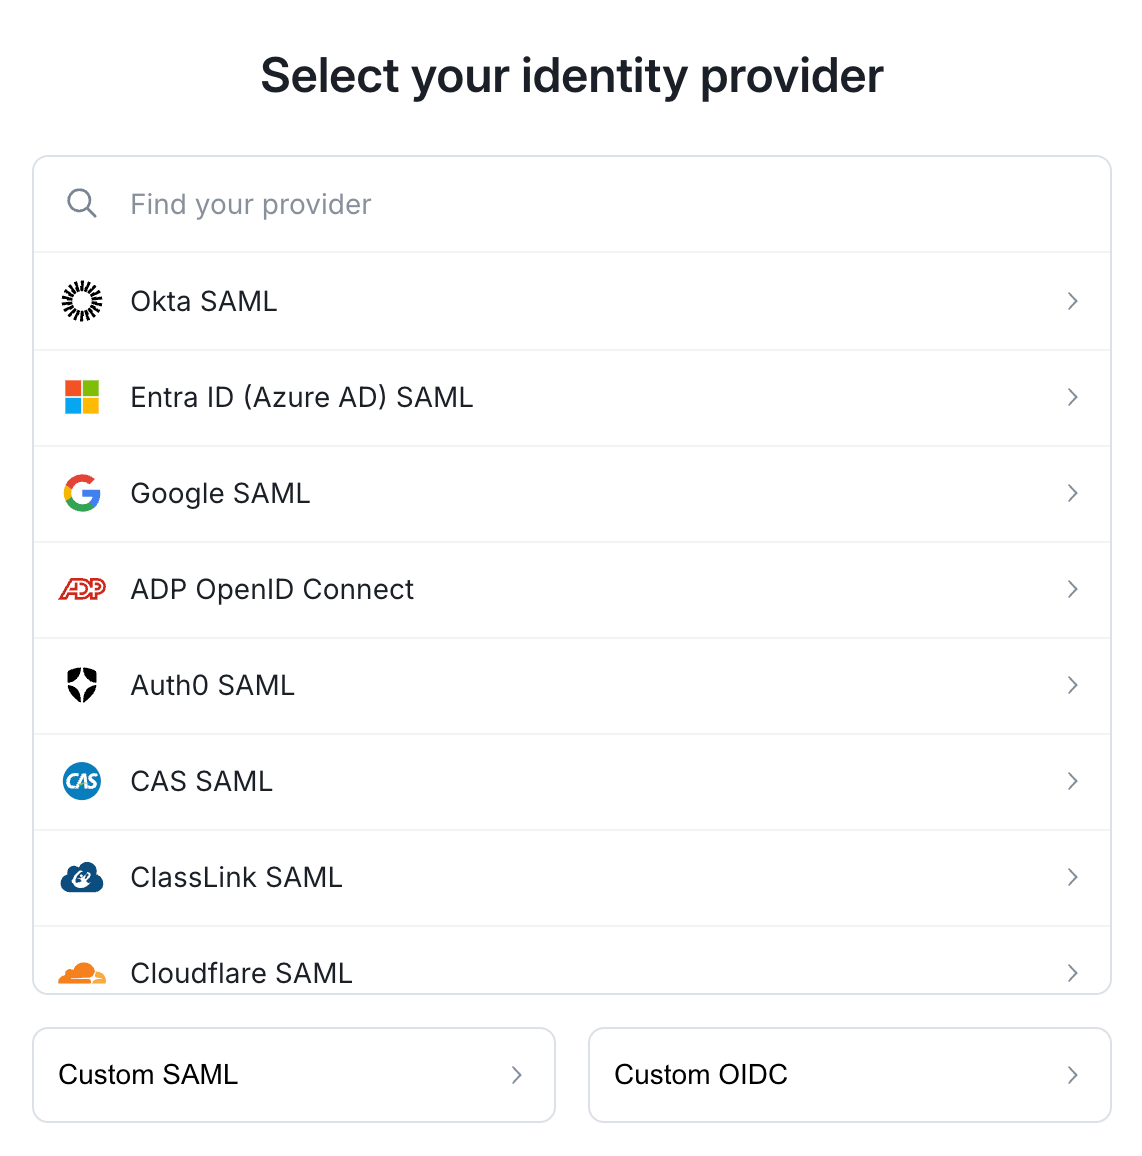
3
You're connected
Once the connection is active, single sign-on is live. Anyone whose email matches a verified domain is now signed in through your IdP.From the Security page you can Configure domains, Manage connection to update your provider setup, or Disable SAML.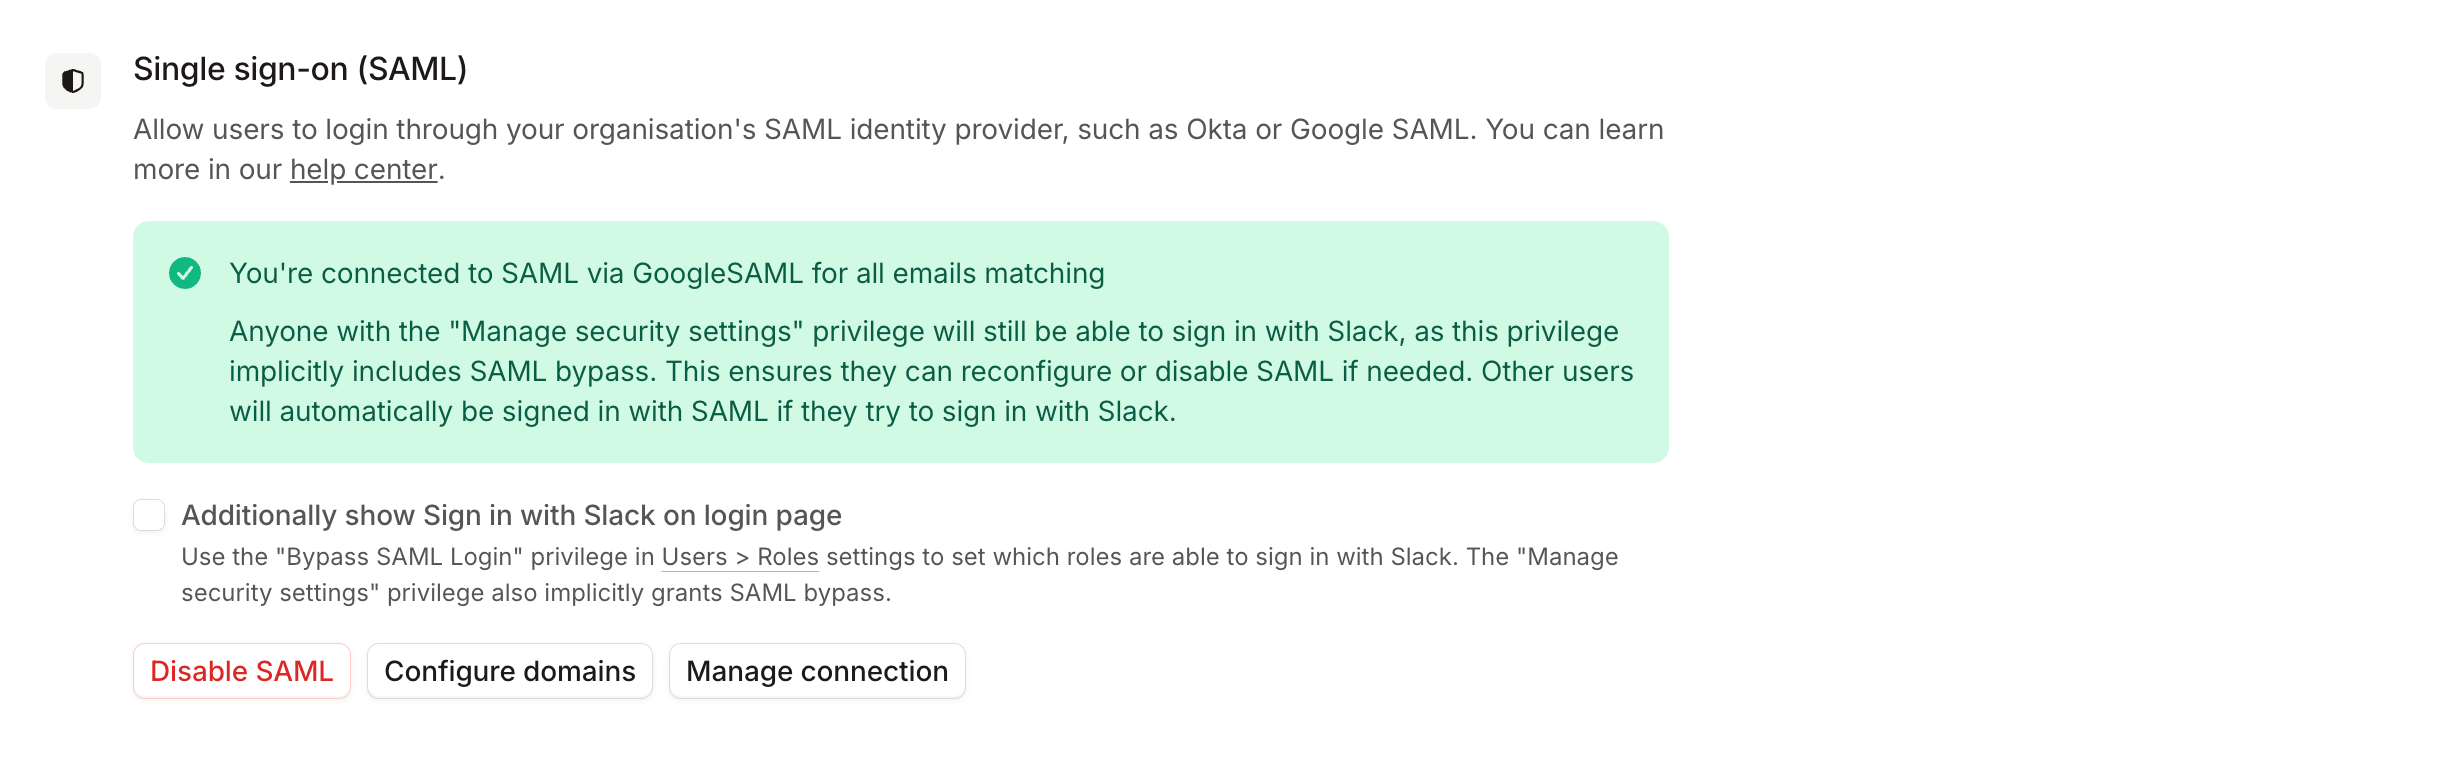
Controlling who must use SSO
By default, once single sign-on is enabled, everyone whose email matches a verified domain must sign in through your IdP, and a Sign in with Slack or Sign in with Microsoft attempt is redirected there. You can loosen that:- Keep the platform login available. On the Security page, tick Additionally show Sign in with Slack on login page to keep the Slack or Microsoft option alongside single sign-on.
- Let specific roles bypass. Grant the Bypass SAML Login permission to a role at Settings → Permissions → Account-level so those users can always use Slack or Microsoft sign-in.
Avoiding lockout
Even with single sign-on enforced, you keep ways in if your IdP has a problem:- Admins always keep access. The Manage security settings permission includes SSO bypass, so anyone who can configure single sign-on can still sign in with Slack or Microsoft to fix or disable it.
- Turn on an email backup. Enable sign in with email before you need it. It works independently of your IdP.
- Broken connections fall back automatically. If your IdP connection breaks, incident.io stops enforcing single sign-on and allows your other sign-in methods, so a misconfiguration won’t lock out your team.
Disabling single sign-on
To turn single sign-on off, go to Settings → Security, click Disable SAML, and typedisable SAML to confirm.
Disabling logs everyone out; they sign back in with Slack or Microsoft. If you’ve removed the incident.io app in your IdP, disable single sign-on here too, to avoid authentication errors.
Mobile app sign-in
When single sign-on is enabled, it’s enforced in the mobile app too. Users signing in on mobile, whether directly or by scanning a QR code from the web dashboard, are redirected through your identity provider. You control whether QR code sign-in is available at Settings → Security under QR code mobile login. Turning it off prevents the QR flow but doesn’t affect direct sign-in on the mobile app.FAQs
What are dashboard-only users?
What are dashboard-only users?
When someone signs in through single sign-on, incident.io looks for a matching Slack or Microsoft Teams account by email. If there’s no match, or the email addresses differ, they’re created as a dashboard-only user. These users can’t be assigned incident roles, referenced in workflows, or receive subscriptions as Slack or Teams messages.
Can I connect an OIDC provider instead of SAML?
Can I connect an OIDC provider instead of SAML?
Yes. incident.io supports any identity provider that uses OIDC, and the setup is the same as for SAML. Click Connect, verify your domain, then choose your provider. Use Custom OIDC if your provider isn’t listed.
What happens if I migrate to another provider?
What happens if I migrate to another provider?
If a user’s email stays the same during a migration, incident.io associates their account with the new provider and doesn’t create a duplicate user. If their email also changes, they’ll appear as a new account and the accounts can’t be merged.
Can I use SCIM with SSO?
Can I use SCIM with SSO?
Yes. SCIM can be set up independently from single sign-on but can use the same identity provider. See SCIM provisioning for details.
Can I restrict mobile app access for unmanaged devices?
Can I restrict mobile app access for unmanaged devices?
Yes. If your team uses managed device policies, you can configure a secondary SAML provider to redact sensitive data on the mobile app. See mobile access restrictions for details.