- Workflows:
- Show or require different information when a user is declaring an incident, depending on what team they’re in
- Auto-subscribe managers to incidents that their team members are participating in
- Restrict accepting a security incident to only members of the infrastructure & security group
- Automatically set custom fields based on who is assigned to a role in an incident
- Features:
- In Insights, understanding how many hours each team spends on incidents
- In Insights, spot trends in follow-up completion rates by team
- In Filters across our dashboard, filter Incidents by the team that reported the incident
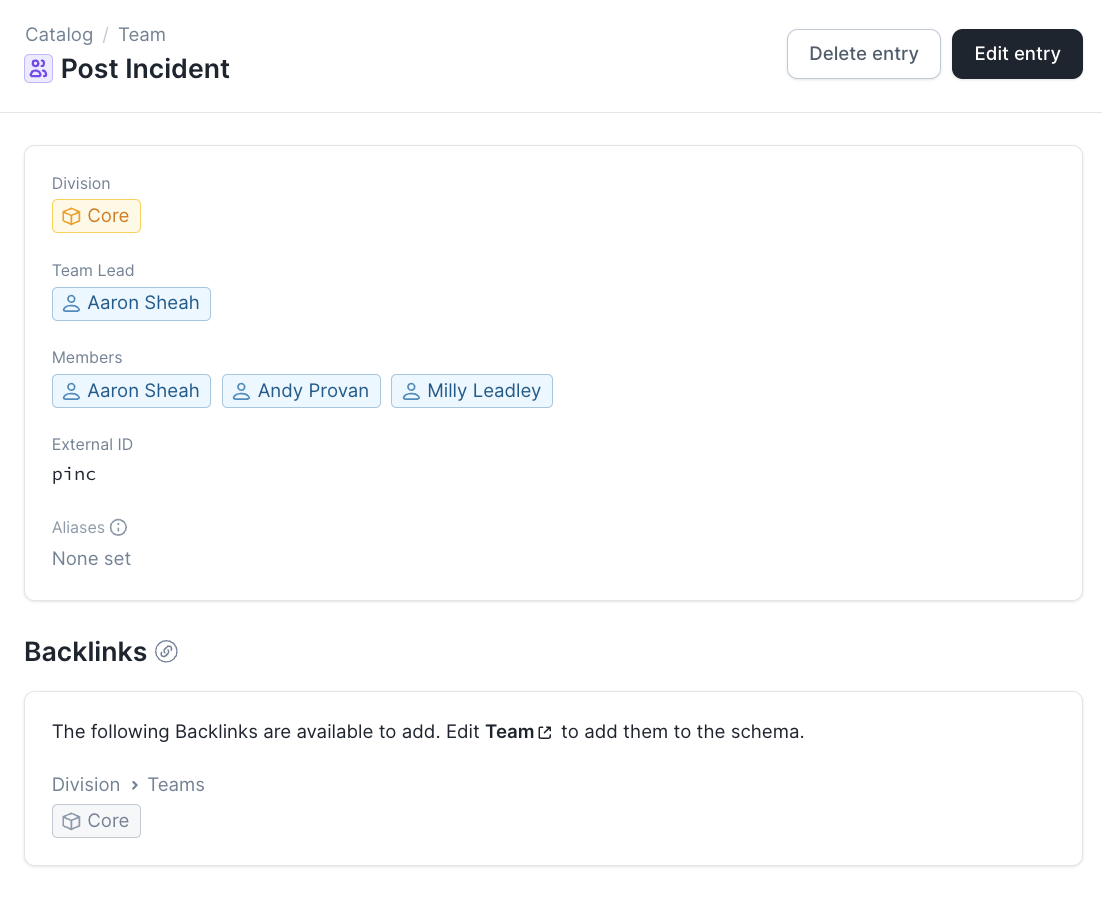
- A Catalog type Team that has Members, a Manager, and a Tech Lead
- A Catalog type Division, which contains a list of the Teams that it includes
- A Catalog type Function which has Members so you know whether someone is an Engineer, a Product Manager or a Customer Success Manager
Step 1: Setting up Teams
To get set up with Teams in Catalog, you have two options:- Create Teams via the dashboard, and manage them with a point-and-click interface
- Head to Settings → Teams
- Click ‘Get started’
- Use the Catalog Importer to create Teams from your own data source (e.g. manage them in Github or Gitlab)
- Follow the Catalog Importer installation instructions
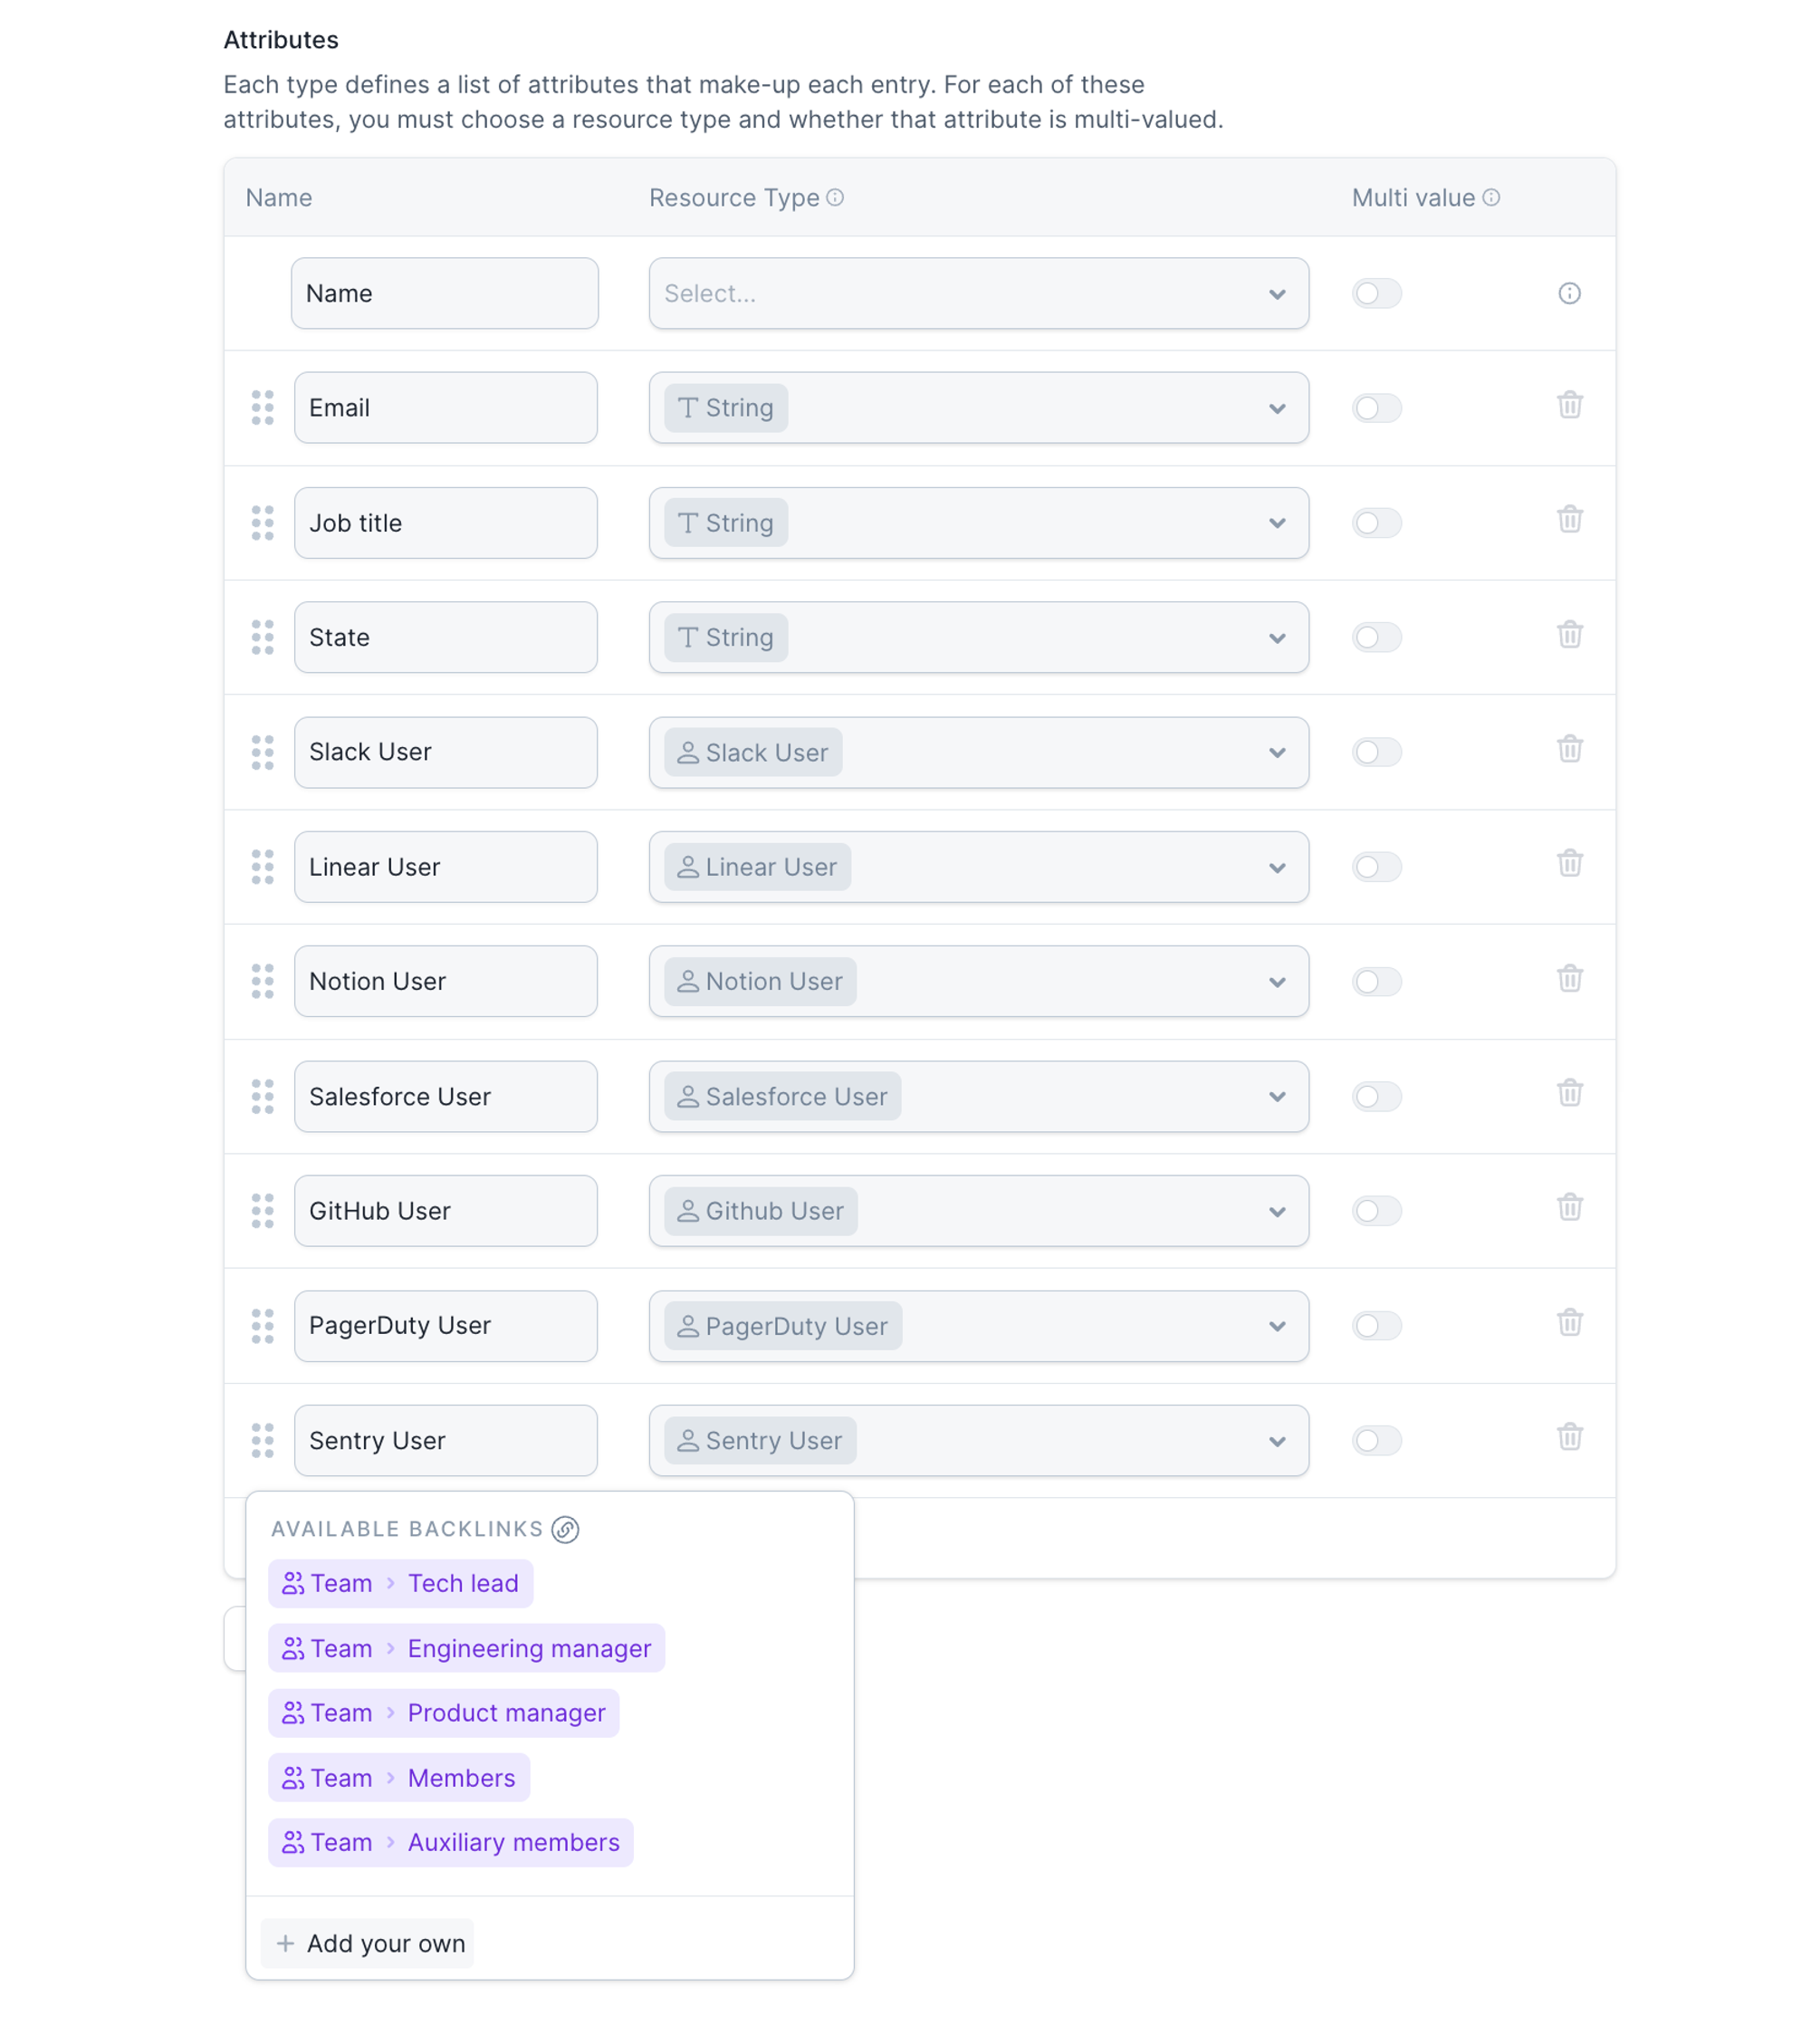
- Ensure that all user attributes, e.g. Team Members, use the
Usertype rather thanSlackUser( see example )
- In Workflows, only execute the Workflow if the Reporter is part of the Database team.
- In Insights, understanding how many hours each team spends on incidents.
- In Insights, spot trends in follow-up completion rates by team.
- In Filters, return a list of Incidents that include a Participant from the Infrastructure team.
- And many more…
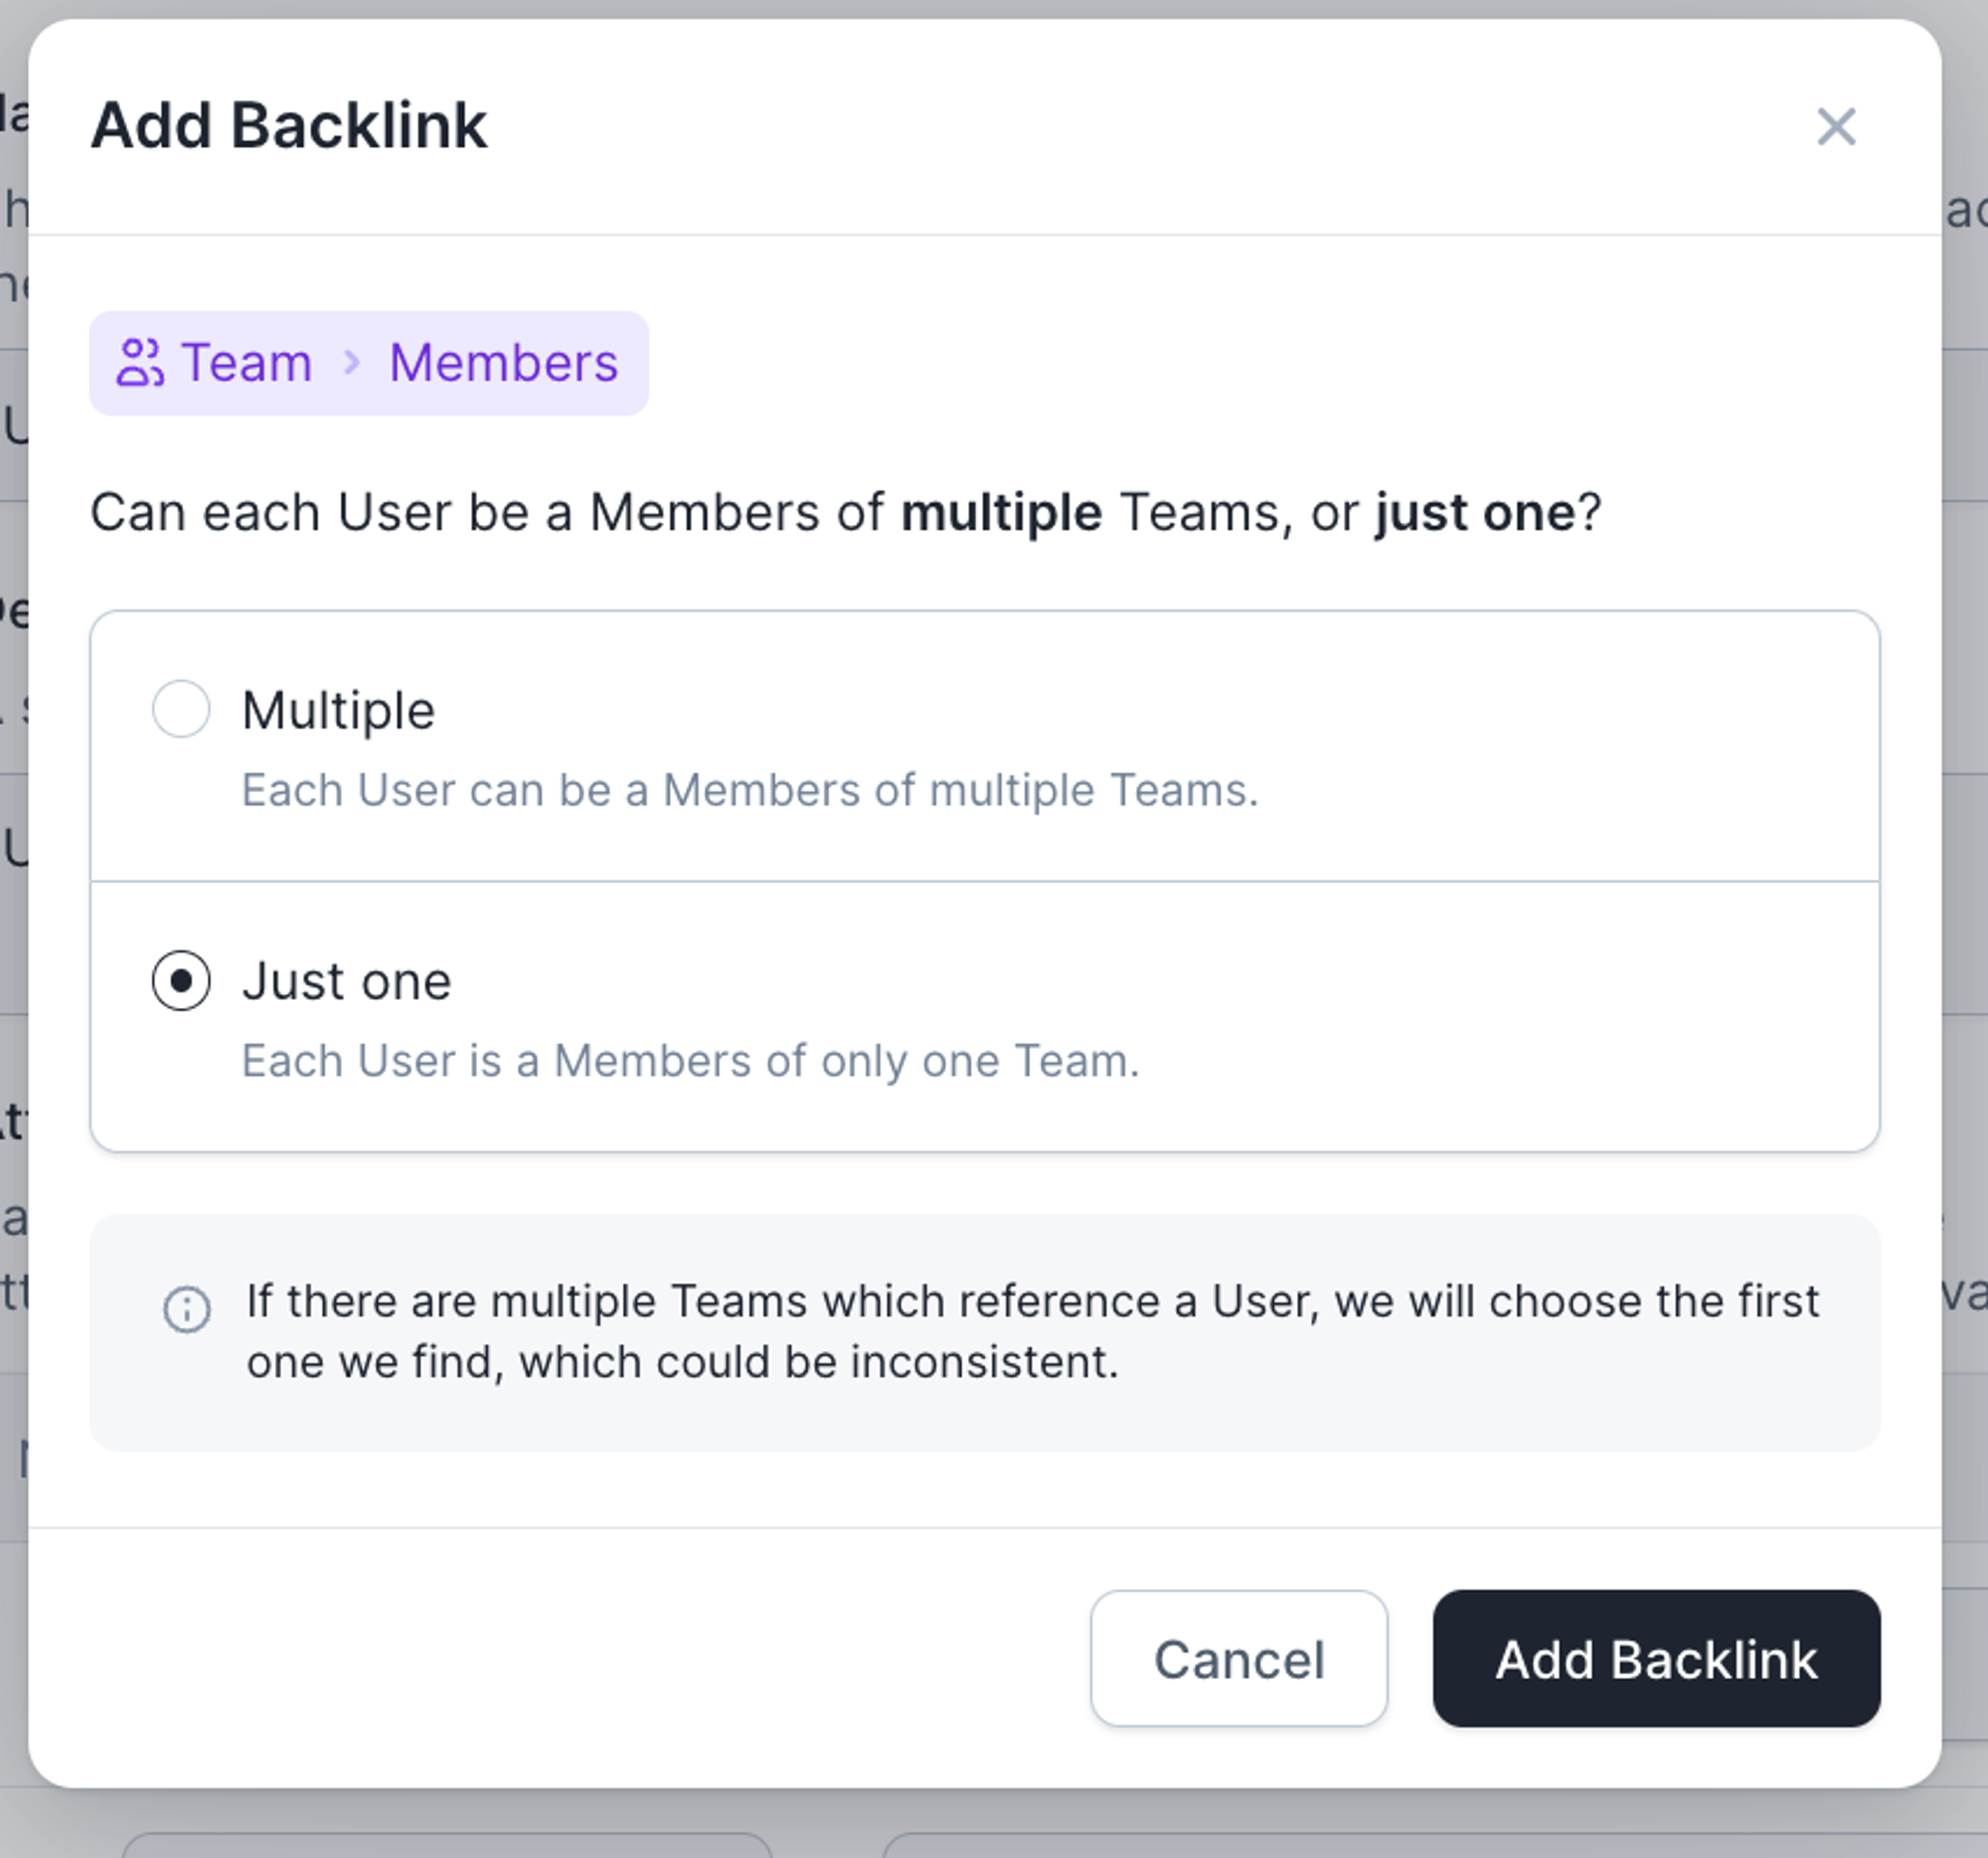
Step 2: Going from User → Team
To unlock the real power of Teams, you’ll want to be able to navigate from a User to the Team they’re in, across incident.io features like Forms, Workflows, and more. To do this, we need to create a Backlink.More details about BacklinksIn almost all cases you’ll configure your Teams in Catalog by adding “Members” to the “Team” catalog type. Why? It’s much quicker to open a specific Team, and then add all Members of that team in a single dropdown select, rather than going through every person in your organization, and adding the Team which they’re in. It’s just quicker & easier to start with Teams!So, in most cases, you’ve associated Teams → Users, but you’re missing the “Backlink” from Users → Teams. It would be a lot of wasted effort to have to also go through all Users and re-pick their Team (e.g. Alice is in Team A, Bob is in Team B). Instead, you simply want to leverage the pre-existing connection (that you’ve already built) between Teams → Users, but in the other direction: Users → Teams. This is what Backlinks do!
Another Backlink Configuration Example
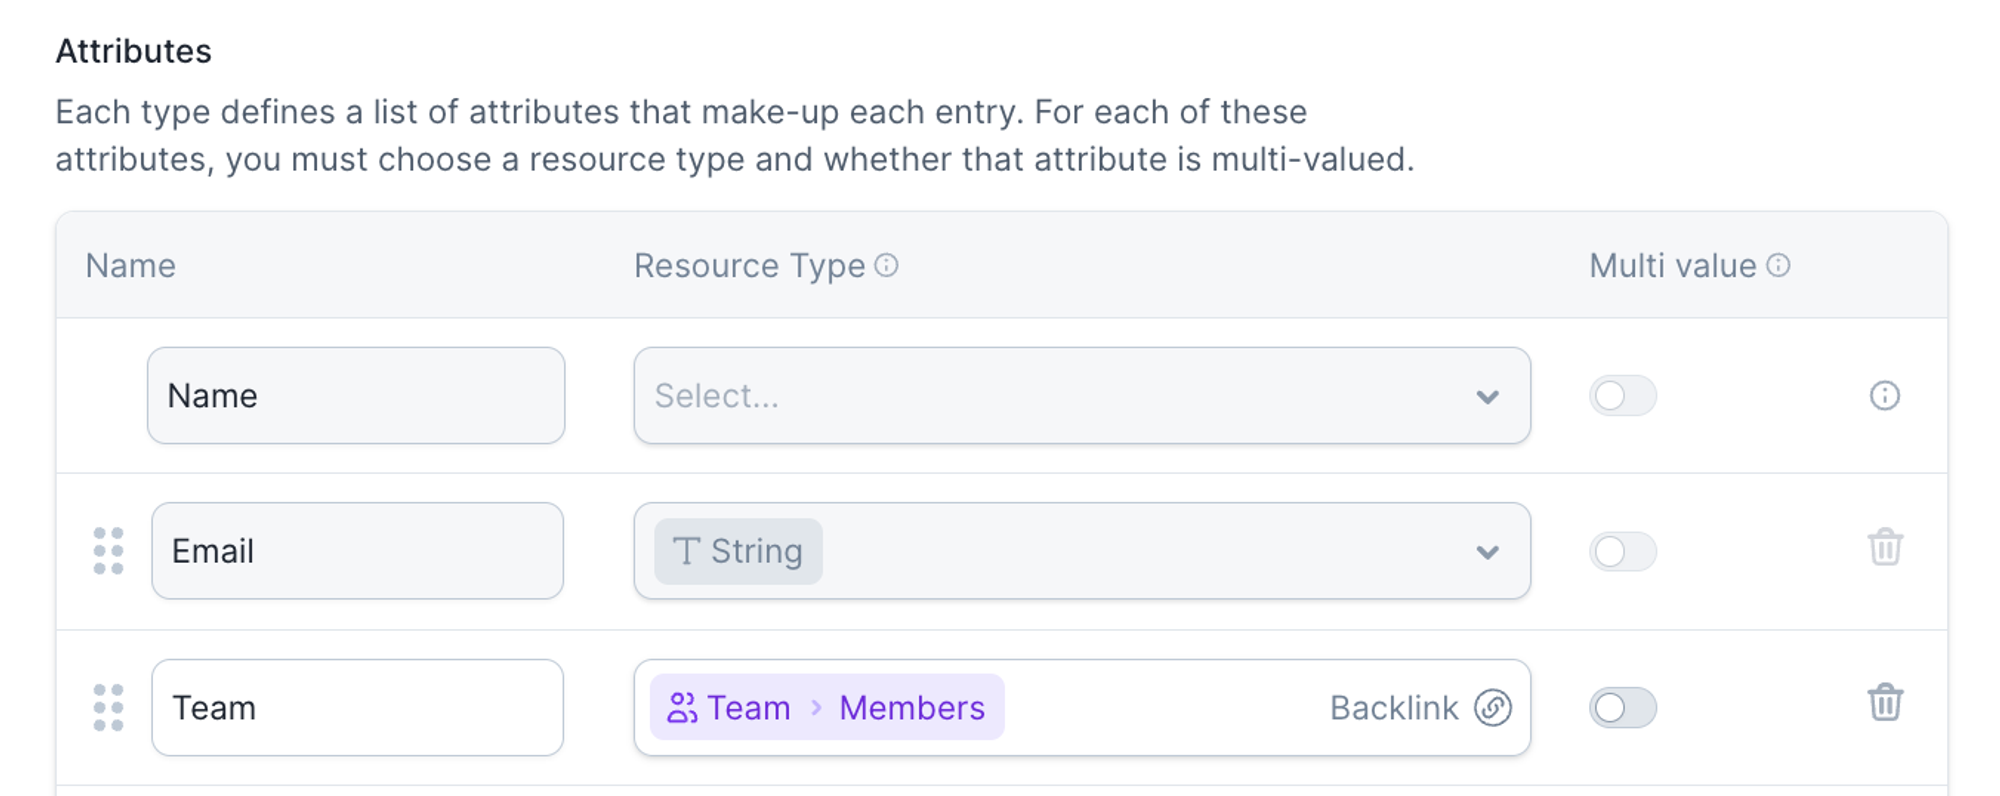
Just to cement what we’ve done in this guide, here’s another example… Let’s assume you have a Features catalog type, and a Feature Areas catalog type (e.g. the higher-level category that a set of features are part of). When setting up Catalog, you map all Features to a Feature Area. It would be extremely repetitive, difficult to maintain, if you then needed to also map all Feature Areas to Features. This means your Feature Area catalog type ends up looking like this (note: the lack of “link” back to Features):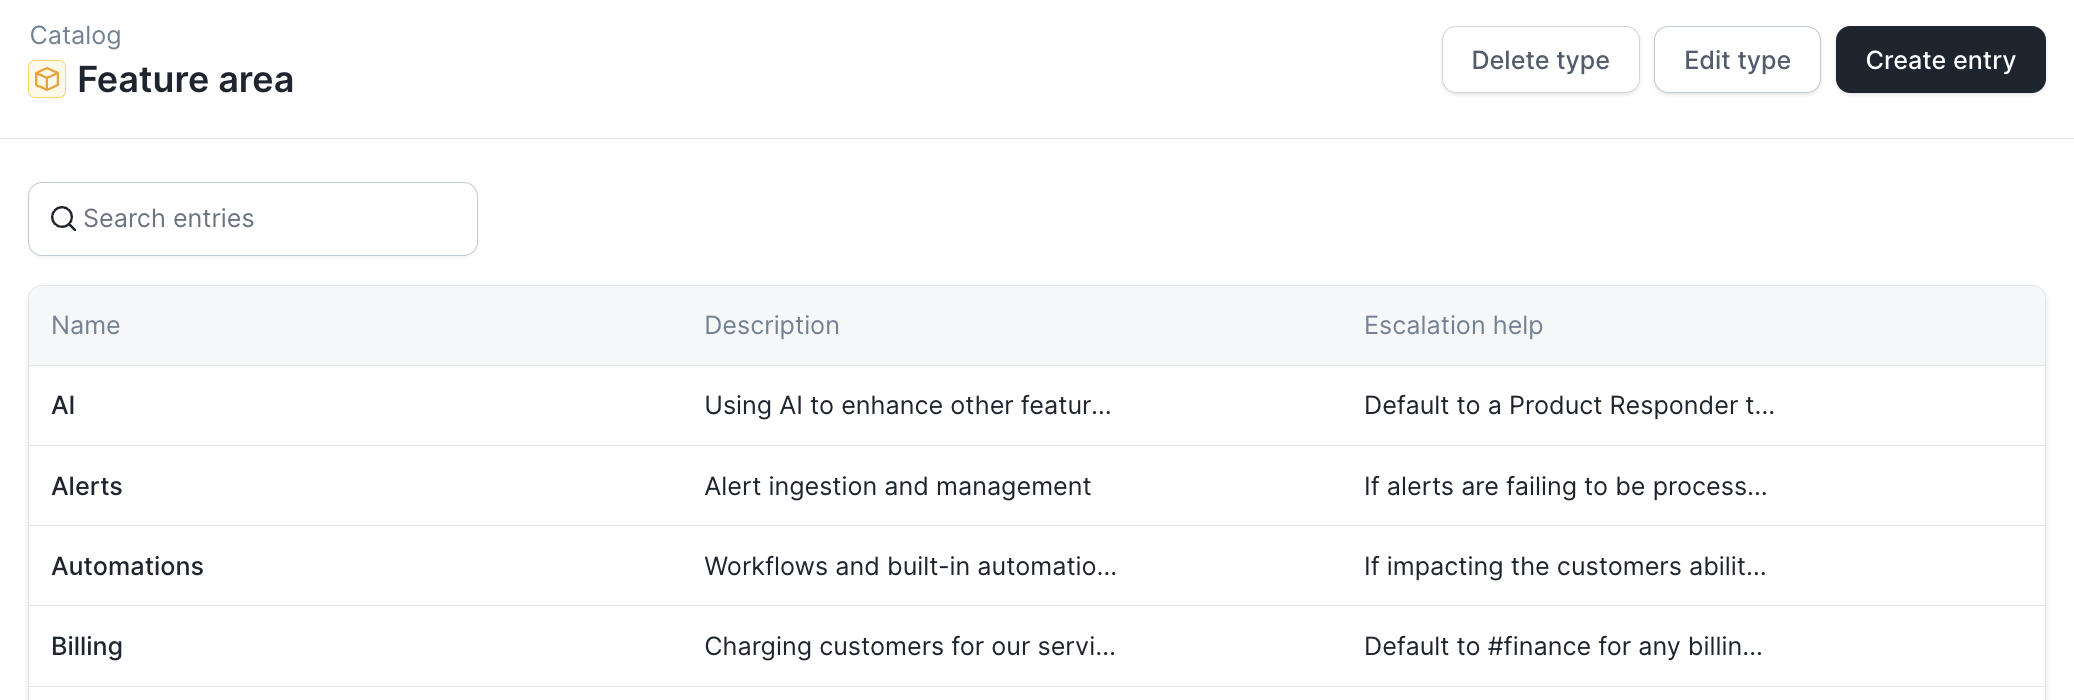

Configuring Backlinks via Catalog Importer
If you’d like to add Backlinks to a catalog type that you’re managing via Catalog Importer, no problem! In your Catalog Importer config, you’ll need to addbacklink_attribute: id, where id = the ID of the attribute that defines the link between your source and target catalog types. Note: You’ll also want to drop the source property from the Backlinked attribute.
In our Features and Feature Areas example, your Catalog Importer config would look something like this:
Examples
There are many examples of how you can use your new Teams catalog type, especially the User → Teams link.Example Usage: Incident Forms
You can now customize your declare incident form based on the user’s team, like defaulting the affected team to the current user’s team or showing / requiring fields based on the user. Check it out in Settings → Forms.
Example Usage: Workflows
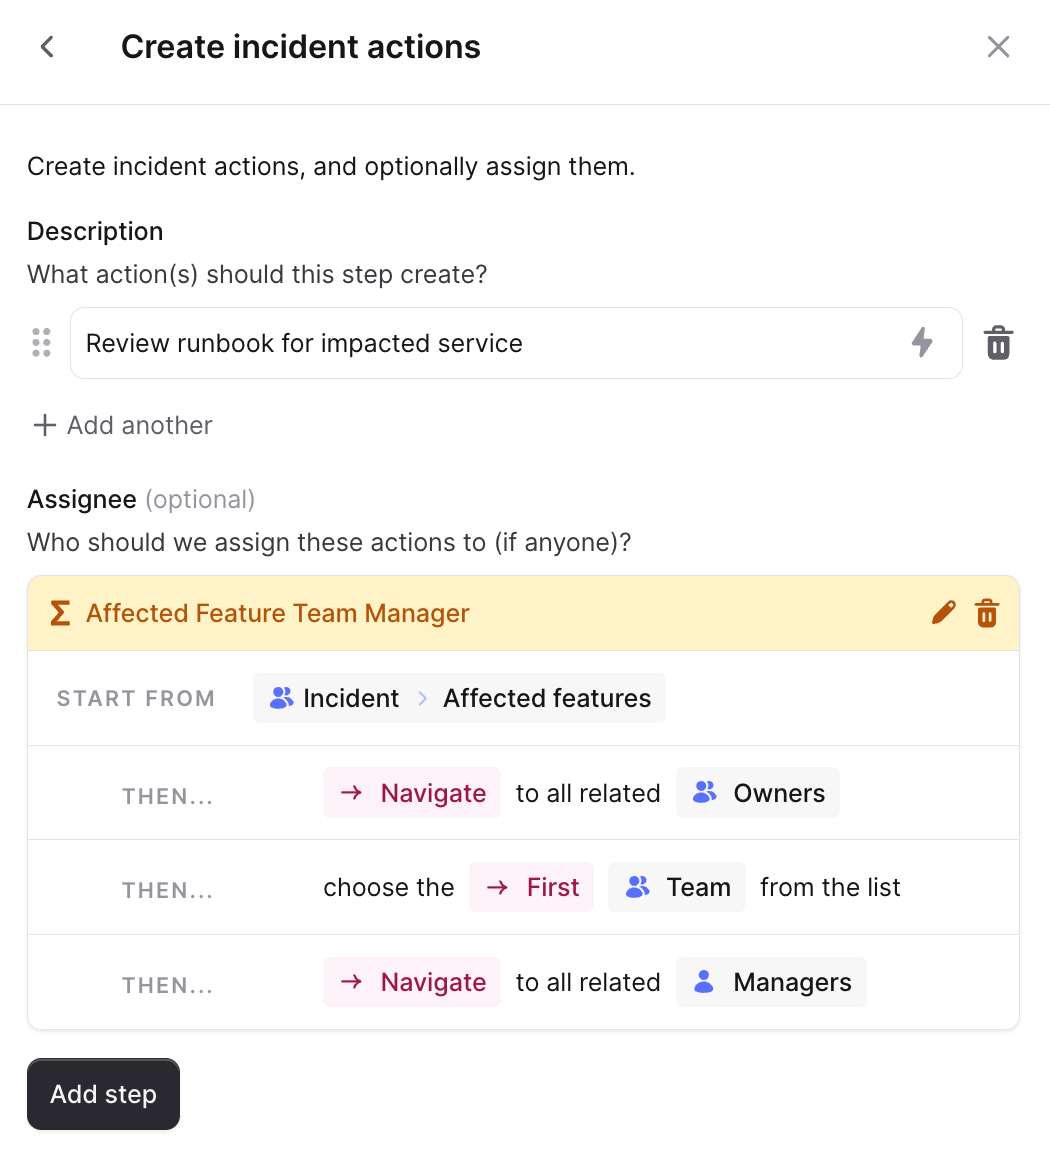
You can now use a user’s team to build out workflows. In this example, we’ll auto-subscribe Engineering Managers to every incident that someone in their team is participating in. This helps keep managers aware of where members of their team might be unexpectedly spending time, and who might need support.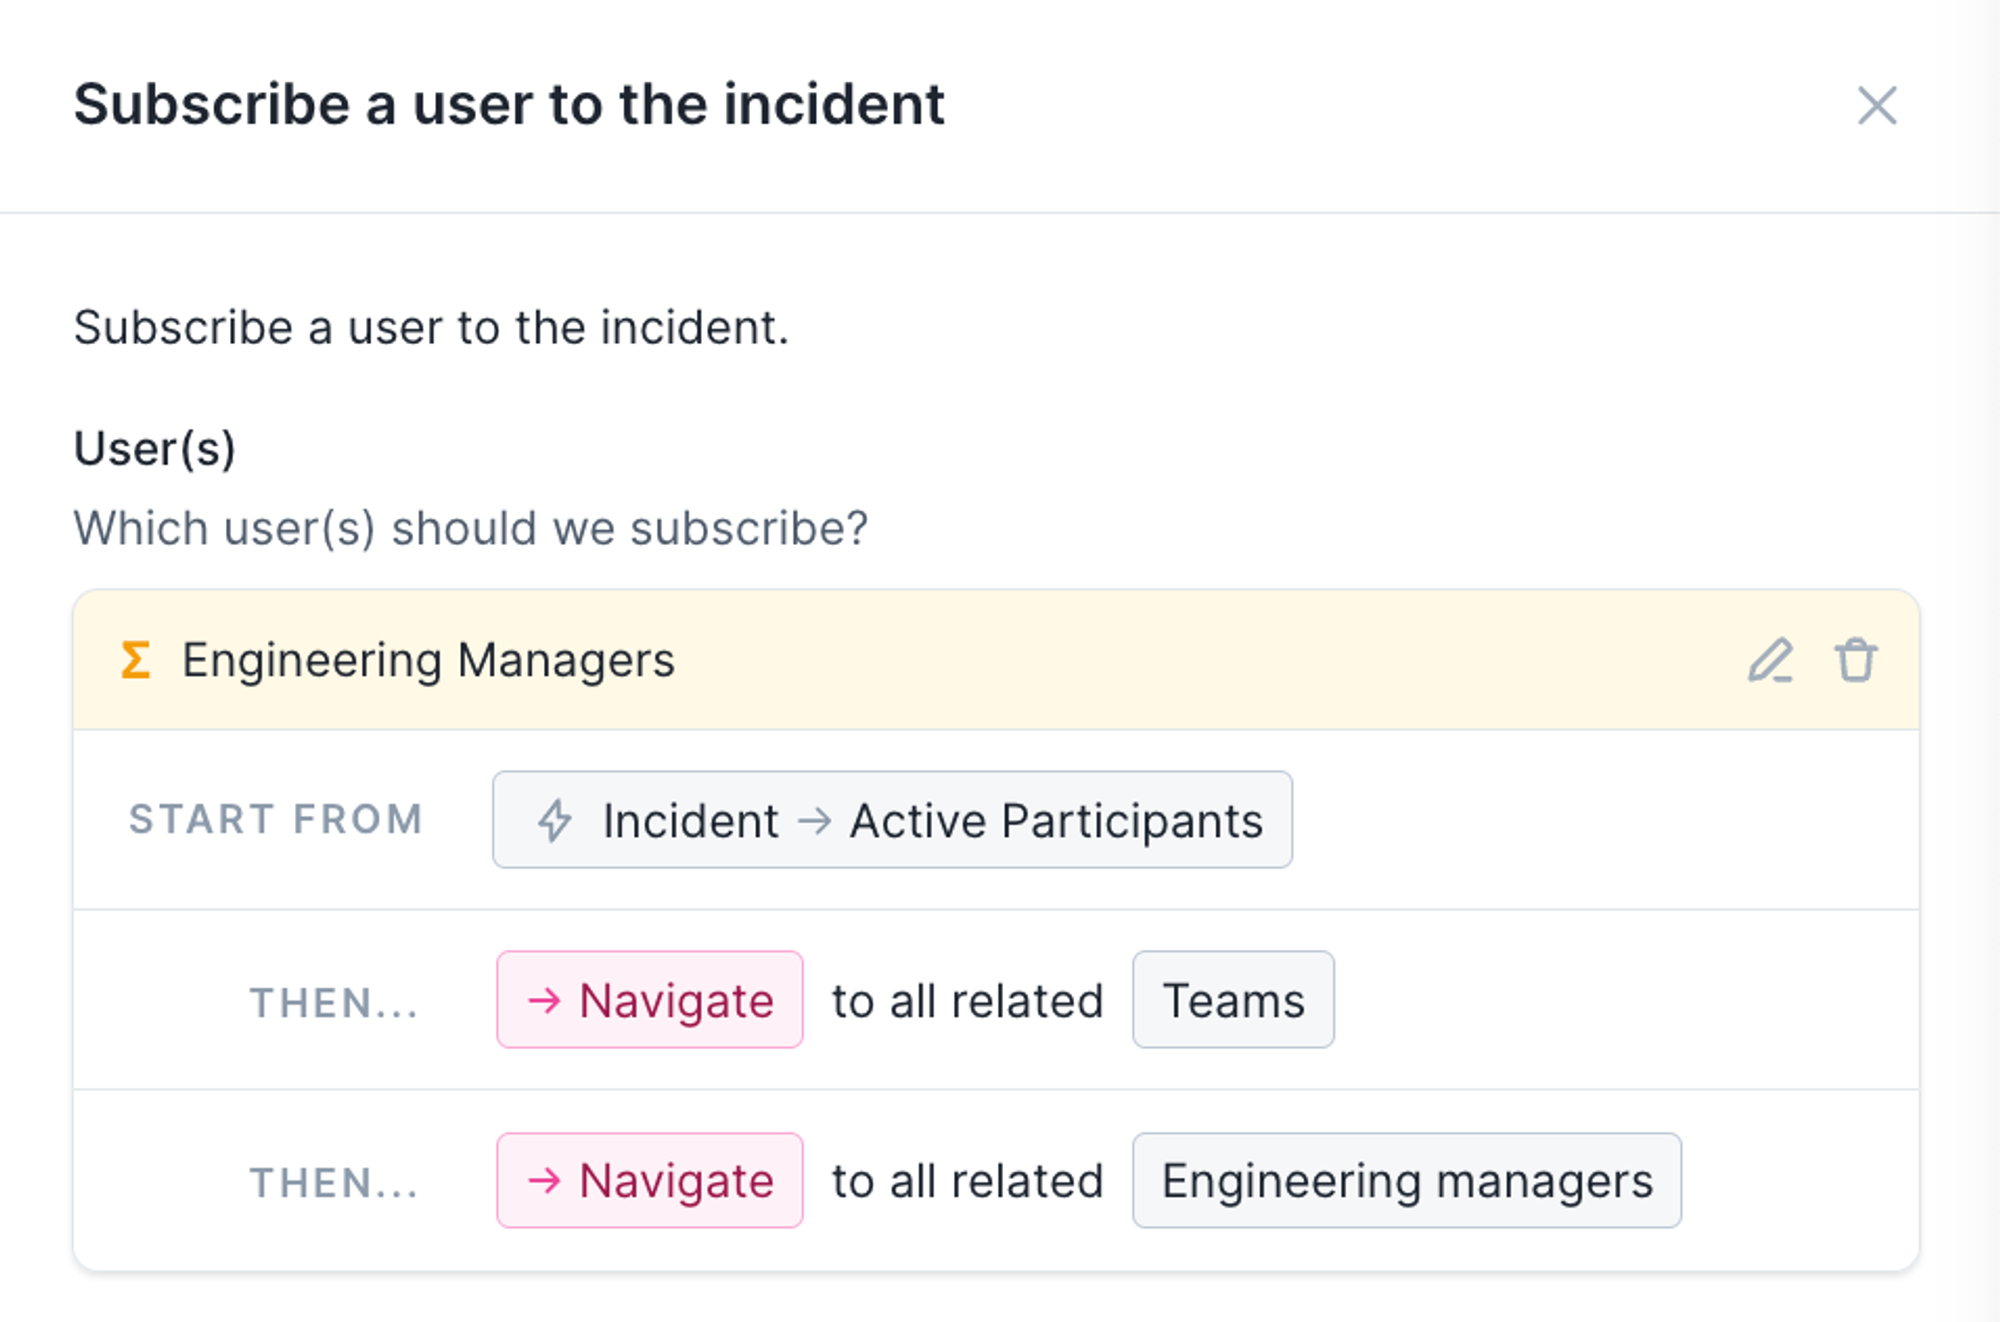
Example Usage: Restricted Incident Types
You can now restrict an incident type by rule - here, we’re saying that only users in the Infrastructure team can accept security incidents.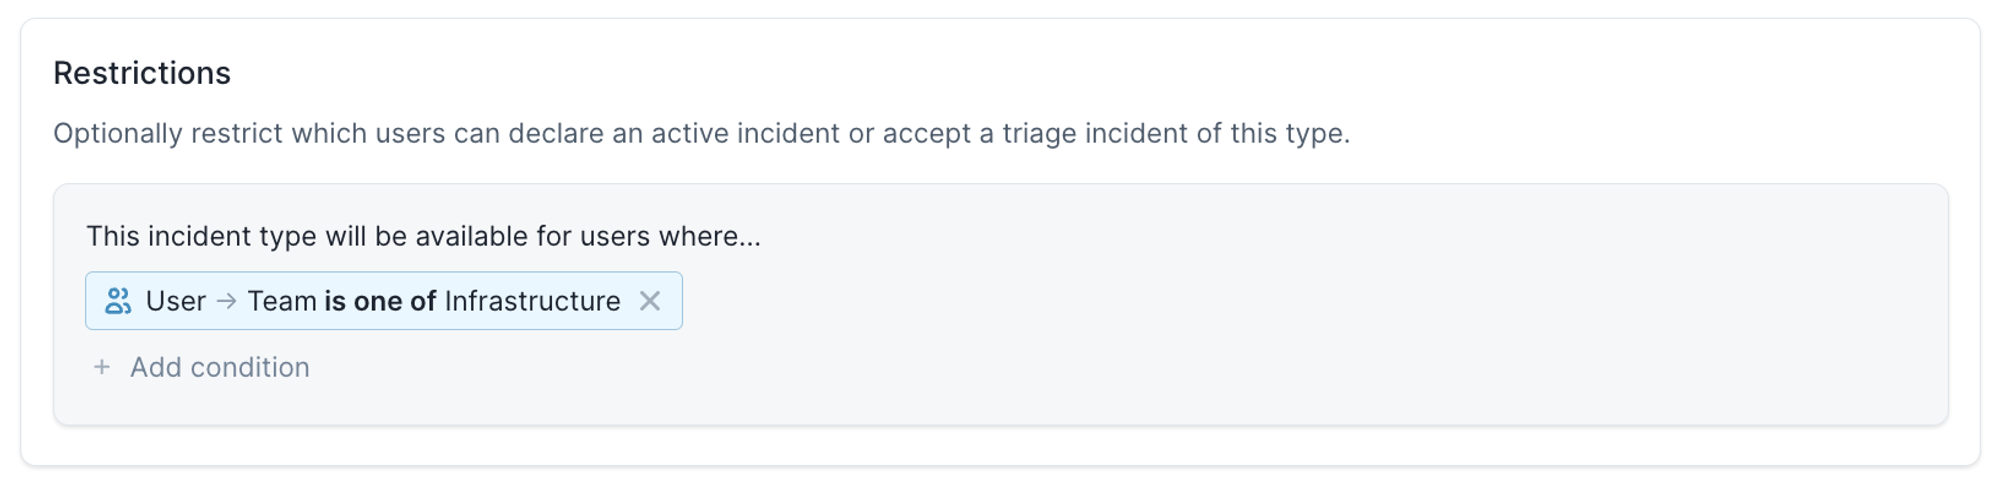
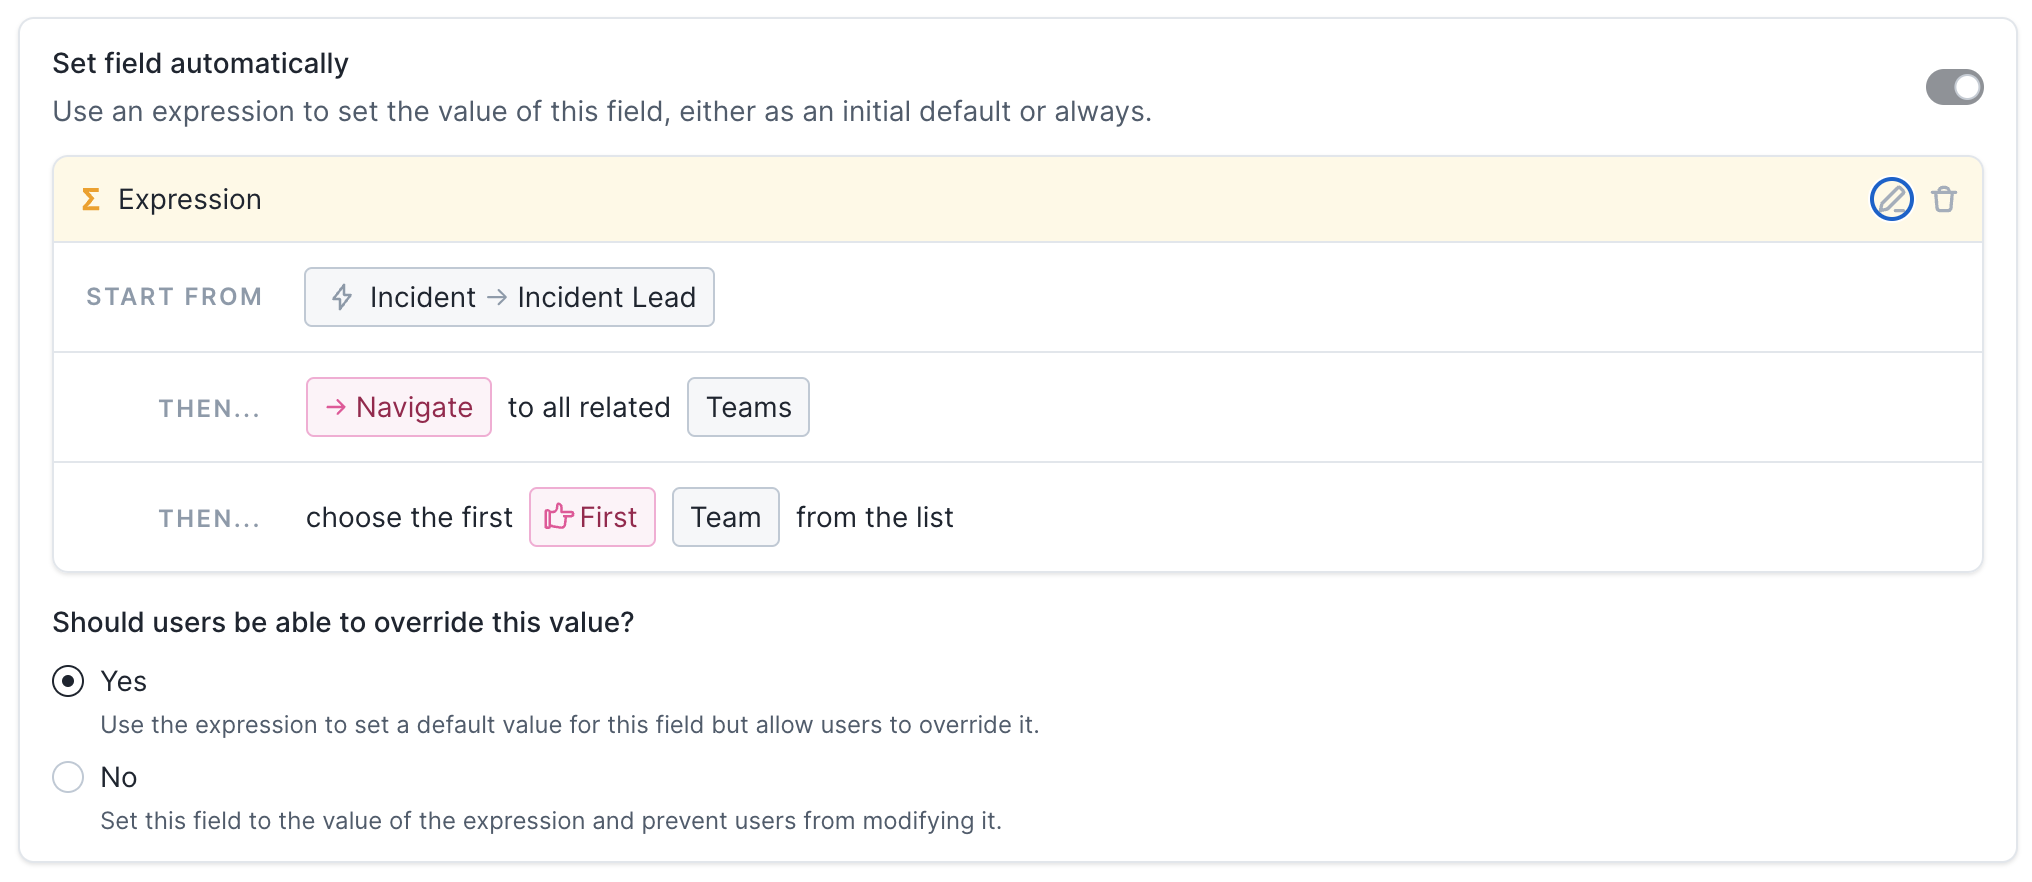
Example Usage: Automatically Set Custom Fields based on Roles
You can now automatically set custom fields based on who is assigned to a role in an incident, for example “set ‘affected team’ based on which team the incident lead is a member of”.