> ## Documentation Index
> Fetch the complete documentation index at: https://docs.incident.io/llms.txt
> Use this file to discover all available pages before exploring further.
# Setting up a webhook in Jira Server
Registering a webhook in Jira Server means that changes to follow-ups that have been exported to Jira will sync back quickly.
You'll need to be a Global Administrator in Jira to register a webhook.
## 1. Navigate to System → WebHooks
In Jira, use the cog menu in the top-right to enter System settings.
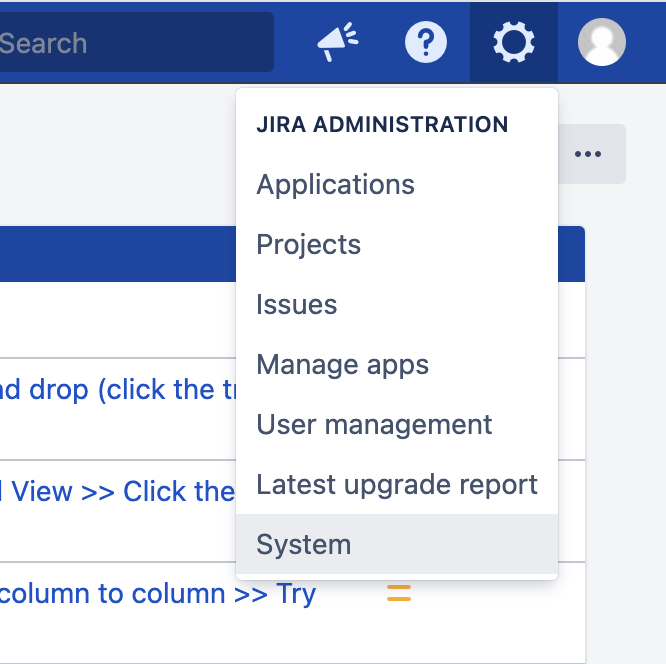 You may need to enter your password to enter 'administrator mode'.
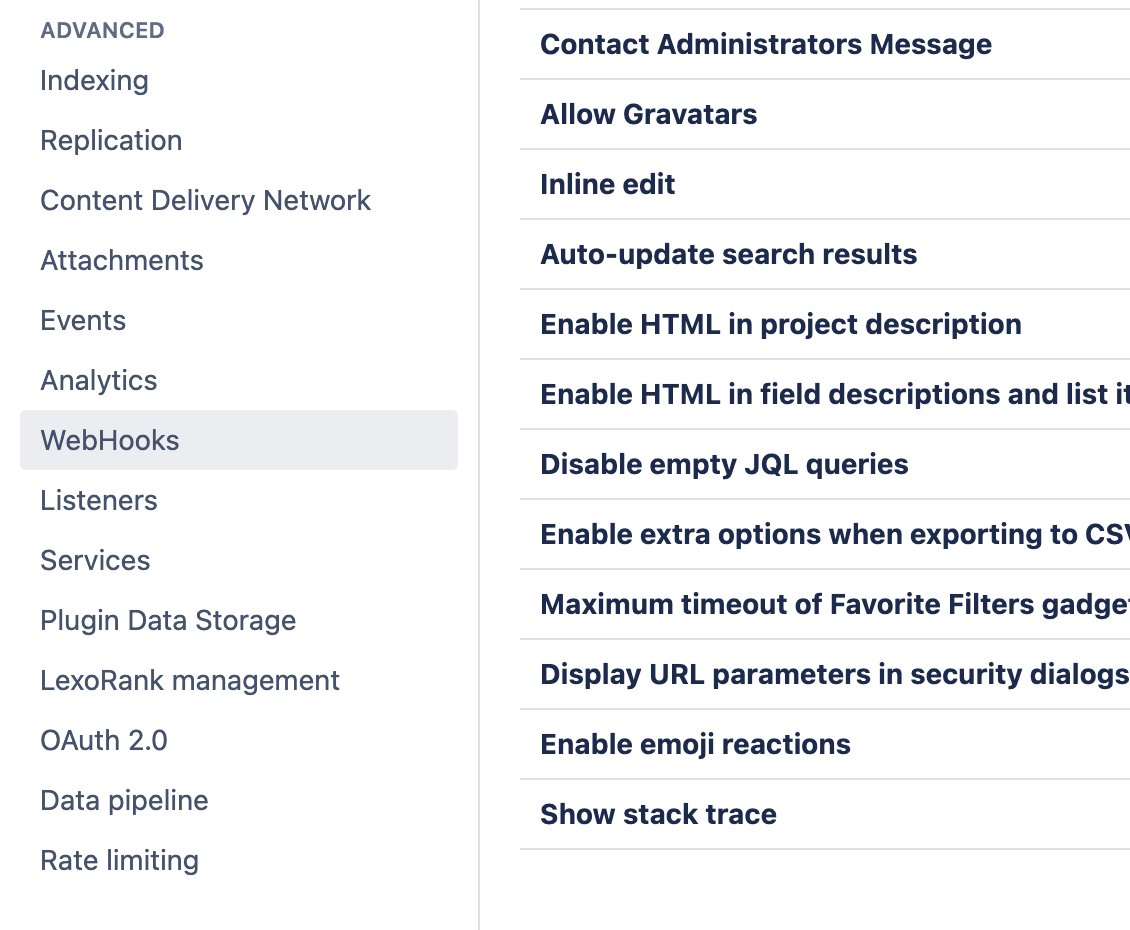
Near the bottom of the left-hand menu, select **WebHooks** under 'Advanced':
You may need to enter your password to enter 'administrator mode'.
Near the bottom of the left-hand menu, select **WebHooks** under 'Advanced':
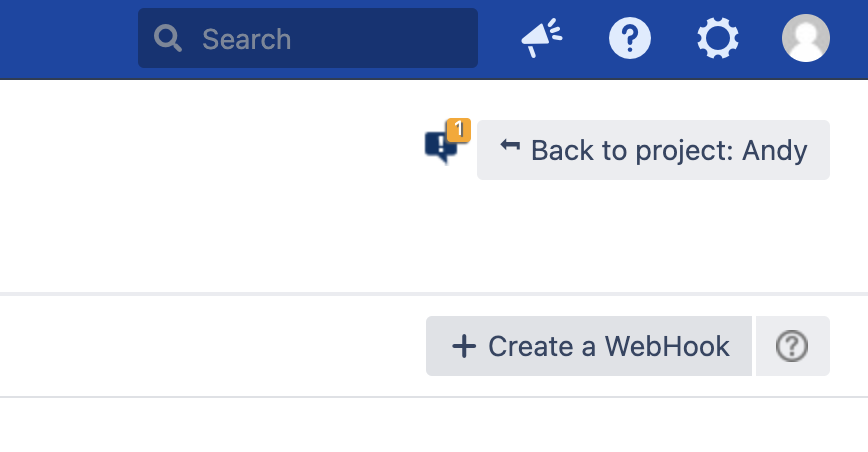
 Near the top-right, click ' **Create a WebHook** ':
 ## 2. Configure the destination
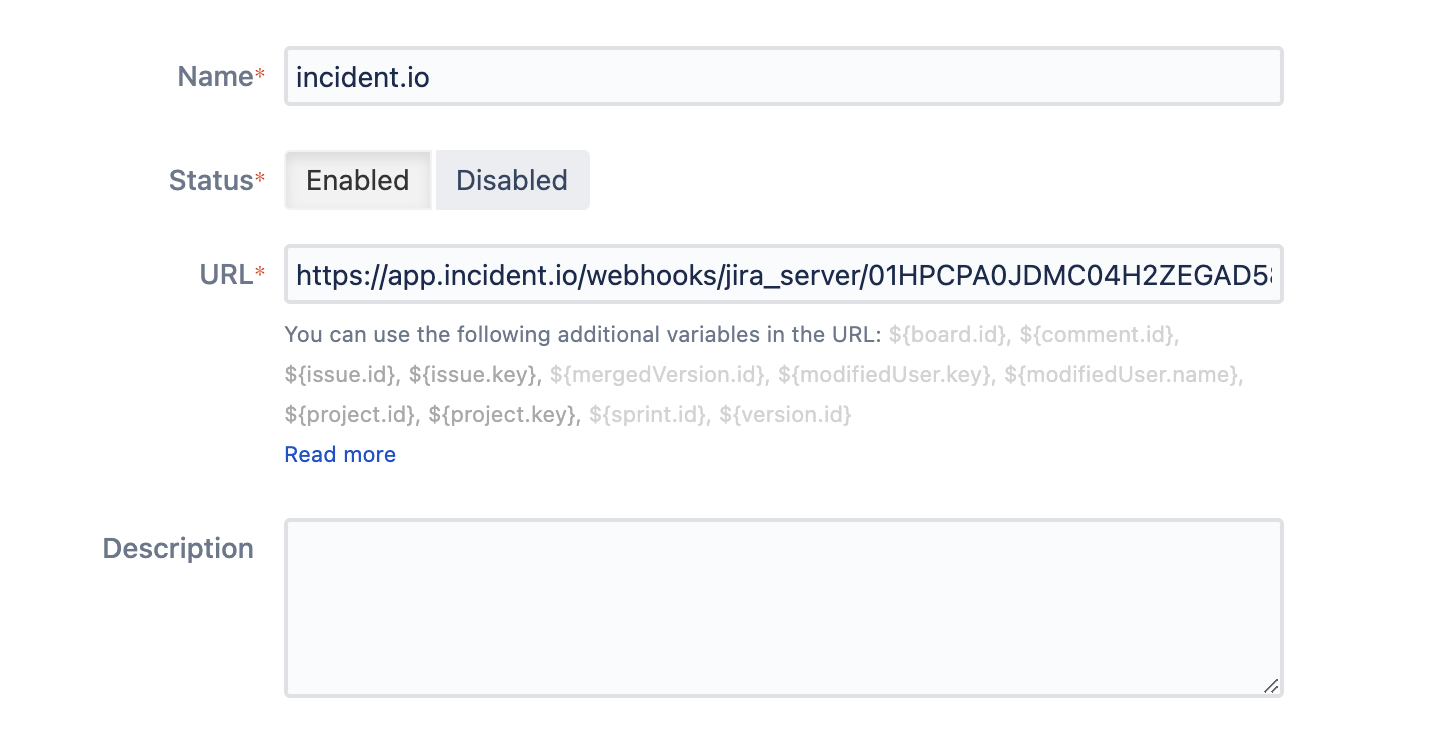
**Name** : 'incident.io'
**Status** : Enabled
**URL** : Check [Settings → Integrations → Jira Server](https://app.incident.io/~/settings/integrations/jira_server) to find your webhook URL
**Description** : Leave blank
## 2. Configure the destination
**Name** : 'incident.io'
**Status** : Enabled
**URL** : Check [Settings → Integrations → Jira Server](https://app.incident.io/~/settings/integrations/jira_server) to find your webhook URL
**Description** : Leave blank
 ## 3. Add events
Under 'Issue related events', check 'issue created', 'issue updated', 'issue deleted', 'issue link created' and 'issue link deleted'.
All other events can be left disabled.
## 3. Add events
Under 'Issue related events', check 'issue created', 'issue updated', 'issue deleted', 'issue link created' and 'issue link deleted'.
All other events can be left disabled.
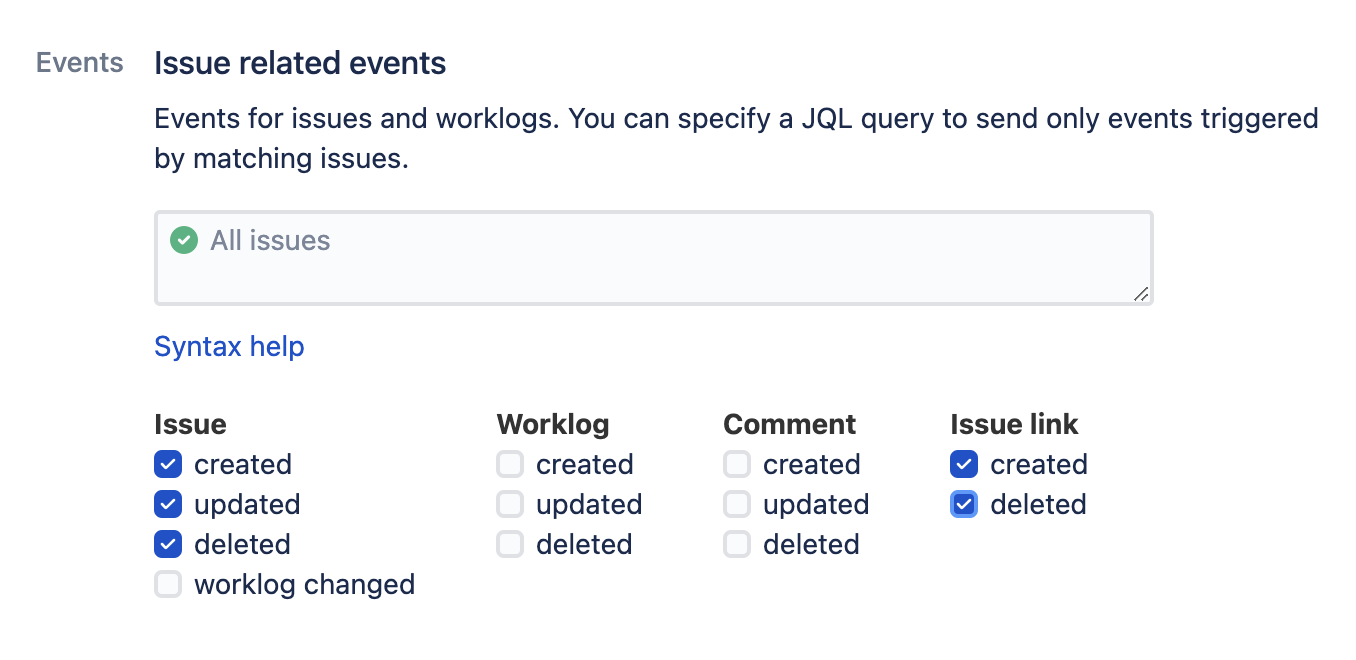 If you configure a JQL filter here, incident.io will only be able to sync updates to issues matching that filter.
## 4. Create the webhook
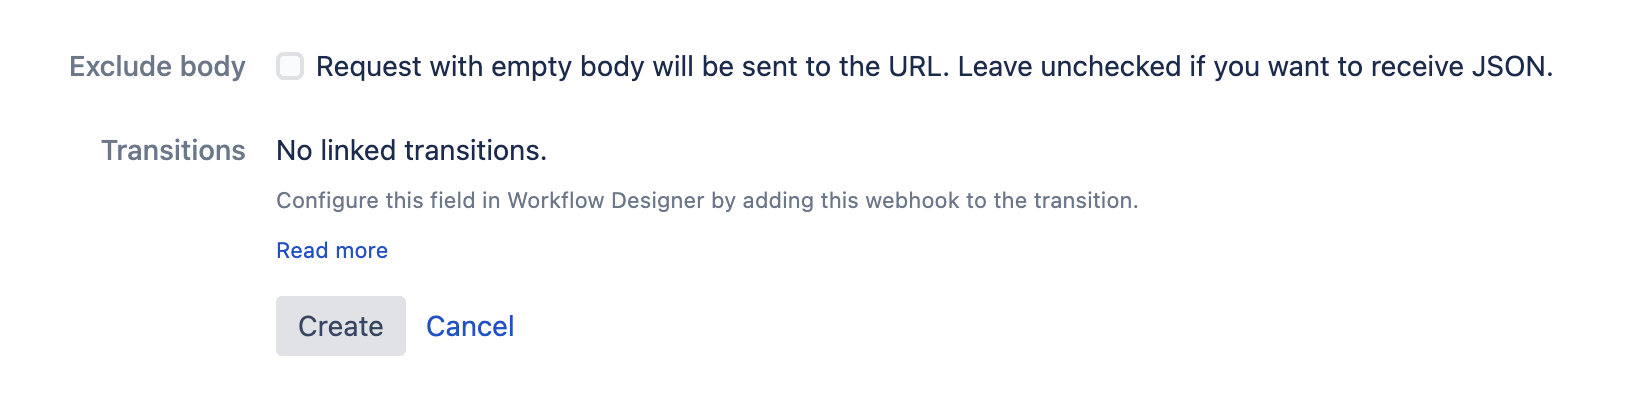
At the bottom of the page, ensure ' **Exclude body** ' is **not** checked, and click ' **Create** '.
If you configure a JQL filter here, incident.io will only be able to sync updates to issues matching that filter.
## 4. Create the webhook
At the bottom of the page, ensure ' **Exclude body** ' is **not** checked, and click ' **Create** '.
 ## You're all set up!
If your Jira Server is behind a firewall, you'll need to ensure that the firewall allows outbound traffic to `app.incident.io`. Please contact your customer success manager if we can help with this.
## You're all set up!
If your Jira Server is behind a firewall, you'll need to ensure that the firewall allows outbound traffic to `app.incident.io`. Please contact your customer success manager if we can help with this.